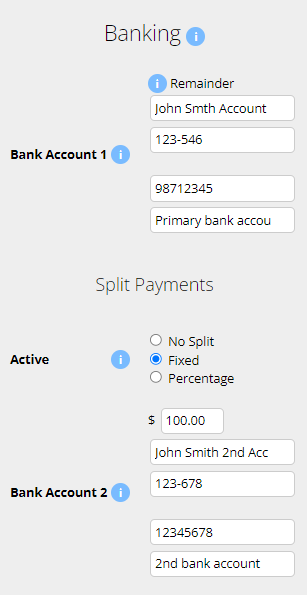
An employee can have up to 3 bank accounts. Additional bank accounts can only be added by a Payroll Admin.
Navigate to Menu > Settings > Employees > click Edit for the employee> in the Employee Profile, under Banking.
When multiple bank accounts are setup, the primary account (Bank Account 1) will receive the remainder of the payment after other splits are allocated.
Additional bank accounts (Bank Account 2 and 3) can be configured for split payments. These splits can be set as either a Fixed amount or a Percentage of the total pay.
Microkeeper is billed based on the Active users in the account. Please note that paid plans do have a minimum charge. Find more details on Pricing page here.
You can find your active user number on the Billing page. Navigate to Menu > Settings > Billing > under Invoices, "There are XX active employees"

Yes, each employee can be customised to have individual secure access levels using the Access Control configuration in each employees profile.
Navigate to Menu > Settings > Employees > click Edit for the applicable employee > within the Employee Profile, under Access Control, configure the level of access by toggling different options.
Yes, the payroll tax threshold and rate are editable inside the business profile. The reports pages will generate payroll tax calculations.
Yes, Microkeeper is partnered with Beam Super for processing super contributions.
Navigate to Menu > Payroll > Super to get started
Click more info for pricing on our Hardware options.
Leave accrual is pro rata depending on how many normal hours an employee works. Only hours classed as normal hours will accrue.
The pro rata accrual amount will be calculated on values set in Employees Profile under Entitlements.
The average amount of data an employee might use over a month of usage would be 6.25mb or 0.128% of a 5GB mobile plan.
Loading the mobile home page and clocking on/off = 160kb~ of data.
Repeating this twice a day, 5 x a week, for 1 month would be around 6.25mb.
Passwords can be reset using the User Password Recovery Tool.
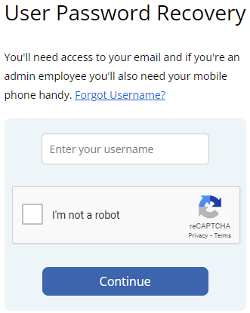
On the User Password Recovery page, enter your Microkeeper username you use to login.
Confirm the reCaptcha and click the Continue button.
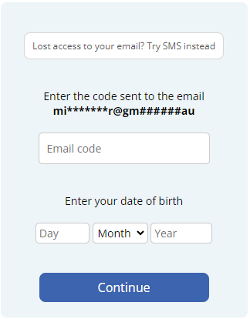
You will receive a 6 digit code to your email address. If you have lost access to your email, a code can be sent to your mobile number instead. Click the "Lost access to your email? Try SMS instead" button.
Enter this code and also enter your date of birth and click the Continue button.
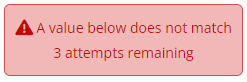
If you get the error "A value below does not match", please review the email code or your date of birth.
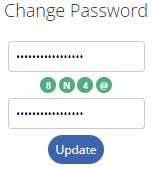
When you have confirmed your email code, you will be prompted to change your password.
Your new password must:
- Be 8 or more characters long
- Must contain both upper and lower case
- Contain a number
- Contain a special character
If your new password is valid, all the green lights will match. Click the Update button to confirm.
You will receive a "Password Changed successfully" message.
An image of the fingerprint is not stored. The fingerprint is converted to a binary string, below is a fingerprint and how it looks as a binary string.
123C2A062123C2A062E123C2A062E296B29123C123C2 A062E296B2123C2A062E296B299123C2A062E296 B292A062E296B292123C2A062E296B2996B29123C2A062E 2123C2A062E296B2996B29E2123C123C2A062E296B292A123C2A062 E296B29123C2A062E296123C2A062E296B29B29062E296B2996B29.
This string can not be converted back into a fingerprint.
I need to run payroll for a terminated employee or employee that was added after payroll was processed?
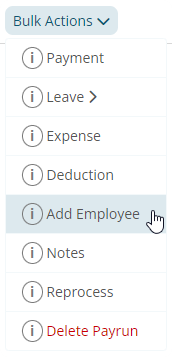
An employee can be added to the Payrun by using the Bulk Actions - Add Employee
- Navigate to the Payslip page of the Payrun
- Click Bulk Actions - Add Employee
- Select the Employee to add and click the Update button
This action will produce a payslip for the employee.
Basic hours are what we expect the employee to work in a typical week. If an employee is set to salary, the basic hours is used to calculate their salary and also their leave accrual.
Once a Roster Calendar Week has been locked, the rostered week will now be visible to staff on their Employee Console.
Within the Roster Calendar page push notifications can be sent out to Employees by clicking the Push button
- A Roster Template has been cloned to the Roster Calendar week
- The correct live fiscal year and week has been selected
- A Location has been ticked to display
Weekly rosters can be printed within the Roster Calendar page.
On the top of the Roster Calender page there is the option to download an Excel file, a PDF file or generate a HTML page. The HTML page allows for further customization of displayed information fields.
First, go to Settings > General > Locations, then click Add Location, then you'll need to add longitude and latitude degrees to pinpoint the location of the Clock In area.
As a default the Geo-fence is set to 70m from the co-ordinates you choose. Staff will be only able to clock hours inside this area.
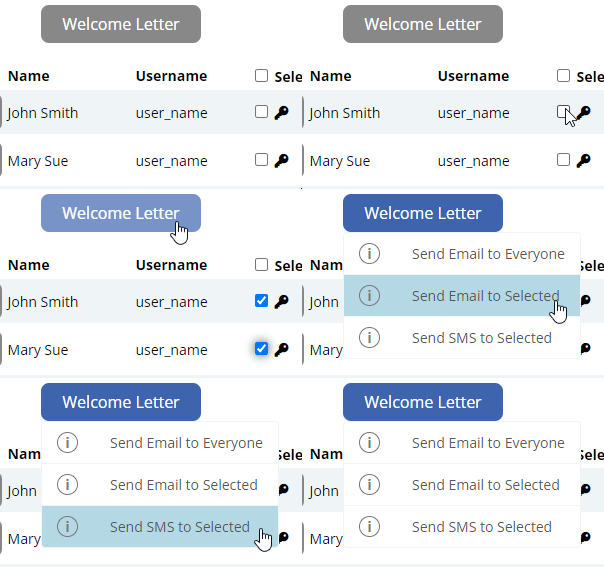
The Welcome Letter can be sent out to employees to inform them of their login details.
Navigate to > Menu > Settings > Employees.
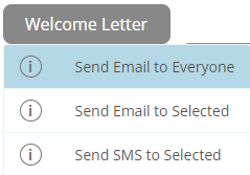
You have the option to either send the Welcome Letter via Email to everyone or send to selected employees.
To send the Welcome Letter to everyone -
- Click the Welcome Letter button.
- select 'Send Email to Everyone'.
To send the Welcome Letter to selected employees -
- Select the tick box next to an employees username
- Click the "Welcome Letter" button
- Select either SMS or Email
Signing up to Beam can be done through Microkeeper.
Navigate to Menu > Payroll > Super
Click the Setup Beam button to begin the sign up process.
A self managed super fund can be added on the Super Settings page.
Navigate to Menu > Settings > General > Super Settings > click the "+ Self Managed Super Fund" button

Enter the details of the fund in the "New SMSF" window and click "Add" to confirm.
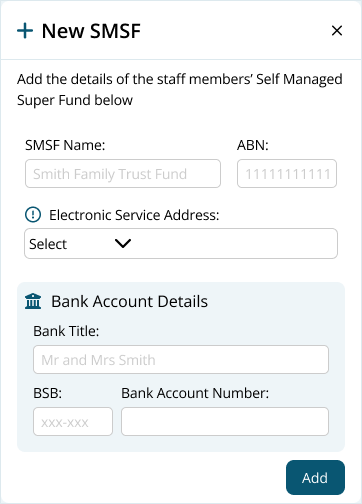
Once added, the SMSF can be selected in the Employee Profile under Super Fund Details.
How do I enter Opening Balances for an employee
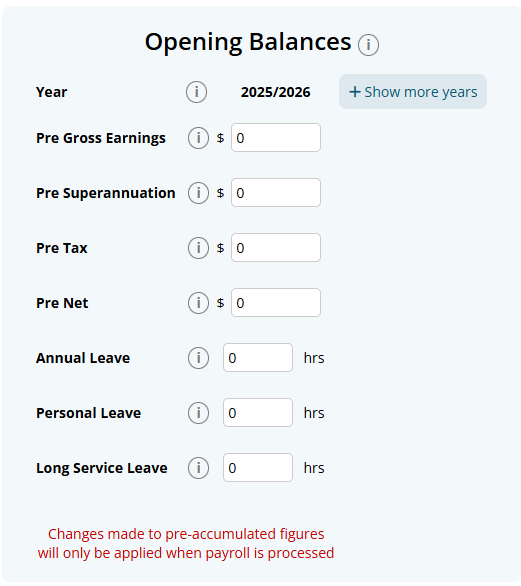
Opening Balances, such as previously accumulated leave or previously accumulated yearly earnings can be entered into each Employees Profile.
Navigate to Menu > Settings > Employees > click edit for the applicable employee > Employee Profile - Opening Balances
What do Opening Balances affect?
Leave opening balances are added to the employee's available leave balance. They can be used for annual leave, personal/carer's leave, long service leave and other active accruing leave types, and are included in future leave calculations.
Financial opening balances record amounts from the employee's previous payroll system. Pre-gross earnings, pre-tax and pre-net are included in the year-to-date totals shown on payslips, while pre-superannuation is used when applicable for annual payroll reporting. These amounts do not create a new payment or get reported again through Single Touch Payroll.
Pre-gross earnings may also affect the Working Holiday Maker tax calculation because the employee's year-to-date gross earnings are used to determine the applicable tax rate.
When changing payroll systems during the financial year, the previous system has already reported the historical payments to the ATO. Microkeeper therefore reports only payments processed through Microkeeper, avoiding duplicate reporting.
Pre-accumulated data is calculated by a balance from either, the previous year (closing balance) or opening balance when you begin a new account.
The opening/closing balance works as a starting point and every time you run payroll the amounts add on top of the balance.
Example: Opening Balance + Payrun 1 + Payrun 2 + Payrun 3 = Total. Totals can be annual leave, personal leave, long service, net earnings and so on
Hover over the red shift to see a system explanation.
Go to Settings > General > Locations.
This will then prompt you to add a location:

By adding longitude and latitude to the location staff will be able to clock into the location via GPS.
Go to Settings > Payroll rules > Extra rules. Read through the info dots and enter the driving allowance amount
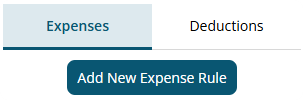
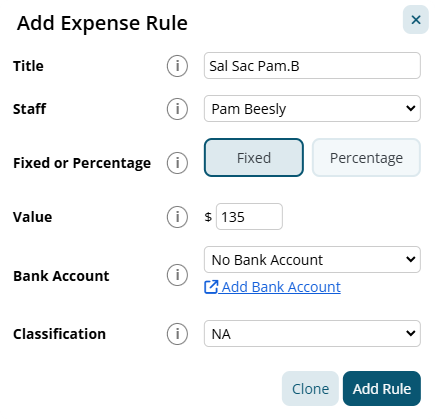
An automated Before Tax Salary Sacrifice can be setup using an Expense Rule.
Navigate to Menu > Settings > Payroll Rules > Deductions Rules > select Deductions > click the "Add New Expense Rule" button.
Example:
Pam has a before tax Salary Sacrifice of $135 per week.
This is paid into her super fund automatically.
The payment should go through a clearing house as a Salary Sacrifice
The configuration for the example above:
- Title: This will be the Payslip Title that appears on the employee's payslip. For example "Sal Sac Pam.B".
- Staff: Select the Employee affected. For example "Pam Beesly".
- Fixed or Percentage: Select "Fixed".
- Value: Change this value to the desired amount. In this example "135"
- Classification: Select "Super".
Click the "Add Rule" button to confirm.
Navigate to Menu > Payroll > Reports > and run the Payroll Invoice report.
A Microkeeper account can be cancelled at any time on our Billing page.
Navigate to Menu > Settings > Billing - click Microkeeper Account Cancel Process (at on the bottom of the page)
Note: Export all necessary reports before cancellation, as access to reports will be lost unless billing is restarted.
Using anything other will void the warranty If you are unsure consult a Microkeeper team member before cleaning.
Find out more on how to maintain your scanner.
For record keeping reasons, an employee can not be deleted, instead terminate the employee in the Employee Profile.
Navigate to Menu > Settings > Employees > click the Edit button for the applicable employee> within the Employee's profile, under Active Status window, tick the Employee Terminated checkbox.
In order to link an accountant to your business account, they first must have a Microkeeper account of their own.
If your accountant has not already done so, request that they register with Microkeeper and provide you with their username that they use to login with. Register Microkeeper Account Link.
In your business account, go to Settings > General > Linked Users > Click Add User, enter your accountants username.
When your accountant logs in to their account, they will go to Menu > Profile (top right) > Business Switcher and select to login to your business. Note: Your accountant will have full access to your account.
Finalising STP (Single Touch Payroll) Reporting in Microkeeper
- Finalise your data for the year and ensure the following:
- All Payruns via Payment Date fall within the current financial year
- All Payment Data within the Payruns match your accounting suite.
We suggest starting by matching tax values.
- Lodge the Final STP submission by entering the STP ATO Lodgment page of the last Payrun of the financial year.
- Navigate to Menu > Payroll > Payruns> Payslip > click "Complete Payrun" > click "STP Lodge" on the locked Payrun
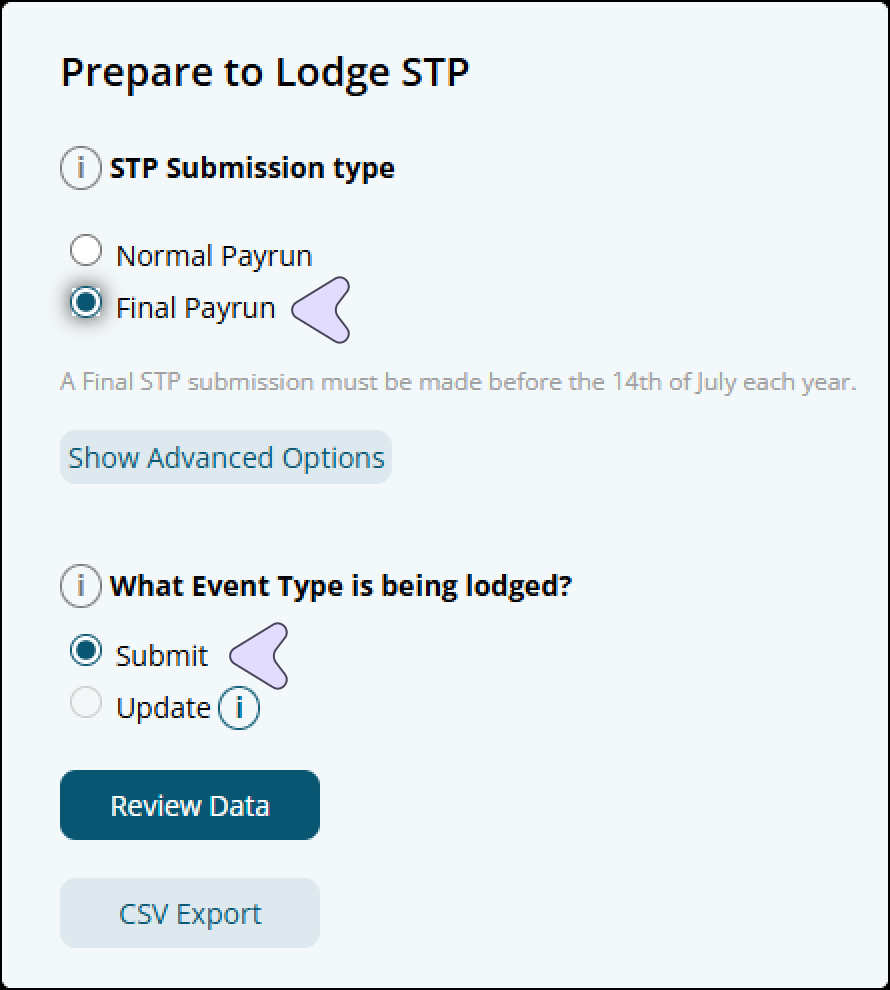
- Configure the "Prepare to Lodge STP" setting with:
- Select Final Payrun as Lodgement Type
- Select Submit as the Event Type
- Match total tax and total values to the accounting suite
The data submitted is used to generate employee Payment Summaries which are used by employees to complete their Tax Returns.
- Confirm the lodgement if the data is correct.

The ATO requires businesses to lodge a STP finalisation declaration by the 14th of July*, which when submitted will allow employees to complete their tax return.
*Employees with closely held payees may have different finalisation due dates
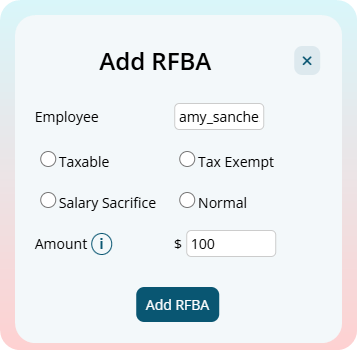
Use the "Add RFBA" button to automatically add the payment and expensive RFBA items onto the employees payslip.
- Open the Actions menu on the payslip
- Click Add RFBA
- Select Taxable or Tax Exempt
- Select Salary Sacrifice or Normal
- Enter the Grossed-up RFBA amount
- Click Add RFBA
Two payslip items will be entered into the payslip:
| Payslip Line | Purpose |
|---|---|
| Payment | Adds the RFBA amount onto the payslip temporarily as "Extra" class |
| Expense | Removes the same amount and classifies it as a fringe benefit for STP reporting |
Breakdown of Fringe Benefit Classes
Microkeeper has four fringe benefit classes:
| Class | STP Fringe Type | Salary Sacrifice Type O | Use this when |
|---|---|---|---|
| Fringe Benefit - Exempt - Salary Sacrifice | Type X | Yes | The benefit is exempt and was provided through salary sacrifice |
| Fringe Benefit - Taxable - Salary Sacrifice | Type T | Yes | The benefit is taxable and was provided through salary sacrifice |
| Fringe Benefit - Exempt - Normal | Type X | No | The benefit is exempt and was not salary sacrificed |
| Fringe Benefit - Taxable - Normal | Type T | No | The benefit is taxable and was not salary sacrificed |
If you are unsure which class to select, confirm with your accountant, bookkeeper, or salary packaging provider.
See this ATO article on "Relationship between reporting RFBA and salary sacrifice type O"
See our full guide on "Amending or Declaring the Reportable Fringe Benefit Amount under STP"
What is the EOFY process for closing off the year before processing the first payrun of the next financial year?
The first payrun of next financial year can be processed without closing off anything from the previous finacial year
Make these checks in this order:
- Tax values match
- Payment Dates of all Payruns fall within Fiscal year
- Date Range match
- STP Report - Foreign Resident, Working Holiday Maker, etc are correct
- Sub-Contractors are not included in STP
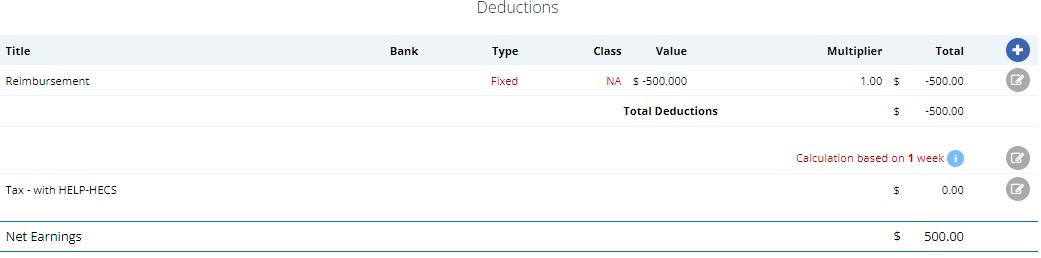
A reimbursement for an expense can be added to the Payslip as a negative Deduction
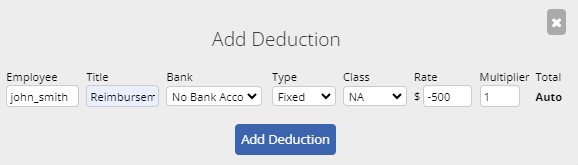
This will increase the Net but not affect Gross
Unlocked Payruns can be deleted within the Payslips page.
Navigate to Menu > Payroll > click the Payslip button for the applicable payslip.
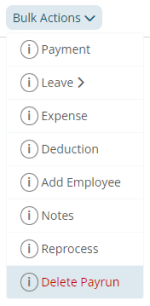
Within the Payslip, click Bulk Action > Delete Payrun.
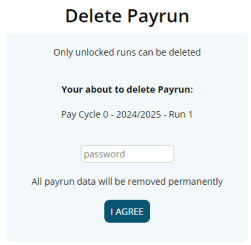
In the Delete Payrun page, confirm the deletion by entering your password and clicking the I Agree button to permanently delete the payrun.
Navigate to Menu > Manage > Groups > within the Group Configuration page you can click the Edit button on the right of a Group and change the name.
Confirm the changes by clicking the save button.
The business information from Global Settings is displayed on the payslip. To change this:
Navigate to Menu > Settings > General > Global > Business Contact
The Business Contact Information details is what will display on the payslip
Rehiring an existing employee can be done by following a few steps.
Step 1
Navigate to Menu > Settings > Employees.
Find the person that needs to be rehired.
Change the Active Status field to Active.
Step 2
Clear the Termination Date and set the Cessation Type back to Employed.
Step 3
Depending on Fair Work requirements, change the Start Date and reset the TFND Sign Date.
Step 4
Depending on Fair Work requirements, reviewing the leave balance, once the employee has been rehired and included in a Payrun, review the currently leave balance, personal and long service leave might been to be reset back to 0.
The Microkeeper mobile app allows you to enable an app lock using a 4-digit PIN or biometrics (such as fingerprint or face recognition). This is a simple security feature that protects access to the app on your device and is separate from your Microkeeper username and password.
If you have forgotten your PIN, you can reset it by following the steps below:
- iOS: Uninstall and reinstall the Microkeeper app
- Android: Go to your device's Settings > Apps > Microkeeper > Storage > Clear Storage
After resetting, you will be able to access the app again and set up a new PIN or enable biometrics if required.
We reccomend re-enrolling the Employee's Fingerprint.
Click the menu > Enroll Employees
An "Enrol New Fingerprint" window will pop up prompting you to scan the employees fingerprint.
For comfort and reliability, it is recommend that you use the index finger.
- Place the entire pad of your finger not just the tip or the side of your finger on the centre of the oval window of the fingerprint reader.
- Apply steady, even pressure on the oval window. Do not roll or swipe your finger
- Hold your finger on the oval window until you see the light under the window blink. This indicates that the fingerprint reader has scanned your fingerprint.
- When the light blinks, lift your finger from the oval window. If the fingerprint reader scans your fingerprint, as indicated by the blink, but the Microkeeper software does not authenticate you after several attempts, try re-enrolling your fingerprint.
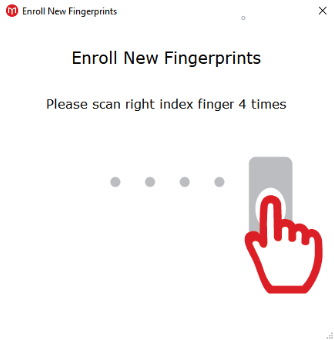
Once the fingerprint has been successfully scanned, an "Enrolment Successful" window will display a match ID.
To Ensure the Fingerprint is of the best quality make sure you're doing the below:
- Place the finger high on the glass and press down firmly
- Make sure that the Fingerprint scanner is clean and dry. Find out more on how to maintain the Fingerprint scanner.
- Make sure fingers are dry if they are wet or use a moisturizer if they are too dry.
- Check the condition of fingerprints. Scar tissue and wrinkles can change the fingerprint. A fingerprint may have to be removed and then registered again.
Microkeeper's automated tax calculation will always be in the ATO's favour. The higher tax rate may be due to a high estimated yearly wage for the employee's payslip.
A list of previous Microkeeper bill invoices can be found under the Billing page of your Microkeeper Account.
Navigate to Menu > Settings > Billing > down the bottom of the page you will see a list of all historical invoices.
Employees leave can be adjusted through the Opening Balances fields on an Employee Profile.
Calculate how many extra leave hours the employee has accrued, for example:
Adding 24 hours of Annual Leave
Navigate to Menu > Settings > Employees > click the Edit button for the effect employee
In the Employee Profile go to the Opening Balances area:
- If the current year is not listed click + Show More Years, and add the current year.
- Adjust Pre Annual Leave to the value. i.e. "24"
A negative adjustment can also be entered, for example: i.e. "-36"
Then Navigate to a recent unlocked payslip for the adjusted employee.
Click Recalc Leave button located on the top of the employee's payslip.
This will now update the employee's balance with the adjusted leave.
A Note can be added to a payslip using the Notes button.
- Click the "Actions" button on the top of a payslip
- Click "Notes"
- Enter your Note message and click the "Save" icon button.
This note will display when viewed by the staff member.
You can reset your MFA if you have lost access to your authenticator app or need to reset your MFA for any reason.
On the MFA Login page, click the "Reset MFA" link under Lost Authenticator Access.
Follow the instructions on the MFA Reset page. Click the "Send SMS" button and enter the 6 digit code that was sent to your mobile.
After your MFA has been reset, you can restart the MFA setup process.
Payslips are viewed on the Employee Console through the Microkeeper website or Microkeeper mobile app.
Payslips can also be downloaded in PDF format to be forwarded. Click the Backup or Print button on the Payslip page to download the PDF format of the payslip
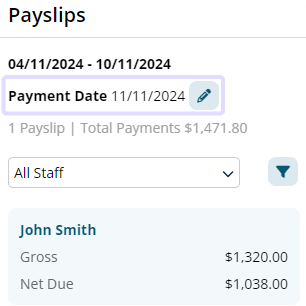
Payment dates can be changed within the Payslip Page for any unlocked payrun.
Navigate to Menu > Payroll > Payruns > click the "Payslip" button for the applicable payslip
On the payslip side bar, click the Edit button next to the Payment Date to enter a new payment date for the payrun.
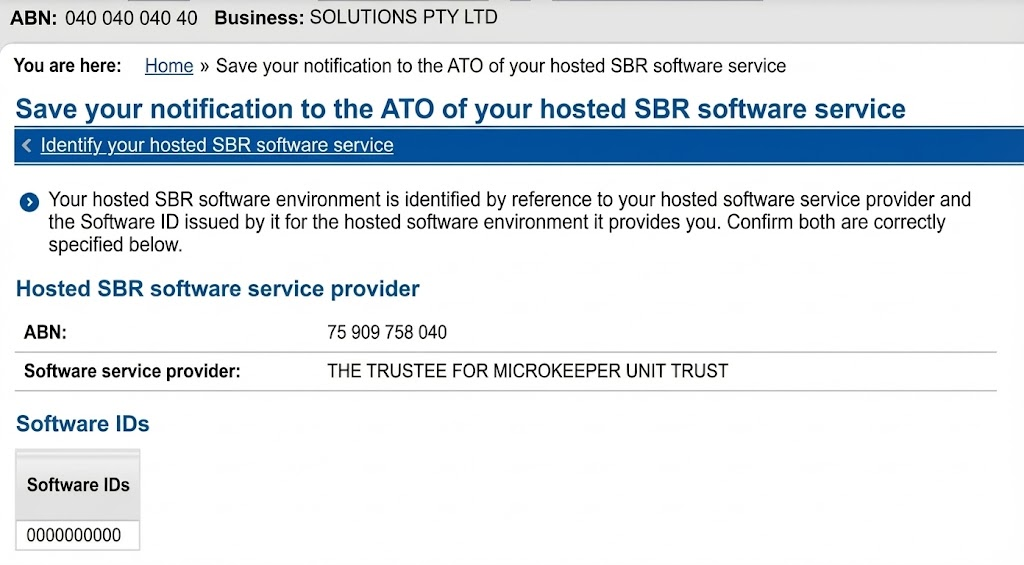
To report to the ATO for STP, the Microkeeper Software ID must be connected to the ATO's Access Manager.
The Software ID to be added can be found on the upper left in the Global Settings page (Menu > Settings > General > Global > STP Settings - ATO/SBR 'BMS ID' 'Software ID').
On Access Manager for business software users:
- Select My hosted SBR software services.
- Select Notify the ATO of your hosted service.
- Search for ABN: 75909758040
- Select the ABN link of "THE TRUSTEE FOR MICROKEEPER UNIT TRUST"
- Enter the Software ID and select Next.
- To find your Software ID, On Microkeeper, navigate to Menu > Settings > General > Global > STP Settings - ATO/SBR 'BMS ID' 'Software ID'
- Read the Notification statement then select Save.
The result should look like this:
Split shifts are rostered using 2 seperate shift lines on the same day.
To terminate an Employee, you must first process their last payslip.
Click the Final button on the employee Payslip.

The One Tap Terminate window will open.
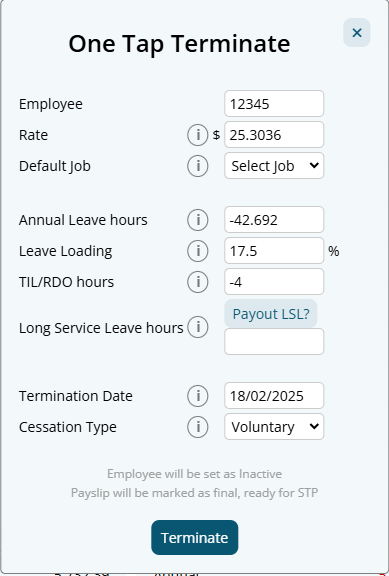
Configure the options as required and click Terminate. An employee can be paid out AL, TIL/RDO and LSL is required.
The employee will be marked as terminated on Microkeeper and STP.
You can remove the file by deleting the uploaded file on the File Manager page
Navigate to Menu > Settings > File Manager.
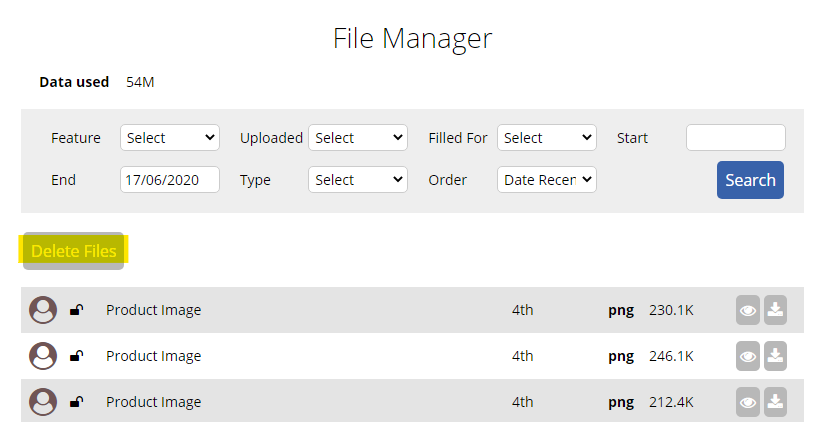
To delete a file click Delete Files button on the left of the screen, then click the trash can icon that appears next to the file you want to remove.
1 - The ABN is not registered with SuperChoice, this can be done with the link below.
2 - The ATO ABR system is down, to solve this try processing again periodically eg every few hours.
3 - The Business Name in Microkeeper does not match SuperChoice Employer Name
With the introduction of Single Touch Payroll (STP), you no longer need to provide your employees with payment summaries for information you report and finalise through STP. Instead Employees will receive an Income Statement available in ATO online services through myGov.
Employees can start their tax return lodgment through their myGov account as soon as the STP finalization declaration has been submitted.
Microkeeper will automatically increase the minimum super guarantee rate to 21% from 1 July 2025.
Change the Employment Type
An employee's Employment Type can be changed within their Employee Profile.
Settings > Employees > Edit, on the individual employee
Change the Employment Type as required
Reviewing Entitlements
The Entitlement values of an employee should also be reviewed when changing the Employment Type as this can have an effect of their entitled leave.
For Casual, make sure the entitled Annual Leave and Personal Leave is set to 0.
For Full time or Part time staff make sure the entitled Annual Leave and Personal Leave is set, typically 4 weeks for Annual Leave and 2 weeks for Personal Leave.
Paying out leave
If the employee has a leave balance and is changing to Casual, then leave will need to be paid out.
This can be done on the payslip by adding a leave payment to bring the balance to 0.
For Annual leave:
On the payslip go to Add Leave > Annual > Cash Out
Fill the Hours field with the current Annual Leave balance.
For Personal Leave:
On the payslip go to Add Leave > Personal
Change the Class to Bonus, the Rate to 0, because Personal Leave is forfeited
Fill the Hours field with the current Personal Leave balance.
With the introduction of Single Touch Payroll, you no longer need to provide your employees with payment summaries for information you report and finalise through STP.
Employees can start their tax return lodgement through their myGov account as soon as the STP finalisation declaration has been submitted.
An Employee Termination Payment (ETP) outside of unused leave can be added as a payslip item in the Payments area of the payslip. Unused leave ETP payments can be added by using the Final button on the employee's payslip.
Before adding an ETP payment, its recommended to first identify the ETP type code for STP purposes. Review the different ETP types here. Also see the ETP tax reporting limitation within the STP guide.
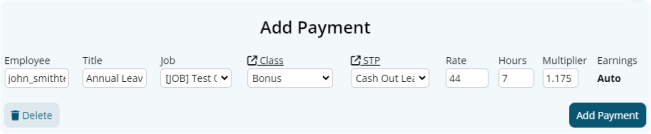
Click the Plus button located on the right side of the Payments area. An "Add Payment" window will appear.
Fill in the values as needed:
- Title: This will be the Title that appears on the employee's payslip. E.g. "ETP Payment"
- Job: The job allocation of the payslip item if needed.
- Class: The classification of the payslip item. Refer to this table for more information.
- STP: Select the ETP type code. See this table for descriptions of the ETP type code options.
- Rate: The rate to be paid.
- Hours: The number of hours to be paid.
- Multiplier: The multiplier of the rate to be paid.
Any tax-free ETP payments will need the tax value to be adjusted as Microkeeper currently does not automatically calculate ETP tax-free payments
To resubscribe a Manager to their email notifications, navigate to Menu > Manage > Notification Config.
Then on this page, under the Email Test Facility, select the Manager and click the Test button, this will send an email to the Managers email, if they are unsubscribed, a prompt to resubscribe the manager will appear.
Managers can also resubscribe to the mailing list by accessing a previous management email and clicking "unsubscribe"
The tax amount can be offset within the individual employee profile.
Navigate to Menu > Settings > Employee Profile > edit the applicable Employee > within Employee Tax, set the offset amount under the Tax Offset Amount field.
The STP Log can be found on the STP STO Lodgement page.
Navigate to Menu > Payroll > click the Payslip button of the applicable Payrun > click the "Complete Payrun" button > click "2. Submit to ATO" menu option on the left side. The STP Log can be viewed here.

The existing Super Admin account can nominate a new Super Admin.
Navigate to Menu > Settings > General > Global > within Business Contact Information. adjust the Super Admin settings to another user
Microkeeper automates a full list of public holidays for all states in Australia.
Review this list by visiting the List of Australian public holidays page.
Public Holidays that are paid out do not deduct from an annual or personal leave balance.
Public Holiday days can be customized within the Public Holiday Rules. Review this guide to skip or add dates to the Public Holiday system.
Company logos can be set in the general settings.
Navigate to Menu > Settings > General > Logo Upload.
The automated tax value can be changed by clicking the Edit button next to the tax amount at the bottom of a payslip.
Change the value and click Save

Microkeeper has added the National Day of Mourning (24th of September 2022) to be treated as a public holiday for all users.
Class the payment as Extra to have the payment item to generate Tax but not Super
To setup your Manager in Microkeeper:
1. Designating an employee as a manager.
- Navigate to Settings > Employees > click the Edit for the manager > in the Employee Profile - Access Control
- Configure the Access Control module and select the features they'll need access to.
2. Designating the staff/area that the Manager is in charge of, this designates who they'll be able to see in the Rosters/Timesheet/Leave Requests area etc.
- Navigate to Settings > Locations
- Click the grey Edit button of the location to configure
- Tick the Managers of that location (Managers can look after multiple locations)
- Ensure the group of staff has been setup correctly in the location. (To see how to configure groups go here: (https://microkeeper.com.au/guides.php?guide=group-configuration)
3. Designating who receives email notifications for particular staff
- Navigate to Manage > Notification Config
- Use the plus button to designate which Manager receives emails for which event along the top of the table.
A payrun can be processed outside of the regular payroll cycle by running an Ad hoc Payrun
This allows you to create a Missed Payslip from a previous pay cycle, or create an blank payslip
Navigate to Menu > Payroll > Payruns
- Click the New Payrun button
- Configure the Ad hoc setting to either Ad hoc -Full Payrun or Ad hoc - Blank Payslips .
Ad hoc - Full Payrun will include all Payrun calculation data the same as a Normal Payrun
Ad hoc - Blank Payslips will skip calculations creating blank Payslips ready for manual amendment - Configure the rest of the New Payrun settings as required.
Why am I receiving an error saying Oops The payroll process has already started contact payroll to make changes?
Timesheets will be locked if an active payrun exists for that pay period.
Only management with Access Control > Payroll/Admin > Payroll - Full Access settings will be able to make changes to the Timesheets for that period.
An Ad Hoc payrun can be generated instead to bypass this protection.
To purchase our Fingerprint Scanners, NFC Scanners, and iPad Mounts you can navigate to our store.
- Click on the "More" button located at the bottom right corner of the page.
- Scroll down to find the "Store" option and click on it.
To add in a new public holiday date, you can navigate to Settings > Payroll Rules > Public Holiday Rules.
Then on the right click "Add Date" and type in the date you wish to add to the system.
Then when payroll is processed for that period of time the date will be treated as a public holiday.
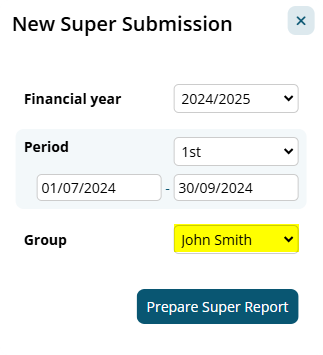
A super contribution can be made for a single employee by changing the Filter.
- Menu > Payroll > Super > click the "New Super Submission" button to begin a new super contribution
- Select the Period
- Select the Employee affected
- Click the Prepare Super Report button.
- Confirm the amount matches the amount in question
If a contribution needs to be made for multiple employees, a Group can be used to generate a super contribution for.
Paid Parental / Maternity Leave can be set up to be paid automatically using an Extra Rules feature.
In this example, we are setting up a Parental Leave Rule that ensures an employee on parental leave receives a fixed payment. This rule will automatically apply the specified amount to the employee's payslip.
Navigate to Menu > Settings > Payroll Rules > Extra Rules, click the Create Extra Rule button to configure the allowance.
Key values to configure:
- Title: This will be the Payslip title for the rule. For example, "Parental Leave".
- Employee: Select the employee from the drop-down list. This ensures the payment is made to the correct person.
- Fixed or Percentage: Select "Fixed".
- Value: Enter the fixed amount to be paid. For example, "500"
- Multiplier: Set this to "1" to ensure the full amount is paid for each instance of leave.
- Class: Select "Extra" to exclude this from Super and Leave Entitlements calculations.
- STP Category: Choose "Paid Parental" to ensure correct reporting.
Custom Fields can be added to store and collect unique data.
Navigate to Menu > Settings > Custom Fields
Click the "Add New Field" button and configure the custom field as required
- ID: A unique string to identify the field programmatically
- Name: A description of the field to explain what is expected. This will be displayed to employees.
- Onboarding: Configure if the custom field will display during Employees Self-Onboarding
- Validation: Configure the validation of incoming data to help filter out unwanted answers. Options include:
- Alphanumeric with spaces, case insensitive.
- Date DD/MM/YYYY.
- Yes or No.
- Only Numbers
- Alphanumeric
Click the "Add Field" button to confirm your new Custom Field.
Paid leave will automatically populate on a Payslip if an approved Leave Application exists for the pay period.
If you want to manually cash out an employees leave balance, you can use the "Add Leave" button on the top of an employees payslip.
Navigate to Menu > Payroll > click the "Payslip" button (of applicable Payrun).
- On the top of the applicable employee's payslip, click the "Add Leave" button

- Select the type of Leave to payout.
- On the Add Payment window, enter the amount of Hours to be paid out. The Rate and Multiplier of the payment can also be manually amended if needed.
- Click the Add Payment button to confirm.
When you need to pay Super but you are missing details for one or more staff members, you can exclude those staff from your Super payment by first creating a group. (Its recommended to add the Inactive staff too)
Now on the Super page, when configuring the Super Payment Process, select the Group you have created.
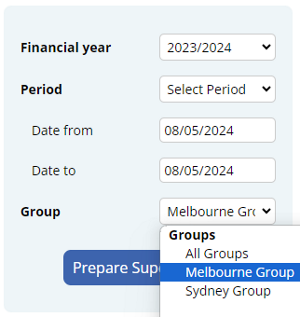
The staff excluded from the group will not be included in the Super Contribution report, therefore Super can be lodged successfully without their details.
SuperChoice will use the bank account details in your Microkeeper account to pay Super. To check the bank account details for Superannuation payments, go to Settings > General > Bank Details.
A doctors certificate can be added to Personal Leave requests only after the request has been submitted.
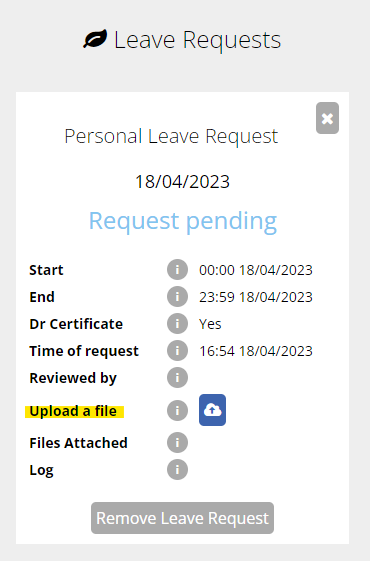
The employee can upload the doctors certificate from the Leave Request section of their Employee Console.
Click the drop down arrow to expand the request:
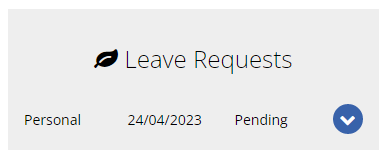
Then click on the button next to Upload a file:
From the 1st of February 2023, all employees of non-small business employers can take 10 days of paid family and domestic violence leave each year.
Based on the ATO's Payslip Facts, you cannot mention this form of Leave directly on the employees Payslip. They say it's best practice to show this on the Payslip in a way that appear that the employee hasn't taken leave.
Achieving this on the Microkeeper Payslips will require a manual adjustment, by editing the Payslip, using either the Add Payment button on the Payslip, or any of the edit buttons on the left of any Payment line.
Microkeeper recommends using the same Title for all instances of family and domestic violence leave so this can be tracked in reporting.
The Payslip may record the time as another type of leave, for example, Compassionate Leave at the employees request, do not use, for example, Annual Leave as this will affect the Annual Leave balance.
Reportable Employer Super Contributions (RESC) can be added on an employees payslip by using the "Add Super" button.
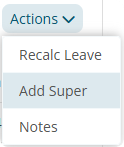
On the payslip using the Quick Action toolbar, click Actions > Add Super
Select Type: RESC and enter the amount to be added to the payslip.
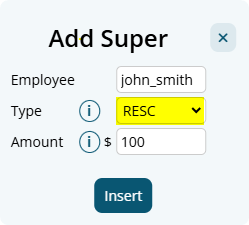
This will be reported as Super type R for STP reporting.
Staff can complete a VEVO check during their onboarding process.
To trigger a VEVO check one of the following must happen:
- Answers No to 'Are you an Australian Citizen?'
- TFND set to Working Holiday Maker
- TFND set to Foreign Residence
- Overseas country set to outside Australia
The employee will then be presented with a VEVO Check form:
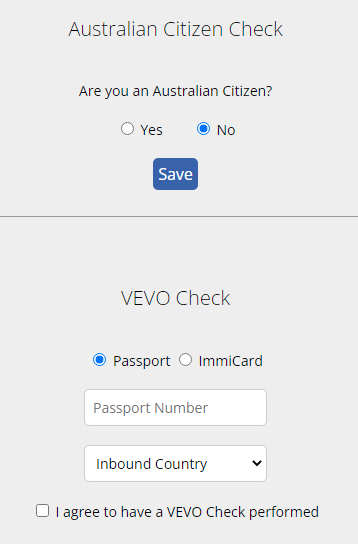
The VEVO Check is performed in real time and a response provided.
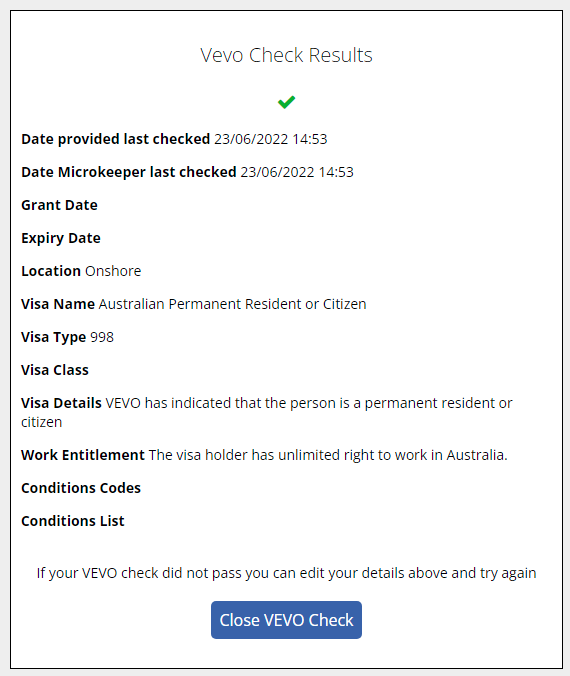
If a record is found the employee can close the form, if not they can try again.
Yes, expired Visas can be managed in the VEVO module.
Navigate to Menu > HR > VEVO Checks > toggle the filter to "Expired"
Any Visa's that have been flagged as expired will be shown here.
Yes, VEVO check can be manually rerun through the VEVO Checks module
Navigate to Menu > HR > VEVO Checks > filter for the applicable VEVO Check and click the dropdown box to see more details
In the details area of the VEVO check, a grey Run button can be clicked to rerun the VEVO Check.
Some staff are eligible to work indefinitely, others are only eligible for 3 months or until the visa expiration date, after which another VEVO check must be completed.
Microkeeper will automatically make these future checks and if a change is detected this will be flagged for review.
Microkeeper will perform these additional automated checks at the start of each financial quarter.
Daily checks are made for visas that have recently expired.
VEVO Check costs are based on a per-check basis at $2 per check.
An employee requiring a 3-monthly check will only cost $8 per annum, plus $2 for the initial check during onboarding.
A manual VEVO check can be run through the VEVO Checks module page
Navigate to Menu > HR > VEVO Checks
Click the Add VEVO Check button.
In the configuration window, select the employee and enter either a Passport or ImmiCard number.
Because the lodgement being made is after the Payroll Payment Date , you won't be able to submit a "Normal" event anymore.
The only option will be to do an "Update" event. This is something decided by the ATO in their STP Reporting guidelines.
Additionally, in Microkeeper we do still continue to send through the Year to Date totals for the financial year, the ATO just will not display the Gross or PAYG totals to pre-fill your BAS when you submit an Update event.
Best practice for STP Lodgment is to ensure that you always report STP on the day payroll is processed as your final step.
That all said, this restriction won't have any affect on the totals to be reported for EOFY, as the Payment Summary amounts are only based upon the Submission that you mark as "Final", which is done when finalizing your final payment for the financial year.
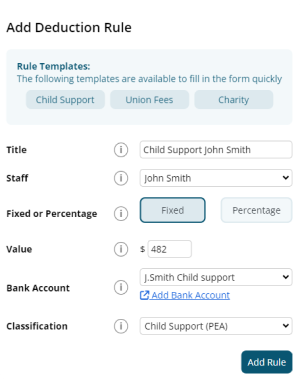
It's recommended to use a Deduction Rule to setup automated Child Support deduction payments.
Navigate to Menu > Settings > Payroll Rules > Deduction Rules - Deductions
Click "Add New Deduction Rule" to setup a new automatic deduction for Child Support
- Title: This will be the Payslip Title that appears on the employee's payslip. (e.g., "Child Support J.Smith")
- Group/Employee: Select the Employee affected.
- Fixed or Percentage: Select "Fixed".
- Value: Change this value to the desired amount. (e.g., "482")
- Bank Account: The deduction can be included in the ABA file to be automatically deducted to the account selected. How to set up a Bank Account for Deductions.
- Classification: Select either PEA or 72A.
- Child Support PEA = Protected Earnings Amount. An amount that is protected from a Child Support Deduction. This amount is updated on the first day of each year and is maintained by Microkeeper
- Child Support 72A = Clause 72A means PEA does not apply, the DHS (department of Human Services) will let the employer know if this clause applies.
Below is an example of a common child support payment
John Smith deducts $482 each week as a PEA child support deduction from his payslip and paid out to a configured deduction bank account.
This is a limitation with the functionality with the "Reimbursement" Class.
This will not affect the PAYG calculations on the Payslips, but will affect the Payroll Summary.
You cannot change an STP lodgment once it's been sent to the ATO.
Instead you will just go to Payroll > Payruns > Payslip > STP Lodge, and under "Prepare to Lodge", Submit another lodgment with the corrected Settings.
"Un-reachable" means the ATO's Servers were unreachable and did not send us any response to your lodgement to whether they received it.
You have two options:
- Check the ATO's Business Portal, and see if they received it, but did not send us a response message back.
- Lodge another STP event with the same settings as last time.
An automated after tax deduction from an employees payslip can be setup using a Deduction Rule.
Example:
A deduction of $50 per week to recover payments for an employee training.
Navigate to Menu > Settings > Payroll Rules > Deduction Rules
Click the Create New Rule button to configure a new Deduction Rule.
- Deduction or Expense: Select "Deduction". This will be applied After Tax.
- Title: This will be the the Payslip Title that appears on the employees payslip.
- Group/Employee: Select the Employee affected.
- Fixed or Percentage: Select "Fixed" for deduct a fixed amount each payrun
- Value: Enter the weekly amount to be deduced from the employees payslip
- Bank Account: The deduction can be setup to automatically paid to a specific bank account
- Classification: Select N/A.
Click the "Add New Rule" to confirm your new Deduction rule.
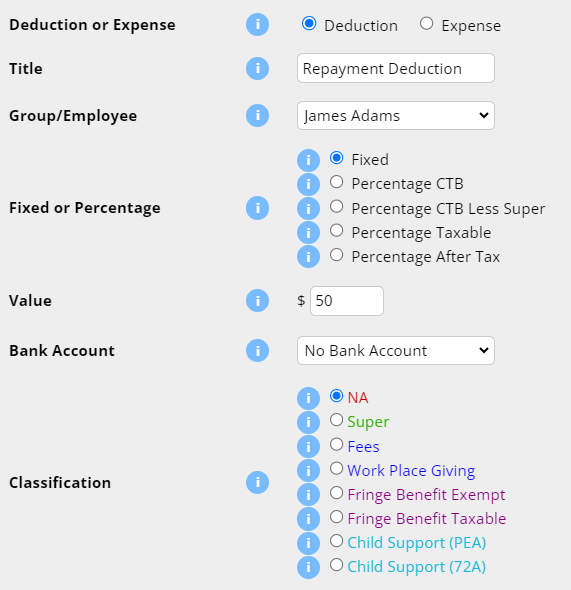
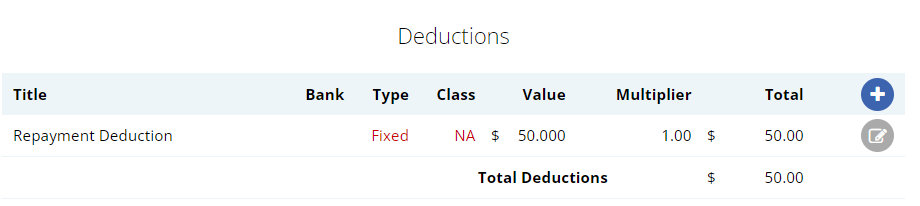
The Deduction Rule setup in the image above will automatically deduct $50 from the employee "James Adam" payslip titled as "Repayment Deduction".
If you get the error message:
An authorisation error has occurred, please check your access permissions.
This is because Xero requires a Business Plan to use Invoicing with Xero or the employer has reached their invoice limit of 20 invoices per month.
Xero API response:

ErrorNumber 23
Type AuthorisationException
The entry level plan only allows 20 invoices per month. Upgrade your plan to a Business Plan to increase your invoice limit.
The Xero authentication process was unsuccessful. Reconnect your Xero account to fix.
Navigate to Menu > Settings > General > Global > under System Settings - Accounting Suite
Click the Disconnect from Xero button
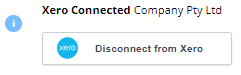
After disconnecting xero, reestablish the connection by clicking the Connect to Xero button and follow the prompts on the Xero page.
Login to Xero with your credentials to authorise the Microkeeper connection.
The invoice that was sent to Xero from Microkeeper was voided.
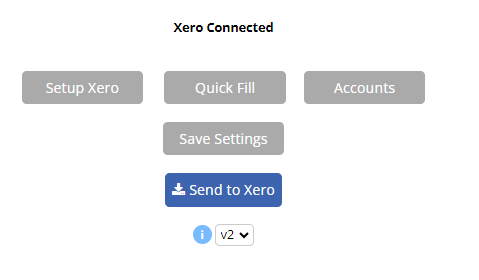
Use the Version change when submitting the invoice to try again.
Click the drop down box under the "Send to Xero" and change from "v1" to another version
Microkeeper uses the Australian Tax Office's Tax Tables to calculate the PAYG Tax amounts being deducted from an employee's Pay.
The tax table used will match the Pay Period (eg Weekly, Fortnightly, Monthly).
The main exception are the Working Holiday Maker tax rates.
An additional factor is when Allowances are categorized as "Tax Free Allowances", which means they do not contribute towards the total Gross Taxable.
A Broken Shift Allowance can be created with a "Extra Rule". Note these steps are not to be confused with a "Broken Shift"
Navigate to Menu > Settings > Payroll Rules > Extra Rules > Click the "Create New Rule" button.
The key values to setup:
- Title: This will be the the Payslip Title that appears on the employees payslip. For example "Broken Shift Allowance".
- Group/Employee: Select the Employee affected.
- Fixed or Percentage: Change this option to the desired condition.
Example
The allowance is half an hour of an employee's ordinary pay - Set as Percentage.
The allowance is $19 per broken shift - Set as Fixed. - Value: Change this value to the desired payment amount.
Example
The allowance is half an hour of an employee's ordinary pay - Set as 0.5.
The allowance is $19 per broken shift - Set as 19. - Classification: See the Payments Classification Chart for appropriate classification.
- STP Category: See the STP Guide for appropriate category
- Timesheet Lookup: Select Split Shift
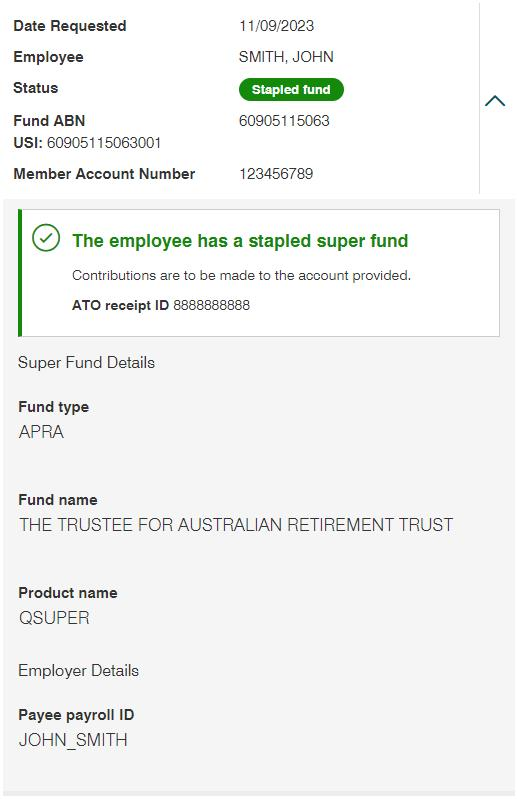
If you are receiving the error 'We cannot confirm an employment relationship', we recommend that you use the employees username for the Payee Payroll ID
In the below image example, the employee SMITH,JOHN with the employee username john_smith -
To add a group to your Microkeeper account:
Navigate to Menu > Manage > Groups.
Click the blue plus "+" icon located at the top of the Group List.
In the Add Group window that appears, fill out the required details:
Group Name: Enter a concise name for your new group (e.g., Kitchen Staff, Front of House, Management).
Auto Add: Decide if new employees should be automatically assigned to this group.
Access: Choose the level of restriction or usage for this group (e.g., All, Payroll, Rosters, or Self Managed).
Click the blue Add Group button to save.
Next Steps: After creating your group, you can allocate employees to it by selecting the checkbox next to the Group name within the Group configuration page, selecting your staff, and clicking Display to assign them.
Can we adjust the system to pay Super for employees under 18 years old who work a large number of hours?
Yes, you can force the system to always pay Super for under 18-year-old employees by setting their status as FT (Full-Time). This ensures that they always receive superannuation irrespective of their hours worked.
If the employee is under the age of 18 and works less than 30 hours in a week, they are not eligible for superannuation. Microkeeper calculates hours based on the pay cycle itself. For example, if the pay period is fortnightly, it would consider 60 hours (30 hours per week in the fortnight).
An under 18 year old who is set to Full Time status will automatically accrue super regardless of hours work.
After adding a bank account to Microkeeper, you'll need to verify it to unlock all available banking features.
Navigate to Menu > Settings > General > Bank Details.
Any bank account that has not yet been verified will display a Verify button.

Click Verify, then select Send Codes. Microkeeper will send two small verification deposits to your bank account.
These deposits usually appear in your bank account instantly, although this may vary depending on your financial institution.
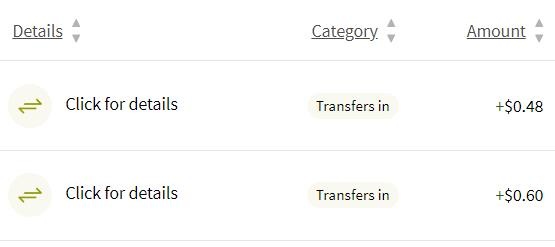
The two deposit amounts contain a two-part verification code. From the example above, if the deposits are $0.48 and $0.60, the verification codes are 48 and 60. Enter the two codes in Microkeeper to complete the verification process.
Once the bank account has been verified, the Verify button will be replaced with a blue tick.

You can configure an employee profile to display their rostered shifts end time to display "Until Required" through their employee profile.
Navigate to Menu > Settings > Employees > click "edit" for the applicable employee
Under Employee Display, untick "Show end time"
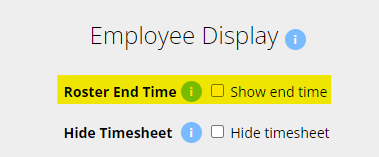
This will change the roster end time to "Until Required"

This issue can occur with the interaction of "Roll Start Time Forwards" setting and two clock events that are close together.
Example Scenario:
Roll Start Time Forwards: Roster - 15mins
Roster Start: 4:30AM
Clock In: 4:25AM
Adjusted Clock In: 4:30AM
Clock Out 4:26AM
In the above example, the system will have rolled the start time of shift to 4:30AM but create a clock off event at 4:26AM which will cause the issue of showing an end time before the start time.
There are different workers compensation laws for each state and territory.
Payment items with the Class "Workers Comp Entitlement" will vary the Leave entitlement based on the state of the employee.
WCES - Workers Comp Entitlements by State table
| Annual Leave | Personal Leave | Long Service Leave | |
| VIC | + | x | + |
| NSW | + | x | + |
| ACT | + | x | + |
| QLD | + | + | + |
| NT | x | x | x |
| WA | + | x | + |
| SA | + (1) | + | + |
| TAS | + | x | + |
(1) Only for 52 weeks, manual intervention required after that
Employees State is determined by the Timezone set in their Employee Profile.
Workcover payments can be automated using an Extra Rule.
Example:
John Smith's workcover payment is 38 hours at their default rate of $25
Navigate to Menu > Settings > Payroll Rules > Extra Rules, click the Create New Rule button
The key configuration for the example above:
- Title: This will be the Payslip Title that appears on the employee's payslip. For example "Workcover J.Smith"
- Group/Employee: Select the Employee affected. In this example "John Smith"
- Fixed or Percentage: Select "Fixed"
- Value: Change this value to hourly rate. In this example "25"
- Multiplier/Shift count: Set this value to the pay cycle hours. In this example "38"
- Classification: Select "Workers Comp Entitlement"
- STP Category: Select either "Gross" or "Workers Compensation". See the STP Quick Reference for more details.
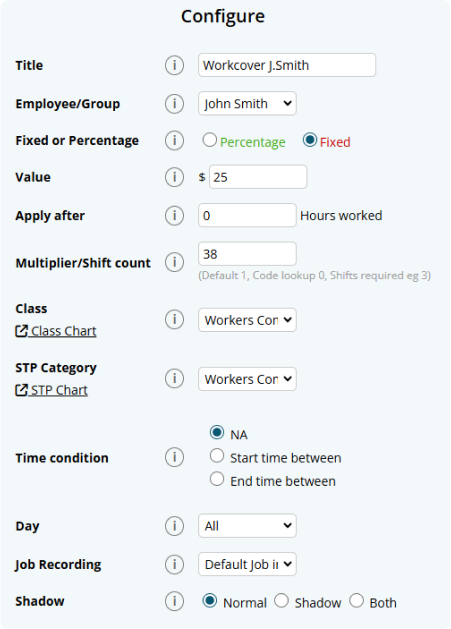
The configured rule will now apply 38 hours at $25 classed as Workers Comp Entitlement.

You can add leave on behalf of an employee on the Leave Review page.
Navigate to Menu > HR > Leave Review > under "Leave Request on behalf", select the type of leave form and the employee to apply leave for.
Employee displayed payslips can be customised in the Global Settings.
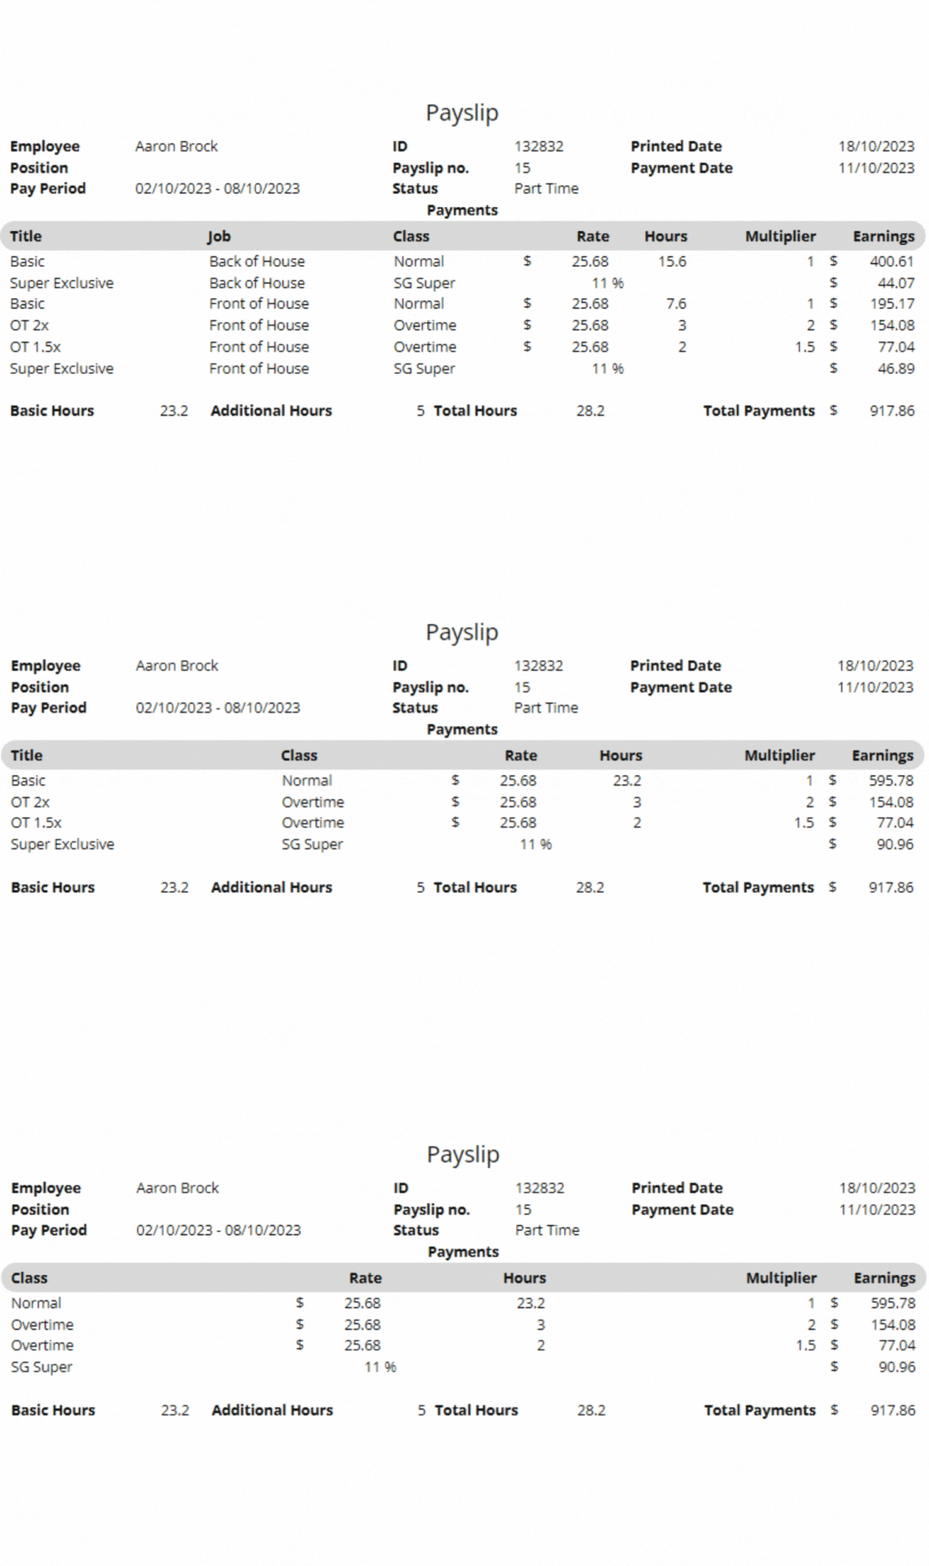
Navigate to Menu > Settings > General > Global > under Payroll Settings, configure Payslip Display
There is 6 breakdown options for the payslip. Check or uncheck the boxes next to each option based on your preference and the clarity you want to provide to your employees.
For a simplified payslip: Check fewer boxes, focusing on the most important details.
For a detailed breakdown: Check more or all boxes to provide complete information.
- Title: This represents the title of the payment. It's recommended to keep this selected as it will produce one line for each Shift Rule, Extra Rule, Leave, and Public Holiday that triggers.
- Date: This shows the date the shift was worked. It might make the payslip lengthy as it will produce a line for each day worked. It's generally not recommended unless necessary.
- Location: This indicates where the employee worked. If employees have different pay rates depending on their location, consider selecting this. Otherwise, it might be better left unchecked.
- Role: This displays the role the employee worked in. Select this if pay rates differ by role.
- Job: This option shows the specific job/task the employee worked on. Useful if there are different pay rates based on the job.
- Class: Refers to various pay categories like Overtime, Bonus, Superannuation, etc. It's recommended, especially if 'Title' is unchecked.
Timesheets can be import via a CSV file. Follow these fields in the exact order mentioned (for any optional fields, leave as blank):
- Employee (Required): This field can be populated using the employee's Username, Payroll ID, Employee ID, or Employee Name. Microkeeper will attempt to match the record using any of these identifiers.
- Date (Required) : The date for the timesheet entry.
- Start Time (Required) : The beginning time of the work period.
- End Time (Required) : The concluding time of the work period.
- Location (Optional): The workplace location.
- Role (Optional) : The specific role of the employee for that timesheet entry.
- Job (Optional) : This can be identified by the JobID, Third Party ID, or Job Title. Microkeeper will attempt to match the record using any of these identifiers.
- Break (Optional) : This field requires the break duration in minutes. Microkeeper will search for a selectable break rule with the same duration and apply it.
- Note (Optional) : Any additional information or context you want to provide for that particular timesheet entry.
To upload formatted csv file navigate to Menu > Rosters > Timesheets > click the Import CSV button and select your CSV file.
If you're re-uploading data within the same date range that was previously imported via CSV, please be aware that any existing data within that range will be destroyed and replaced with the new CSV data.
Super on Leave Loading can be enabled via the Employee Profile - Entitlement settings.
Navigate to Menu > Settings > Employees > click Edit for the applicable employee > within the Employee Profile, under Entitlements, select Apply Super.
Microkeeper Bills/Invoices can be paid via Credit Card or Paypal.
Paypal does offer a direct debit payment option which can be used to pay via direct debit.
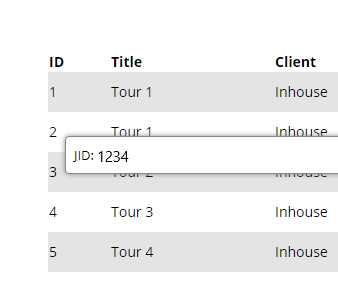
To find the JID/unique Job ID, Navigate to Menu > Manage > Jobs.
Then in the list of jobs, hover the mouse over the ID number of the job you wish to track, and a small box containing the Job ID will appear. EG The below Job ID is 1234.
Personal Files allows admins to store and manage individual employee-related documents such as contracts, performance reviews and certifications.
Navigate to Menu > Settings > Employees > edit the applicable Employee > within the Employee Profile, Personal Files
Adding a New File
Click on the "Add File" button to upload a new document
- Title Enter a descriptive title for the file. This will be displayed to the employee
- Type Select the type of file from the dropdown menu. Options include awards, certificates, disciplinary actions, contracts, etc
- Upload Attach a required document
- Status Select the status of the document
- Draft The file is not yet finalized and visible to the employee.
- Sight and Sign The employee can view and sign the document to acknowledge receipt and understanding.
- Critical The document must be signed before the employee can proceed with other tasks, like clocking in.
- Hide The document is only accessible by admin staff and not visible to the employee.
- Archive To store the document away from the active list without deleting it.
Employees can sign a document electronically through their Employee Console. Once signed, the document's status updates and it no longer be edited to ensure compliance.
If the document pertains to employee qualifications or skills, consider using the Skills Matrix instead, as employees cannot upload documents to the Personal Files.
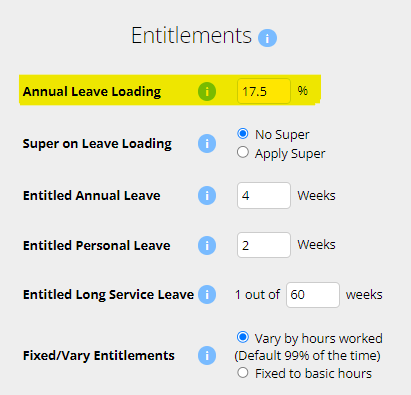
Leave Loading can be configured in the employee's profile.
Navigate to Menu > Settings > Employees > click Edit for the applicable employee > within the Employee Profile, under Entitlements -
Set the Annual Leave Loading to the desired value.
A Time Off Request leave application can be used to apply for unpaid leave.
Time Off Request is unpaid leave not attributed to any leave balance.
Access Control ensures users have appropriate access to the different modules in the organization. Each user can have their own individual Access Control configuration allowing a dynamic setup of managers with different roles and responsibilities.
Navigate to Menu > Settings > Employees > click Edit to enter the Employee Profile > Access Control
The Access control divided into two main Categories:
- Manager Options
- Payroll/Admin Options.
Each category contains a list of permissions that can be toggled on or off for individual employees.
Manager Options
- Location Access - Location Access controls which employees a manger has access to for Rosters, Timesheets, Leave Requests and HR module actions.
- Locations - All: Grants a manager access to all Locations in the organisation.
- Location - Staff: Access only to employees of Locations the manager is assigned to.
- Location - Clients: Access only to employees of Locations the manager is assigned to. Timesheets are restricted to only entries with jobs for the clients assigned to the manager's Location.
- Rosters
- Full Access: Allows complete control over rosters module
- Read Only: Limits to viewing HTML Roster page only
- No Access: Restricts any interaction
- Display Costs: Displays the costs associated with rosters, such as pay rates and shift rules of employees
- Timesheet Access
- Full Access: Allows complete control over timesheets
- Read Only: Limits to viewing only
- No Access: Restricts any interaction
- Leave Requests: Allows full access to the Leave Modules
- Employees
- Add/Edit: Allows adding and editing employee details. Areas of Employee Profile is restricted by what Access Control you have
- Edit: Allows for editing of employee details. Areas of Employee Profile is restricted by what Access Control you have
- Add: Allows for adding a new employee
- No Access: Prevents any modifications
- NFC tags, Fingerprints, Facial: Enables manager to assign NFC tags and enroll fingerprints or facial recognition details
- HR - Skills and Qualifications
- HR - Config: Allows the creation of skill sets and qualifications within the system
- HR - Full: Managers can review both pending and approved skills and qualifications
- HR - Review: Limited to reviewing pending submissions. Once approved, the manager cannot view them again
- HR - No Access: Managers cannot see or manage employee skills and qualifications
Payroll/Admin Options
Note: Payroll/Admin Options are system wide.
- Payroll Access
- Full Access: Enables full payroll processing capabilities
- Medium Access: Provides read-only insight
- No Access: To payroll information
- Jobs and Clients: Allows the tracking and management of Jobs and Client-related information
- Invoicing: Enables the creation and editing of invoices
- Activity Feed: Provides visibility into the activity feed for organisation events and actions
- Group Config: Manages configurations for different groups within the organization
- Reports: Grants access to Reports and Analysis modules. Reports shown will display based on other Access Control Settings
- Settings: Provides access to all settings within Microkeeper
- Files: Allows access to file management without the ability to delete files
Allocated Staff List
Use the Allocated Staff List to quickly review which active staff are assigned to a manager, filter the list by location or pay cycle, and find employees by name without leaving the current page.
Open the allocated staff list
- Open the Employee Profile page.
- Click Show Allocated Staff List.
- The system opens a modal titled Allocated Staff.
The list is limited to active employees and only shows staff that match the manager's visible locations and access rules. If the employee does not have access, the page shows an access error instead of the staff list.
Review the staff list
- Review each employee row for the staff name and allocation pills.
- Check the Location pill, which shows the location allocation for that employee.
- Check the Pay Cycle pill when it is available, which shows the pay cycle assignment for the employee.
- Hover over a pill to view the full allocation details in the tooltip.
Each row includes the employee's profile image, name, and allocation summary. If the employee has more than one location or pay cycle, the label shows the count and the tooltip lists each item individually.
Understand the results
- The count shows visible staff out of the total loaded staff for that manager.
- If no staff match the selected filters, the page shows No staff match these filters.
- If no active locations exist for the selected manager, the page shows a no-location message.
- If the manager is not allocated to any active locations, the system shows a no-access/empty state rather than a full list.
When the list is large, the modal uses a virtualised row view so the page stays responsive while still showing all matching staff entries.
Reference
- Access is checked before the list loads, including the current user's access-control permissions and the manager employee record.
- Location visibility is based on the manager's active location access and allocation.
- Pay cycle visibility follows the manager's pay cycle and payroll access rules for the selected employee profile.
- The list reflects active staff only and does not include inactive employees.
How do I set a manager so they can only view a certain locations or groups on the roster and timesheet?
Manager access is determined by which Location/s the manager is assigned to

Each Locations manager will only be able to action their Access Control level tasks for the location they are managing.
Managers with All Locations configured in the Access Control will automatically have manager access to all setup Locations in the system.
Rest Step Up is an advanced shift rule condition used to handle scenarios when employees do not get a sufficient rest period between shifts and requires an adjusted payment multiplier due to this.
The Rest Step Up must be configured with an upper and lower limit hour threshold.
For example if you set a minimum 4 hours and a maximum 10 hours, the Rest Step Up shift rule would apply if the employee to any situation where an employee's time between shift is greater then 4 hours but less then 10 hours.
The lower limit is to handle any legitimate split shifts that an employee may work.
Rest Step Up rules will override all other Shift Rules.
Below is a shift rule configured to pay 200% of the default rate classed as Overtime when an employees time between two shifts is greater then 4 hours but less then 10 hours.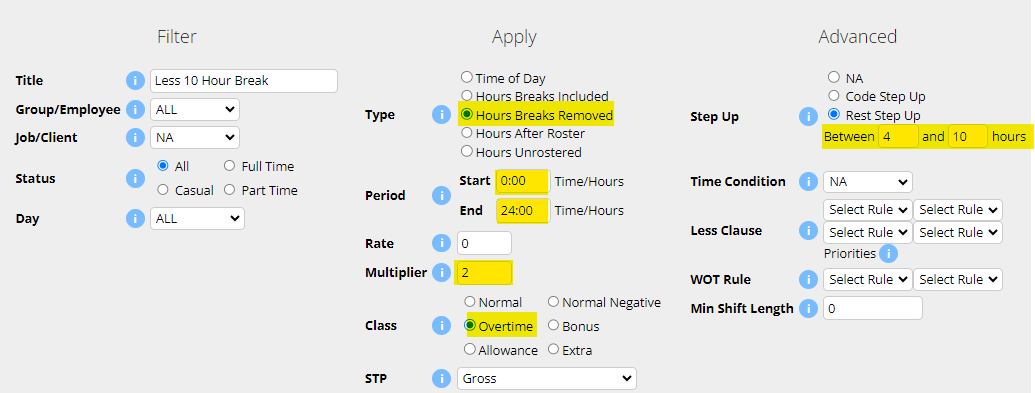
The Shadow Payrun feature is an advanced module available for employees set as Salary in Microkeeper. It allows you to compare a salaried employee's standard pay with that they would have earned if they were paid from Timesheet hours and any Payroll Rules applied. This is userful for organisations with annualised salary agreements who want to check for any large pay differences between contracted and worked hours.
When enabled, Shadow Payrun automatically calculates and displays a side-by-side breakdown on the payslip:
- One section shows what the employee would be paid if they were paid by timesheet hours (with all payroll rules applied)
- The default section will display the standard salary calculation.
This allows you to:
- Compare salary vs actual times worked
- Identify any significant discrepancies between contracted hours and actual hours.
- Report on these differences over time using the Shadow Comparison Report
How to Enable and Use Shadow Payrun
1. Activate Shadow Payrun Module
- Navigate to Menu > Settings > General > Global - Payroll Settings
- Under Shadow Payrun - select Shadow Payrun - Annualised Salary

2. Configure Employee Profile with Shadow Rate Rule
An Employee can now be configured with a Rate Rule that will be used to compare against their salary hourly rate.
- Navigate to Menu > Settings > Employees > edit the applicable Employee
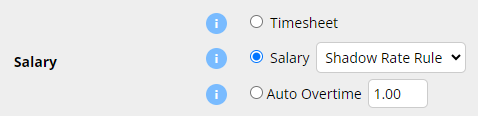
- On the Employee Profile, under Payment and Employment - Salary, select a Shadow Rate Rule. This sets the hourly rate for Shadow calculations
Viewing the Payslip
A configured Shadow Salary employees payrun will now display two separate sections:
- The greyed out section at the top calculates the Timesheet payrun with all Payroll rules applied.
- The white section underneath is the standard Salary payrun.
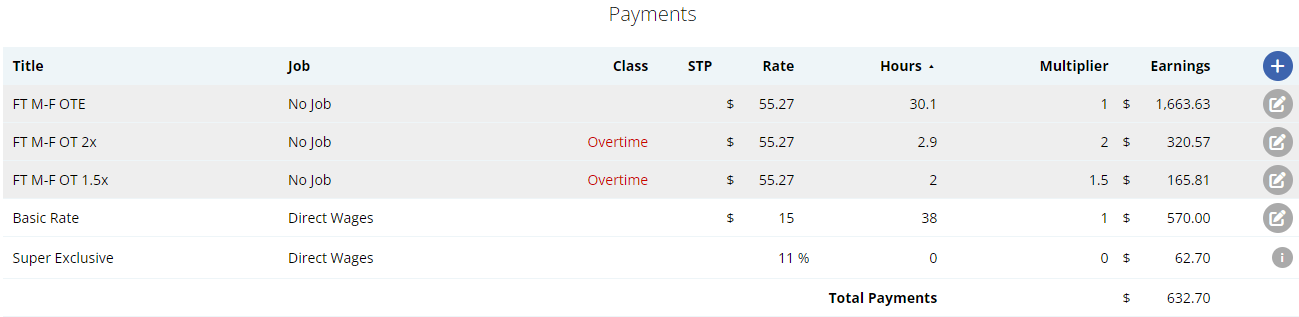
Reporting: Shadow Comparison Report
The Shadow Payrun is designed to be used with the Shadow Comparison report.
Navigate to Menu > Payroll > Reports > open the Shadow Comparison report.
This report will break down each employee by each payrun with a comparison between the Normal salary calculation and the Shadow Timesheet calculation.
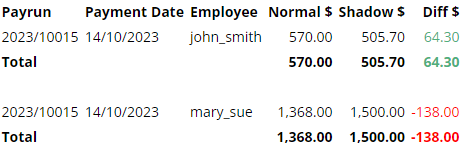
Yes, terminated staff will still be able to login to their Microkeeper account but under a limited access.
Their Employee Console will be restricted to their Personal Details and Payslips.
A once off commission or bonus payment can be added as a payment line to an employees payslip.
Click the + button to add a payslip item to any area of the payslip.
An Add Payment window will appear. Configure the payment accordingly.
Below is an example of a common payment item for a commission.
John Smith to be paid $5000 Commission
- Title: The Title that appears on the employee's payslip "Commission"
- Rate: The flat sum of the payment. "$5000"
- Hours: N/A
- Multiplier: 1
- Class: Bonus
- STP: Gross
- Tax Method: PAYG for the Standard Tax Table or Method A or Method B for further calculation options.
Payments can be bulk uploaded via CSV through the Bulk Action area of a Payrun.
- Click the "Bulk Actions" button on the top of the unlocked Payrun
- Select "Payment"
- Click the "Import Payments via CSV" button
- Review the uploaded items and double check the total payments
- Click "Add Payments" to confirm adding payment items to payslips.
Prepare your CSV file formatted with columns for:
- Employee Identifier. Accepted formats are:
- Username. (e.g., john_smith)
- Name. (e.g., John Smith or Smith John)
- EID. (e.g., 1234)
- EmployeeID. (e.g., abc123)
- Title: The Title that appears on the employee's payslip. (e.g., "Car Allowance")
- Job: The job allocation of the payslip item if needed.
- Rate: The rate to be paid. (e.g., 25)
- Hours: The number of hours to be paid. (e.g., 38)
- Multiplier: The multiplier of the rate to be paid. (e.g., 1)
- Classification: The classification of the payslip item. Refer to this table for more information.
- STP Category: The STP code of the payslip item. Refer to this table for more information.
Employee Identifier | Title | Job | Rate | Hours | Multiplier | Classification | STP Category |
|---|---|---|---|---|---|---|---|
| john_smith | OTE | 1234 | 25.00 | 8 | 1 | Normal | |
| EID123 | OT 1.5x | Job A | 30.00 | 6 | 1.5 | Overtime | Meals |
Payslips cannot be directly emailed. Instead payslips are viewed on the Employee Console through the Microkeeper website or Microkeeper mobile app.
Payslips can also be downloaded in PDF format to be forwarded. Click the Backup or Print button on the Payslip page to download the PDF format of the payslip.
No we do not recommend using an international mobile number for your profile registration. An Australia mobile number (+61) is required for many verification processes such as removing MFA authenticator access.
Yes, selecting an ESA is required in Microkeeper for a SMSF setup if you're processing superannuation contributions through a clearing house.
If you're exempt from Superstream (eg., only receiving contributions from related entities), you must still select an ESA during the setup but the selected ESA will not impact how you currently process direct contributions to your SMSF.
If any employee does not have the ability to select a particular leave type when applying for leave, confirm they are entitled to that leave type.
Navigate to the Menu > Settings > General > Employees > click Edit for the employee > within the Employee Profile, under Entitlement.
If there is no value set within the specific Entitled Leave, the employee will have this leave type disabled as a Leave Request option.
A notification email can be sent to staff who have not yet completed a skill.
Navigate to Menu > HR > Skill Review
On the filter bar, set the Status to "Skill Missing" and under Skills, select a the skill you wish to notify staff to complete

A list of all the employees who have yet to complete the selected skill will be displayed.
Click the "Send Email Notification" button to send an email to all the staff who have yet to submit the selected skill.
An email message like this will be sent to the employee:
Pending Skill to complete
Hi Aaron,
You have a pending Skill to complete:COVID-19 Self Check-up
Please login to Microkeeper to complete this Skill
Timesheet data can be uploaded via CSV through the "Import CSV" button on the Timesheets vs Roster page.
Prepare your CSV file formatted with columns in the exact order mentioned (for any optional fields, leave as blank):
- Employee (Required): This field can be populated using the employee's Username, Payroll ID, Employee ID, or Employee Name. Microkeeper will attempt to match the record using any of these identifiers
- Date (Required): The date for the timesheet entry
- Start Time (Required): The beginning time of the work period
- End Time (Required): The concluding time of the work period
- Location (Optional): The workplace location
- Role (Optional): The specific role of the employee for that timesheet entry
- Job (Optional): This can be identified by the JobID, Third Party ID, or Job Title. Microkeeper will attempt to match the record using any of these identifiers
- Break (Optional): This field requires the break duration in minutes. Microkeeper will search for a selectable break rule with the same duration and apply it
- Note (Optional): Any additional information or context you want to provide for that particular timesheet entry
| Employee Identifier | Date | Clock On (24 hour) | Clock Off (24 Hour) | Location ID | Role ID | Job | Break (Minutes) | Note |
| john_smith | 01/01/2024 | 09:00 | 17:00 | 2233 | 5566 | Melbourne Restaurant | 30 | Started Late |
| jane_doe | 06/01/2024 | 11:00 | 19:00 | 4565 | 0 |
Uploading the Timesheet Data File
Navigate to Menu > Rosters > Timesheets > click Import CSV and select your csv file.
You are looking for a confirmation message towards the bottom of the page that should say there was a number of CSV Imported like below:
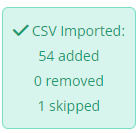
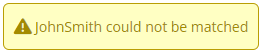
If you get an error message in the yellow box that states a name cannot be matched, it means that the name inside the CSV file did not match the names in Microkeeper. The CSV file should be updated to match the name in Microkeeper.
Submit STP on behalf as a Registered Tax or BAS agent
Registered Tax agents can submit STP on behalf of their clients through Microkeeper. The Client's Microkeeper account must be configured with their Agent's ABN and Registered agent number (RAN) or Tax agent number (TAN)
As the Tax/BAS Agent, you will need to:
1. Provide your client with your practicing ABN and TAN or RAN number
2. Notify the ATO of your hosted software service
Option 1 - Notify via Access Manager
- Log in to Access Manager
- Select My hosted SBR software services.
- Select Notify the ATO of your hosted service.
- Search for ABN: 75909758040
- Select the ABN link of "THE TRUSTEE FOR MICROKEEPER UNIT TRUST"
- Enter the client's Software ID and select Next.
- Read the Notification statement then select Save.
Option 2 - Notify via calling the ATO
- Call 1300 85 22 32
- Follow the prompts and provide Microkeeper ABN (75909758040) and your clients Software ID when requested.
As the Client you will:
1. Link your Tax Agent details to your Microkeeper system.
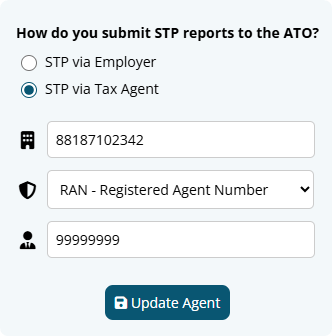
- Navigate to Menu > Settings > General > Global - ABN and Pay Cycles
- Under your applicable ABN, click the edit button next to "STP via Employer" to open the window.
- Select STP via Tax Agent
- Enter your Agent's ABN
- Select either Registered Agent Number or Tax Agent Number
- Enter the Agent Number provided by your Tax/BAS Agent.
2. Provide your Tax Agent your SBR Software ID.
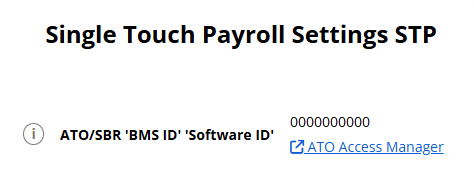
- Navigate to Menu Settings > General > Global - STP Settings
- Provide the number under "ATO/SBR 'BMS ID' 'Software ID'
Leave and Public holidays are calculated and paid by using the employees Roster, deducting any Timesheet hours and then applying the remaining hours as Public Holiday or Leave Request hours.
Firstly, make sure that the Roster, Timesheet and Leave Requests configurations applicable to the Payslip are correct.
- Click the Simulate Button on the Payslip.
This will cause the simulate area, which displays the Roster, Timesheet and Leave Requests
applicable for this payslip, to appear. - Check Roster
Check that all the days and hours in the Roster column are the days the Employee was supposed to have a:
a) Worked shift or
b) Paid Leave or
c) Unworked Public Holiday payment.
If this is not correct the Applicable Roster will need to be updated.
This will either be the Calendar or Static Roster.
The Roster type being used will be listed at the top of the Roster Column in the Simulate area. - Check Timesheet
Check the Timesheet column and make sure that there is not a Clocked Shift listed for the day the Employee is on Leave. If there is, you will need to go to the Timesheet page and delete it. - Check Leave Requests
Make sure that the Leave Request is listed, if not you will need to go and approve it in the Leave Review page.
Next make sure that the date and time of the leave request is correct.
To check the times of the leave request move the mouse over the grey i, and it will show the times
of the request.
If either of these is incorrect it can be updated by clicking View, and then updating on the Leave Review page.
Once the incorrect configuration has been identified and resolved, the Pay Run button on the Employee Payslip can be clicked and it will update the Payslip accordingly.
A payslip can be removed/deleted by hovering over the payslip item and clicking the Rubbish button

Troubleshooting the Microkeeper App for Android and Apple
Location Information is unavailable
Accurate Location cannot be determined
User denied the request for Geolocation
Login details failed. Please try again. You will likely need to login again
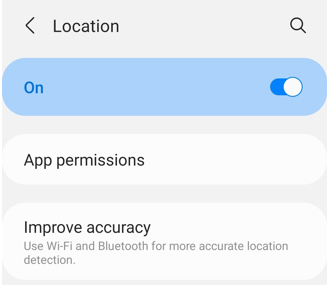
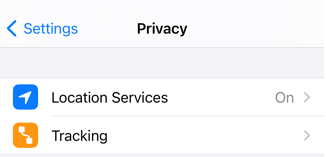
Location Information is unavailable - Check your GPS settings are active on your device.
| Android |
|---|
 For more information refer to the guide here |
| Apple IOS |
|---|
|
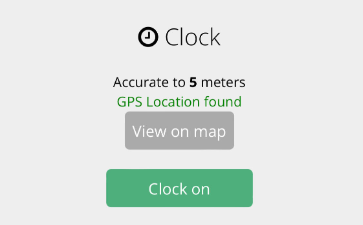
Accurate Location cannot be determined - Check your internet and location settings on your device.
- Microkeeper uses Google Location services to detect your location.
- Your device must be Accurate to under 500 meters and the device must confirm "GPS Location Found"
Find and improve your location's accuracy
| Android |
|---|
How Google Services finds your current locationGoogle Services estimates where you are from sources like:
Turn on high accuracy modeTo help Google Services find your location with the most accurate blue dot, use high accuracy mode.
More ways to improve location accuracyIf your location is still wrong, here are some things you can try.
|
| Apple IOS |
|---|
How Google Services finds your current locationGoogle Services estimates where you are from sources like:
Turn on location servicesTo help Google Services find your location with the most accurate blue dot, turn on location services.
|
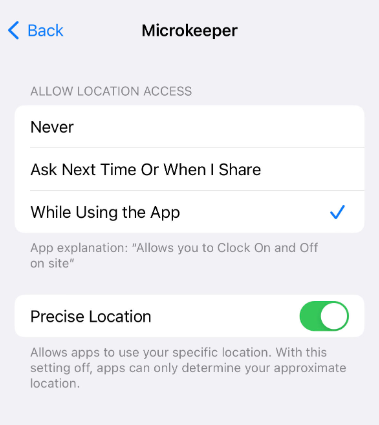
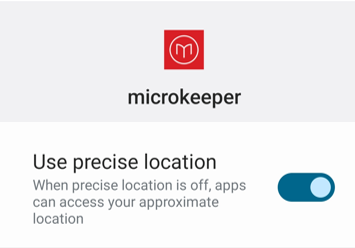
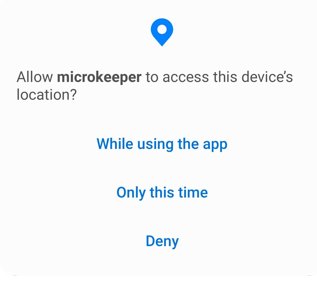
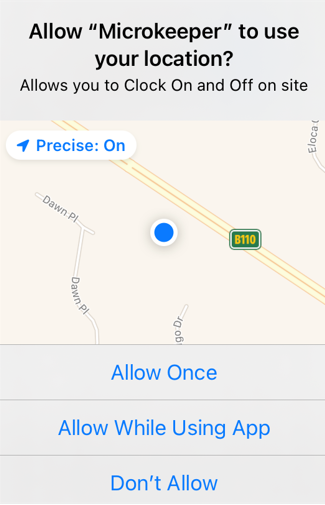
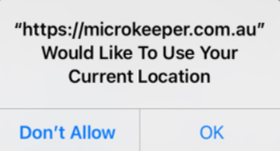
User denied the request for Geolocation - Close and re-open the App, Allow Microkeeper to use your Location.
| Android |
|---|
|
| Apple IOS |
|---|
|
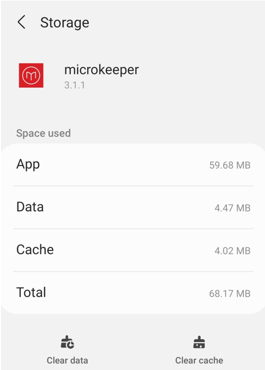
Login details failed. Please try again. You will likely need to login again - Clear the Data & Cache of the app and reinstall.
| Android |
|---|
|
| Apple IOS |
|---|
|
Employee's addresses can be shown on their payslips when activated in the Global Settings.
Navigate to Menu > Settings > General > Global > under Payroll Settings, select Address on payslip for snail mail - Address in window

The employees address will be displayed on the top of their payslip. This setting applies to all employees.
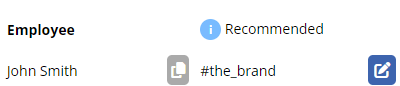
The Brand
The Brand (your company eg. Bob's Plumbing) can be selected for users that do not have a Primary Manager.
For example Owners, Directors, CEO etc.
Microkeeper would recommend selecting a Direct Manager if required.
Example, if the CEO requests Annual leave, a Message to Payroll manager might be required.
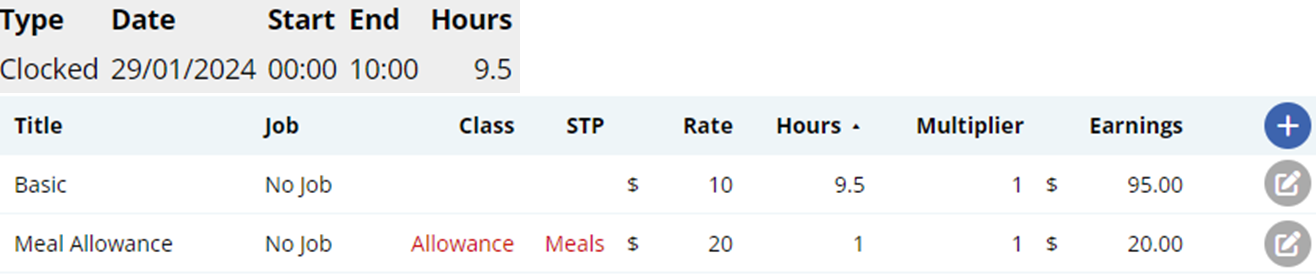
An Automated Meal allowance can be created with an "Extra Rule".
In this example an employee will receive a $20 meal allowance after 9.5 hours.
Navigate to Menu > Settings > Payroll Rules > Extra Rules, click the Create New Rule button to configure the allowance.
Key values to configure:
- Title: This will be the the Payslip Title that appears on the employees payslip. For example "Meal Allowance".
- Group/Employee: Select the Employee affected.
- Type: Select "Fixed".
- Value: Enter the weekly amount to be paid. For example "20"
- Apply after: Enter the total hours worked including breaks . For example "9.5"
- Multiplier/Shift count: Leave as "1"
- Classification: Select "Allowance"
- STP Category: Select "Overtime Meals"
- Timesheet Lookup: Select "Shifts (=)"
The Extra Earnings Rule setup above will automatically apply a $20 payment for every shift 9.5 hours (including breaks) or longer.
How to import Jobs via CSV
Jobs can be imported via CSV on the Jobs page.
Navigate to Menu > Manage > Jobs > click CSV Import
Prepare the CSV file formatted with columns in the exact order mentioned (for any optional fields, leave as blank):
- JID (Optional): The unique Job ID number associated with the Job. The system will automatically generate this
- 3rd Party ID/JobID (Optional): If you use a third party system for tracking things like invoices, cost centers, job orders, etc this can be entered into this field.
- Job Title (Required): The title of the Job
- Start Date (Optional): Start date of the Job, used to activate access to the Job. Format YYY-MM-DD. 0000-00-00 if not set.
- Client ID/CID (Optional): Unique Client ID in Microkeeper. Set to 0 for no client, known as an In-house job in Microkeeper.
- Status (Required):The status of the Job.
- Quoted: The Job is quoted but not yet won. Cannot yet be accessed by employees.
- Pending: The Job is won, but not yet ready to be clocked yet. Cannot yet be accessed by employees.
- Active: The Job is active and can be clocked by employees.
- Finished: The Job is archived and can no longer be clocked onto.
- Job Access (Optional):Control the access options of the Job.
- 1 = All employees. All employees can clock onto this job. When adding a new employee they will automatically have access to the job.
- 2 = Location. The employee can only clock jobs that are near their location. Requires a GPS device and locations to be set up correctly, usually recommended option.
- 0 = Individual. Individual employees can be selected, allowing access to just those employees, can be time-consuming for admin and usually overly restrictive.
| JID | JobID | title | startdate | CID | status | job_access |
|---|---|---|---|---|---|---|
| ABC123 | Job A | 2018-10-2 | 4321 | Pending | 1 | |
| Job B | Active |
Adding a payslip item to a payslip
A payslip item can be added to any payslip by clicking the Plus button in the Payments area of the payslip.
Click the Plus button located on the right side of the Payments area. An "Add Payment" window will appear.
Fill in the values as needed.
- Title: This will be the Title that appears on the employee's payslip.
- Rate: The rate to be paid.
- Hours: The number of hours to be paid.
- Multiplier: The multiplier of the rate to be paid
- Class: The Microkeeper classification of the payslip item. Refer to this table for more information.
- STP: The STP code of the payslip item. Refer to this table for more information.
- Tax Method: Select PAYG for standard payments.
- Job: The job allocation of the payslip item.
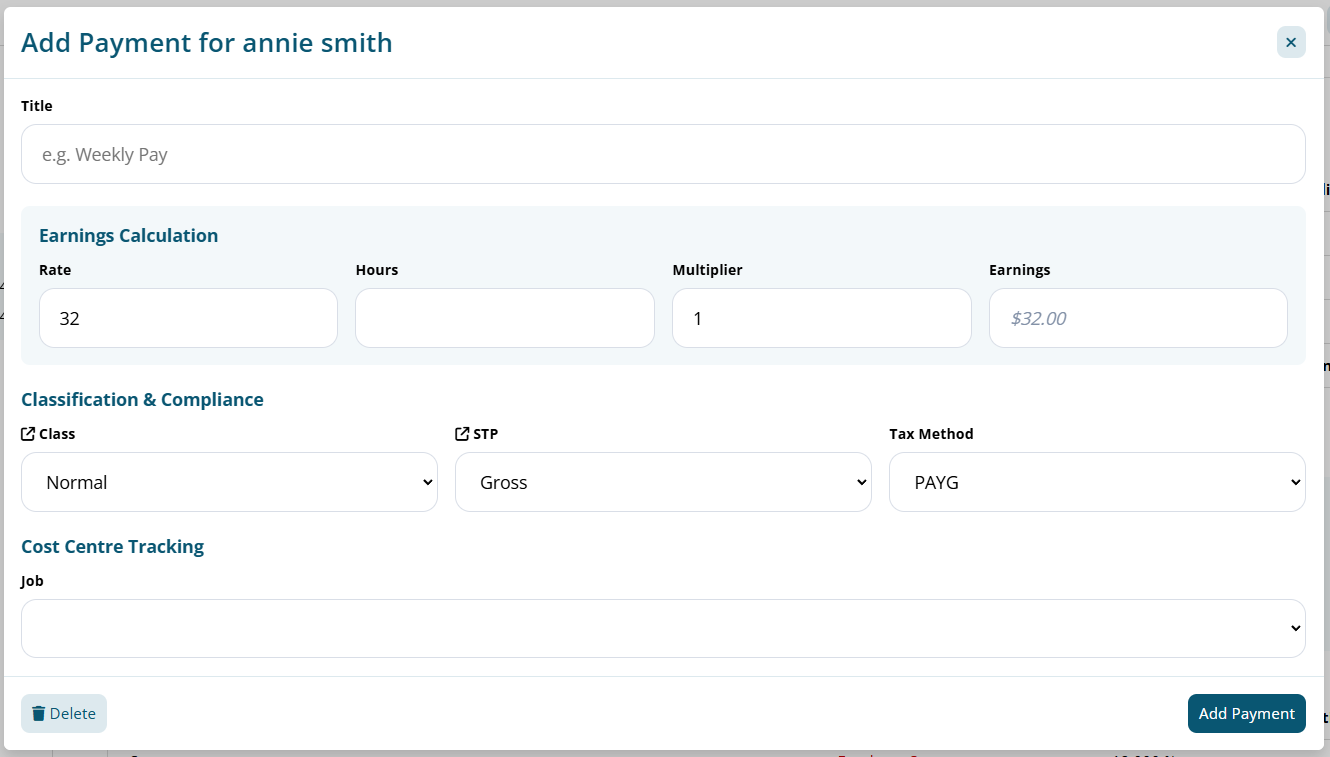
Configuring your business bank account is a critical step for generating ABA payroll files and facilitating superannuation payments through the Beam Super Clearing House.
Navigate to Menu > Settings > General > Bank Details.
Steps to configure your account:
- Navigate to Menu > Settings > General > Bank Details.
- Click the Add Bank Account button.
- Enter the required details:
- Nickname: The name of your financial institution.
- Group: Choose the category where this bank account will be used (Wages, Super, Deductions/Expenses, or All).
- Account Name: Enter the name of the account as it appears on your bank documents.
- BSB: Input the Bank-State-Branch number, a unique code for your bank's branch.
- Account Number: Enter the account number.
- Bank Code: Choose your bank from the dropdown list provided.
- APCA Code: If required, enter the APCA code provided by your bank. ( Also known as the Direct Entry Number)
- Reference: Set a reference that will appear on statements for easy identification.
- Once all required fields have been completed an "Add Bank Account" button will appear. Clicking this confirm and add your configured bank account to the system.
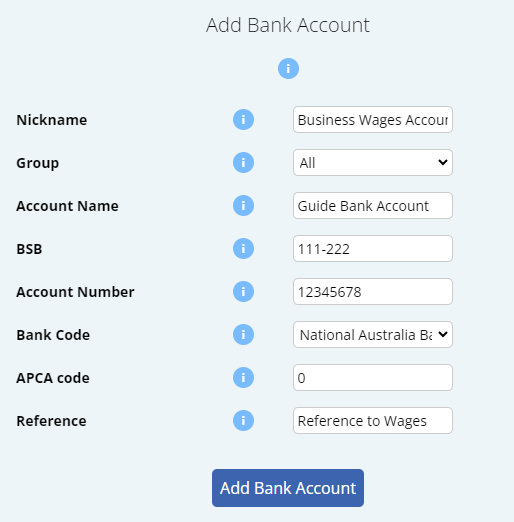
You can see a list of all configured Business Bank Accounts on the same Bank Details page.
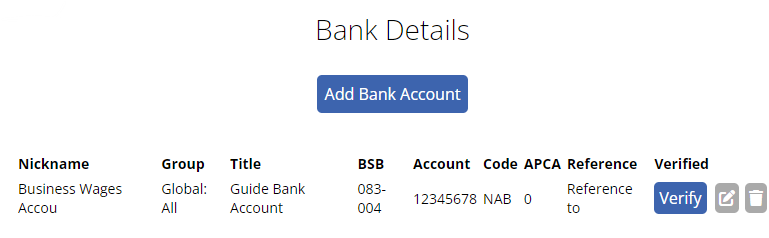
To resolve the error message "Super Frequency is missing Global Settings"

Navigate to Menu > Settings > General > Global, under Super Settings - Super Frequency
Configure the Super Frequency setting to the appropriate selection. The selection should be the standard frequency the business processes superannuation payments.
- Payrun: Superannuation is processed after every Payrun.
- Monthly: Superannuation is processed on a monthly basis
- Quarterly (Most Common): Superannuation is processed on a quarterly basis.
On Access Manager for business software users:
- Select My hosted SBR software services.
- Select Notify the ATO of your hosted service.
- Search for ABN: 75909758040
- Select the ABN link of "THE TRUSTEE FOR MICROKEEPER UNIT TRUST"
- Enter the Software ID and select Next.
- To find your Software ID, On Microkeeper, navigate to Menu > Settings > General > Global > STP Settings - ATO/SBR 'BMS ID' 'Software ID'
- Read the Notification statement then select Save.
The result should look like this:
To test if notifications are being received by the employee, use the Push button located on the Employees page.
Navigate to Menu > Settings > Employees.
Locate the employee to test and click the Apple or Android logo under Push

How to apply an Extra Earnings Rule using a Timesheet Code
An Extra Earnings Rule can be triggered with a Timesheet code. This feature is useful when an allowance is applied on an adhoc basis
In this example we are setting up a Living Away from Home allowance of $98 that must be paid when an employee is required to spend a night away from their usual place of residence. A Timesheet Code is used to alert the system that they are eligible for this allowance.
Navigate to Menu > Settings > Payroll Rules > Extra Rules, click the Create New Rule button to configure the allowance.
Key values to configure:
- Title: The first word of the title will be recorded as the code the system detects to apply the allowance. For example "LAFHA allowance".
- Type: Select "Fixed".
- Value: Enter the amount to be paid. For example "98"
- Multiplier/Shift count: Set as "0".
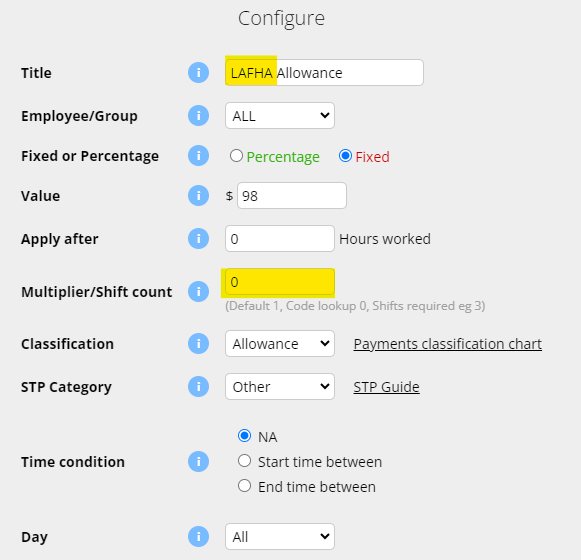
The above configuration will apply $98 on the employees payslip for each timesheet that has the code "LAFHA" on the timesheet note.


Leave Entitlements accrual values can be adjusted in the Entitlements section of an Employees Profile.
Navigate to Menu > Settings > Employees, click Edit for the employee > Employee Profile, under Entitlements.
Leave is generated on a pro rate basis and is calculated based on a financial year.
- Entitled Annual Leave: How many weeks of annual leave the employee is entitled to.
- Entitled Personal Leave: How many weeks of personal leave the employee is entitled to.
- Entitled Long Service Leave: How many weeks of employment for every 1 week of LSL accrual.

An employee can be configured to be paid either as Salary or Timesheet under the Payment and Employment - Salary area of their Employee Profile.
Navigate to Menu > Settings > Employees > click Edit for the employee> in the Employee Profile, under Payment and Employment - Salary:
- Salary: For employees on a fixed salary. Payslips are calculated from the Basic Hours x Default Rate.
- Timesheets: Payslips are generated from hours recorded in the timesheets. All Payroll Rules are applied.
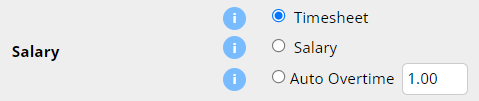
You can withhold extra PAYG for an employee for their HELP-HECS in the Employee Tax section of the Employee Profile.
Navigate to Menu > Settings > Employees > click Edit for the employee> in the Employee Profile, under Employee Tax -
Select the HELP check box under the HELP-HECS Loan option.

Once enabled the HELP-HECS amount will be withheld on the employees payslip.
The Tax area of the payslip will be updated with Tax - with HELP-HECS.

The Pro-Rata/Fixed Entitlements area in an Employee Profile - Entitlements will determined how the leave will be generated.
- Pro-Rata Leave Accrual: The employee will generate entitled leave based on the amount of Ordinary hours they have worked in the pay period/payslip.
- Accrual Fixed to Weekly Ordinary Hours: The employee will generate entitled leave based on the Ordinary hours set in their Employee Profile.
A reminder that only payslip items that have been classed as Normal will generate entitlements on the hours for Pro-Rata
To change this setting navigate to Menu > Settings > Employees > click edit for the applicable employee > Employee Profile, under Entitlements - Pro-Rate/Fixed Entitlements.
To add a Job to a shift in the timesheet, modify the shift by clicking on the Date, or Time of the shift.
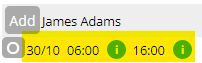
Then add a job in the Update Shift form.
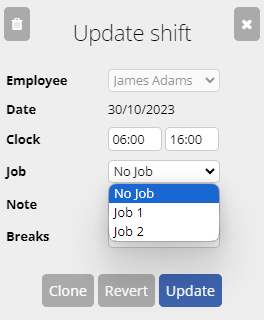
Clicking update will complete assigning the Job to the shift
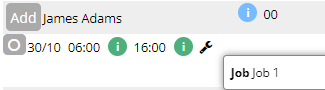
How to sign up to Beam Super
Signing up to Beam can be done through Microkeeper.
Before processing super, you must first sign up to Beam Super through Microkeeper.
Navigate to Menu > Payroll > Super
Click the Setup Beam button to begin the sign up process.
You will be navigated to the Beam sign up page.
Click the Start button to continue.
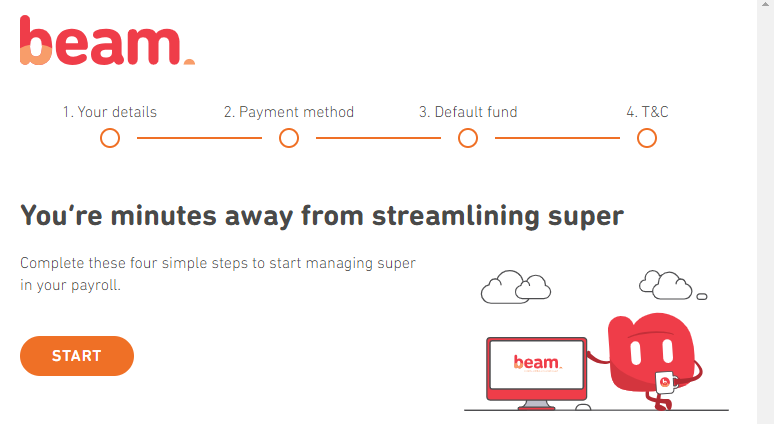
Completing the "Your details" section
The Your details section contains the Business information and key contact details.
These settings will already be prefilled with the Business Contact Information from your Microkeeper Global Settings.
Click the Next button on the bottom of the page to move on
Completing the "Payment method" section
The Payment method section is where to setup the method of payment for the superannuation clearing.
The verified bank account from Microkeeper will already be configured.
Click the Next button on the bottom of the page to move on.
Completing the "Default fund" section
The Default fund section will allow you to select the nominated default super fund for employees who don't have a chosen or stapled super fund.
If you would like to make Australian Retirement Trust your default fund, click the Select Australian Retirement Trust.
If you would like to select your own default fund you can using the search tool. Search by either USI or ABN.
Click the Next button on the bottom of the page to move on.
Completing the "Terms and conditions" section
The Terms and conditions section details all the required Terms and conditions of the Beam Super service.
You must read and accept to:
- Beam Product Disclosure Statement and Precision's Privacy Policy
- Direct Debit Request Service Agreement
- Participating employer of Australian Retirement Trust
Click the Next button on the bottom of the page to move on.
A Super Contribution can be made on the Super page.
Navigate to Menu > Payroll > Super, click the "New Super Submission" button to start a new Super Payment.

Super contributions that have been refunded can be reprocessed on the Super-Refunds page.
Navigate to Menu > Payroll > Super > Refunds
The Refunds page will list any contributions that have been refunded during the contribution process. This list can be filtered by financial year.
To reprocess the contribution click the "Redo" button.
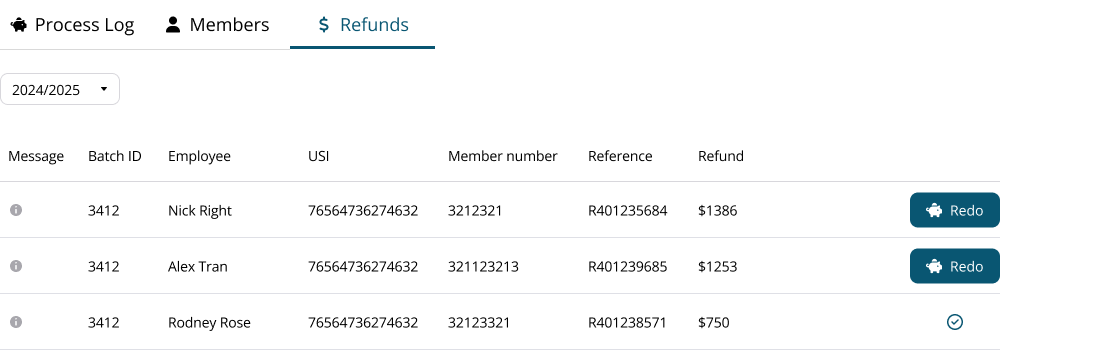
A preconfigured Super Contribution report will be generated for the refunded amount and employee.
Action any errors and click the Submit Super button to process the refund.
Other valid options for the Tax File Number field in the employee profile are:
- 000000000: The employee chooses not to quote a TFN or fails to provide one within 28 days
- 111111111: Employee has applyed for a TFN but has not yet received it
- 333333333: Where the employee is under the age of 18 and:
- earns $350 or less weekly,
- or earns $700 or less fortnightly,
- or earns $1517 or less monthly:
- 444444444: Employee is a pensioner - where the employee is a recipient of a social security or service pension or benefit an exemption from quoting a TFN may be claimed
- 987654321: Where an employee has quoted a TFN with alpha characters - This code must also be used where the TFN quoted cannot be contained in the TFN field
To Pay out an Employee's Notice Period you will need to add a manual payment to their Final Payslip.
Once you've created the Payrun, navigate to the Employee's Payslip.
- Click the Plus button on the right hand side
- In the Title Field, enter "Notice Period" or another relevant payment name.
- Select the appropriate Payment Class (most frequently this is "Normal" or Ordinary Time Earnings)
- Select the appropriate Single Touch Payroll Classification
- Enter then Number of hours to be paid
- Click "Add Payment"
Beam Super will be available starting from March 2024.
To sign up, navigate to Menu > Payroll > Super
Please Note: SuperChoice will be discontinued by June 30, 2024. You can still make the previous year's super payment in SuperChoice.
Beam Super clearing house is included in your Microkeeper subscription at no additional cost if you are processing super contributions either monthly or quarterly.
Yes you can check and export the STP data that is being sent to the ATO through the STP ATO Lodgment page on the latest Payrun.
Navigate to Menu > Payroll > click Payslip for the latest Normal Payrun of the financial year > Complete Payrun > click Submit to ATO section
On the Single Touch Payroll ATO Lodgement page, you can view the STP data or export the STP data
Configure the Prepare to Lodge as standard and either click Review Data to view the STP data on screen or click CSV Export to review the data through a CSV file.
Why am I receiving a pending leave request warning when the leave request is outside of the pay period?
A leave request that is outside of a Payrun's period may trigger the "These Pending Leave Request fall within this Pay Period:" error during the creation of a Payrun.
This is because a timesheet's shift end time may have possibly entered into the next date.
If the last day of the period did not enter the next day through an overnight shift then the error can either be ignored until next week, or the leave request can be reviewed now.
An employees payslip can be recalculated using the Reprocess button located on the toolbar on the top of a payslip.

Any changes to the following settings will be reflected on the employees payslip:
- Timesheet
- Employee Profile
- Global Settings
- Payroll Rules
- Groups
Any lines on the Payslip that have been modified will be re-calculated.
Any lines manually added to the Payslip will remain.
A skill can be submitted on behalf of an employee through the Skills Review page.
Navigate to Menu > HR > Skills Review
On the Skills Review page, first select the skill you wish to submit on behalf of the employee using the filter - Skills.

You will also need to select the Employee to submit the skill on behalf of by using the filter - Employee

Once you have selected both the Skill and Employee you are submitted on behalf of, click the On Behalf button to begin the skill submission.
When an employee receives a payment every Payrun for the same number of hours, no matter how many hours are worked you want to put them on Salary in Microkeeper.
To set an Employee as Salaried, you will need to firstly navigate to Settings > Employees - EDIT.
Then enter their Hourly Rate, the Ordinary hours, and select Salary.
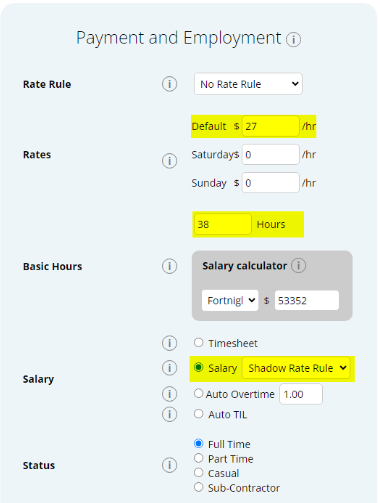
The Add Super button can be used to manually add a one-off superannuation amount of a payslip as either Super Guarantee Contributions (SG) or Reportable Employer Super Contributions (RESC) amounts onto a payslip.
Note: If you are looking to add Concessional/Before Tax or Non-Concessional/After Tax super, please look at the Expenses and Deduction guide.
Click the Add Super button located on the toolbar of the desired employee.
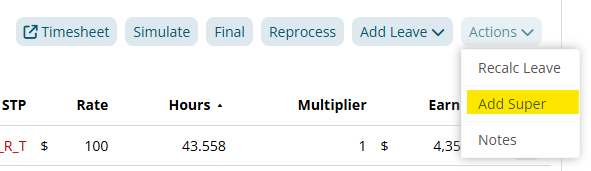
On the Add Super window, configure:
- Type:
- SG = Super Guarantee Contributions
- RESC = Reportable Employer Super Contributions
- Amount: The amount of super to add or deduct from the payslip.
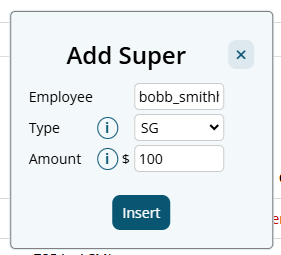
There will be 2 "Fix Super" items added to the payslip to calculate the super added. These payslip items will cancel each other out so they can be safely ignored.

Each employee can clock on/off with a different method of your choice.
These options can be configured in the Employee Clocking settings in the Employee Profile.
Navigate to Menu > Settings > Employee > click the Edit button for the employee you want to configure > Employee Profile - Employee Clocking.
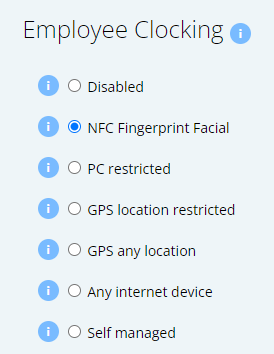
The Primary Manager can be changed on the Notification Config page.
Navigate to Menu > Manage > Notification Config
A novated lease is a three-way agreement between an employer, employee and a novated lease provider where the employer takes on the obligation for repayments under the lease and a corresponding deduction is made from the employee salary
To setup a Novated Lease go to Settings > Payroll Rules > Deduction Rules.
Then Select "Create New Rule".
Pre Tax Setup
- Select "Expense".
- In the Title, title the rule "Pre-Tax Novated Lease".
- Select the Employee this applies to.
- Select Fixed
- Enter the weekly amount to be deducted under "Value"
- Select the Correct FBT Classification.
- Click Add New Rule.
Post Tax Setup:
- Select "Deduction".
- In the Title, title the rule "Post-Tax Novated Lease".
- Select the Employee this applies to.
- Select Fixed.
- Enter the weekly amount to be deducted under "Value"
- Select "NA" as the Classification.
- Click Add New Rule.
This will now deduct this amount automatically in the Payrun.
What should I do if I receive an error message stating that the ABN provided is not known to the message receiver and it mentions an incorrect ESA for an SMSF?
When processing superannuation contributions for a Self Managed Super Fund (SMSF), you may encounter an error message similar to this:
"The ABN provided is not known to the message receiver. If the superannuation fund is a self-managed super fund (SMSF), please confirm with the employee that the ESA provided is correct; or please contact the fund for more information. ABN [ABN Number] not known to the Message Receiver. Please check to ensure that the message has been sent to the correct location."
To resolve this issue:
- Confirm ESA Details: Contact the employee to confirm that the Electronic Service Address (ESA) provided for their SMSF is correct.
- Update SMSF Settings: Once you have the correct ESA details, update the SMSF settings in your system.
- Navigate to Menu > Settings > General > Super Settings.
- Ensure that the ESA is correctly entered for the SMSF.
- Verify with the Fund: If the issue persists, contact the SMSF directly to verify that all details, including the ABN and ESA, are accurate and up-to-date.
- No Refund Associated: Note that this error message does not indicate any financial transaction issues or refunds. It is purely an informational message to correct the details provided.
A First Aid Allowance can be setup to be paid automatically to an employee every payrun using an Extra Earnings Rule.
In this example, we are setting up a First Aid Allowance that is paid to an employee who is part of the First Aid Allow group. When the employee is assigned to the group, their payslip will automatically have $12.94 added.
Navigate to Menu > Settings > Payroll rules > Extra Rules, click the Create New Rule button to configure the allowance.
Key values to configure:
- Title: This will be the Payslip title of the allowance. For example "First Aid Allowance".
- Type: Select "Fixed".
- Employee/Group: Select who is eligible for this allowance. For example, the group "First Aid Allow".
- Value: Enter the amount to be paid. For example "12.94".
- Classification: Select "Allowance".
- STP Category: Select "Certs".
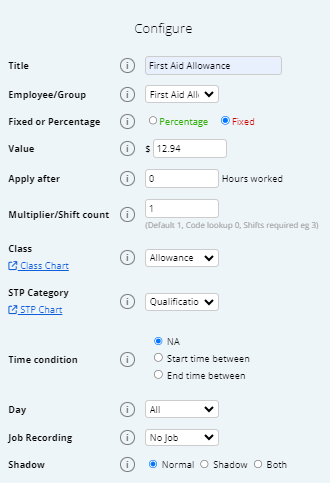
From 1 July 2024, the proposed tax cuts will be automatically applied in Microkeeper:
reduce the 19 per cent tax rate to 16 per cent
reduce the 32.5 per cent tax rate to 30 per cent
increase the threshold above which the 37 per cent tax rate applies from $120,000 to $135,000
increase the threshold above which the 45 per cent tax rate applies from $180,000 to $190,000.
Subcontractors can be entitled to super in Microkeeper.
Navigate to Menu > Settings > Employees > click Edit for the employee> in the Employee Profile, under Payment and Employment - Status
Select the Sub-Contractor with Super option.
Timesheets can be filtered by Group if you have the Access Control setting - All Locations.
The Default Fund can be reconfigured in the Beam config.
Navigate to Menu > Payroll > Super > Beam Settings
Follow the prompts to reconfigure the Default fund.
Employees have the option to attach a Doctor Certificate file when submitting their Personal Leave applications.
If they select they are providing a Dr Certificate, after submitting the initial form they will be prompted to upload a file.
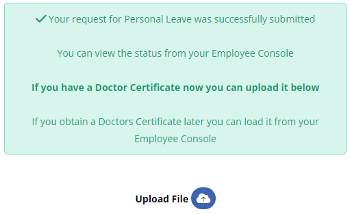
If they do not have the file yet, they can upload the file from their Employee Console at a later date.
The Employee Console will prompt them with a reminder until the doctor certificate is uploaded.
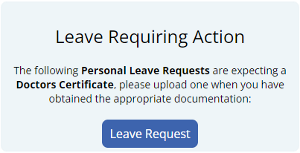
A Salary is a fixed amount payment regularly made by an Employer to an Employee.
In Microkeeper this is most commonly represented by a fixed hourly rate multiplied by a fixed number of hours per Pay Period.
To setup an Employee on a Salary, go to Settings > Employees > EDIT > Payment and Employment.
First Select "Salary" as the option, then set the rates and hours to be work.
To do this enter the Staff's hourly rate, into the Default area, and the number of hours worked per pay period into the hours.
The Salary Calculator should then reflect the Yearly Salary Amount.
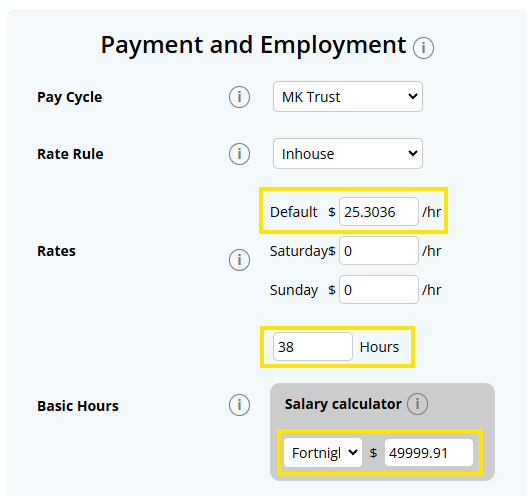
A Timesheet is the record of an Employee's worked hours during a pay period.
In Microkeeper this is represented by a record of an Employee's start and finish time. Microkeeper then automatically calculates the total length of the shift as well.
Employees then can have their earnings calculated off of their Timesheets for a Pay Period allowing for Overtime, Penalty Rates and more.
A Roster is a Timetable showing what dates and times Employees are required to work, provided to Employee's in advance.
In Microkeeper, this is represented by a Start and End time, and also can include what Cost-Centre, Location or Role they are expected to work within in the business.
A Payslip is a document with details of an Employee's pay for each pay period.
Common Items on a Payslip are:
- Hourly Rates
- Hours Worked at each Rate
- Superannuation Calculations
- Gross Payments
- Tax Deducted
- Net Pay
A Payrun is the process of remunerating your Employees for work performed during a pay period.
In Microkeeper this involves the process of Calculating the Payroll from the Payment and Employment Settings configured for your Employees.
If an employee's clock-in time is different from their local time, it is likely that the Timezone setting in their Employee Profile is incorrect. Please verify and update the time zone in their profile to match their current location.
Navigate to Menu > Settings > Employees > click Edit for the employee> Employee Profile > Address-Timezone
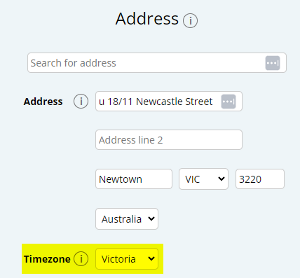
The time zone for an employee in Microkeeper is determined by the Timezone setting in their Employee Profile, not by their home address.
Navigate to Menu > Settings > Employees > click Edit for the employee> Employee Profile > Address - Timezone
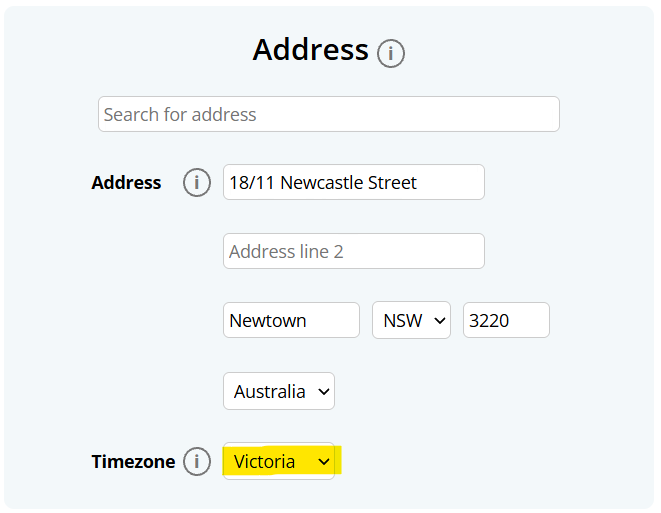
Changing your ABN in Microkeeper is potentially a time consuming and difficult process.
You have to find a way to make a cut between one ABN's STP Reporting and the new ABN's.
There are a few options on how to execute this change, we've listed them in recommended order below.
Change ABN's at EOFY.
This is the Fastest, Cleanest, and Easiest option. When you change at EOFY all the Payroll Data from the historical year is contained to an old ABN, and then the new Financial Year in the New ABN. The change is simple and clean.
However this isn't always possible, if not, there are three other options:
Changing Payment Dates for Year To Date Data.
This keeps wage costs in each separate year, allowing the split between each ABN mid-year.
However, you will have to adapt to having the Costs of the Year before the change in a historical year, to enable this split.
New ABN claims cost for the Year To Date.
This effectively cuts off the Wage Cost to the current ABN back at the start of the Current Fiscal Year. That wage cost is then attributable to the new ABN instead.
Create a new Microkeeper Account
This is an entire new account to make the cut between the old and new ABN.
This is our least recommend option, as your have to register a new account, and then enter in all Employee Details, Locations, Jobs etc,This is a large project,with a large amount of Manual Data Entry and can result in Human Error.
For Assistance with changing your ABN, you can always contact our Support Team, on 1800 940 838
To resolve Validation Error from Beam - Error - ERR051 - The SMSF is not an active fund at this time. Please confirm with the employee that the provided ABN is correct. - USI (fund_name)
Check with the Employee to confirm that the provided ABN is correct.
You can also use the ATO's Super Fund Lookup tool to double check if the fund exists.
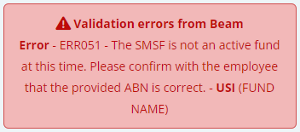
To resolve Warning - WRN098 - The ESA service provider has advised that the ABN for this self managed super fund is unknown to them. Please obtain the correct ESA from the employee. - USI (FUND NAME)
To resolve this issue:
- Confirm ESA Details: Contact the employee to confirm that the Electronic Service Address (ESA) provided for their SMSF is correct.
- Update SMSF Settings: Once you have the correct ESA details, update the SMSF settings in your system.
- Navigate to Menu > Settings > General > Super Settings.
- Ensure that the ESA is correctly entered for the SMSF.
- Verify with the Fund: If the issue persists, contact the SMSF directly to verify that all details, including the ABN and ESA, are accurate and up-to-date.
Note: This Warning message will not inhibit you from processing your Super payment.
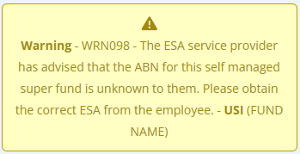
The Starting Day of Work can be changed in the Global Settings - System Settings.
Navigate to Menu > Settings > General > Global > System Settings - Starting Day of Work.
Warning: Changing this after you have already started to use the system will:
- Timesheet: When an employee clocks on, their timesheet is assigned to a week. By changing this setting, the week the shift is assigned to will change.
- Solution: Click Edit and then Update on every shift in the timesheet. This will reassign the shift to the correct week.
- Solution: Click Edit and then Update on every shift in the timesheet. This will reassign the shift to the correct week.
- Period will change: All the payment periods for all payslips, past and future, will change.
- See this FAQ on changing "Transitioning to a New Pay Cycle".
Your configured Default Super fund can be found in the Global Settings.
Navigate to Menu > Settings > General > Global > Super Settings - Default Super Fund.

This can be changed by navigating to the Beam Configuration.
The Static Roster is an area of the System that allows you to setup an Employees permanent Contracted Hours.
This is used in Microkeeper as one of the options that can be used to Calculate Leave and Public Holiday Hours to be paid out. This documents the expected working times and days for the Employee.
The Static Roster is configured in the Roster Templates area, by selecting the Static Roster for editing when Managing Templates.
Individual Static Roster
The individual Static Roster is an option to calculate how Leave Requests and Public Holidays are to be paid out to employees.
The Individual Static Roster is set within the Roster Template designated as Static.This allows you to set a Contract for an Employee if the Roster Calendar isn't an accurate reflection of their Contracted Hours.
To see the Current applicable Individual Static Roster for an employee:
- Go to the Employee Profile
- Scroll down to Contracted Roster
- Update the Employee to have Individual Static Roster Selected
Check the Employees rate in their Employee Profile.
Navigate to Menu > Settings > Employees > click Edit for the employee> in the Employee Profile, under Payment and Employment.
Verify the Default Rate or any applicable Rate Rules. If incorrect update the rate.
Recalculate the payslip with the Payrun button on the toolbar at the top of the payslip to apply the changes.
Review the Employee's Leave Entitlement settings in their Employee Profile.
Navigate to Menu > Settings > Employees > click Edit for the employee> in the Employee Profile, under Entitlements.
Ensure that the correct leave entitlements are set and that the accrual method (Fixed or Vary) is appropriate.
Check the Shift rules and Weekly Rules settings in the Payroll Rules. Ensure that the correct overtime thresholds and multipliers are set. Also verify that the employee's timesheet hours accurately reflects their worked hours.
Verify that the Employee's tax settings in their Employee Profile has been set up correctly.
Navigate to Menu > Settings > Employees > click Edit for the employee> in the Employee Profile, under Employee Tax.
Check the employee's tax settings for:
- Tax Scale
- Tax Free Threshold Claimed
- HELP-HECS Loan
- Trade Support Loan
- Student Financial Supplement Scheme
- Seniors and Pensioners Tax Offset
- Tax Offset Amount
- Tax Rate Fix Percent
Check Payrun settings for:
- Taxable Runs in year
- Pay Period
If incorrect, update any settings and recalculate the payslip with the Payrun button on the toolbar at the top of the payslip to apply the changes.
Check the Super Rate settings on both the Global Settings and the Employees Profile.
Checking the Global Setting - Super Settings:
Navigate to Menu > Settings > General > Global - Super Settings.
Confirm that the Super Rate is correct.
Checking the Employees Profile - Super Settings:
Navigate to Menu > Settings > Employees > click Edit for the employee> in the Employee Profile, under Advanced Super Details.
Confirm that the settings have been configured correctly.
Verify that you have completed the following:
- Notified the ATO Microkeeper as your hosted SBR software service
- Verified all employee details for STP are complete.
- Fixed all validation errors in the STP lodgement screen.
Check if the leave request has been approved in the Leave Review section.
Ensure the leave dates fall within the current pay period.
Verify that the employee's roster aligns with the leave request dates.
Review the Deduction Rules in Payroll Rules. Ensure the deduction is set up correctly for the specific employee or group.
Recalculate the payslip with the Payrun button on the toolbar at the top of the payslip to apply the changes or check if the deduction rule was manually overridden.
Check the Australia Public Holiday list to see if the public holiday is listed. If not, a Public Holiday date can be added on the Public Holiday Rules page.
Navigate to Menu > Settings > Payroll Rules > Public Holiday Rules
Click Add Date and add the date of the public holiday.
Verify that the employee's roster aligns with the public holiday dates and did not work the public holiday date.
Public Holidays hours are calculated by using the employees Roster, deducting the Timesheet hours then applying the remaining hours as Public holiday hours.
Public Holiday entitlements are applied based on the timezone of the employee. Check the employees profile to ensure they are set to the correct timezone.
Navigate to Menu > Settings > Employees > click Edit for the employee> in the Employee Profile, under Address - Timezone.
Adjust the Timezone to the employees working State.
Verify the Public Holiday Rules are set up and the employee is eligible to the set up conditions.
Also check the Australia Public Holiday list to see if the public holiday is listed. If not, a Public Holiday date can be added on the Public Holiday Rules page.
Navigate to Menu > Settings > Payroll Rules > Public Holiday Rules
Verify all employee bank details are correct in their profiles.
Ensure the company's bank account details are correctly set in the Business Bank Settings.
Navigate to Menu > Settings > General > Bank Details.
Double-check the total amount in the Payrun matches the ABA file amount generated on your business bank account.
It is recommend to adjust overpayments to employees by processing a negative payment item in their next Payrun.
Click the button to add a Payslip Item to any area of the Payslip
Enter the amount to deduct and click Add Payment.
Review the worked hours of an employees timesheet for that pay period. Make any corrections if needed.
Check if there is any minimum timesheet hours setup in the settings for the employee. These configuration settings will pay a minimum amount of hours if set up:
- Employee Profile - Payment and Employment-Min Daily Timesheet Hours
- Shift Rules - Min Shift Length
A fringe benefit is a 'payment' to an employee, but in a different form to salary or wages. These need to be reported to the Australian Tax Office through STP.
You can find out guide on processing Fringe Benefit Tax through the ATO here.
Why does Microkeeper show 53 weeks in one fiscal year when my actual 53rd payment falls in the next fiscal year?
Microkeeper includes Week 53 in the current fiscal year to allow for the possibility of paying it on the last day of the fiscal year (e.g., June 30th).
If your Payment Date is in the next fiscal year, your Payrun schedule will be displayed as 53 > 1 > 2 > etc.
If my last pay run of the fiscal year falls on the first few days of the new fiscal year which year does it count towards?
If the Payrun paycheck is dated and becomes available to the Employee in the after June 30 of the fiscal year, the Payment is considered part of the new year's Payments.
This rule applies regardless of whether the work was performed during the previous fiscal year or not.
Conversely, if the paycheck is available to you on or before June 30 of the old fiscal year, the income is taxable in that year, even if the Payment is dated in the following year
The Rule is:
June 30: The last day of the Australian financial year. Any pay run with a payment date on or before June 30 counts towards the current financial year.
July 1 or later: If you process a pay run on July 1 (even if it is for work completed in June), it counts towards the new financial year.
In most cases, no manual adjustments are necessary. Microkeeper automatically handles 53-week years. However, you can manually change the "Runs in Year" to 53 if needed in your Payrun configuration settings.
From the ATO website:
If you have lodged an update event, it will appear in your STP reporting list. However update events only correct employee year-to-date amounts. An update event will not include W1 and W2 totals, so will not be reflected in your activity statement pre-fill.
In Microkeeper, it's not recommended that you go back to update a previous Payrun.
Instead you can wait until the next Payrun, and either make the additional payment, or deduct the amount that was overpaid as an additional line on the Payslip.
If you did do an underpayment, the other option is to process a single Ad-Hoc Payslip, that only pays the employee the missing amount.
An Expense payslip item can be added to any payslip by clicking the Plus button in the Expense area of the payslip.
Click the Plus button located on the right side of the Expense area. An "Add Expense" window will appear.
Fill in the values as neeeded.
- Title: This will be the Title that appears on the employee's payslip.
- Bank: A setup Bank Account can be selected for the expense item to automatically be expensed to.
- Type: Select if the expense is a Fixed amount or a Percentage amount
- Class: The classification of the payment. Refer to this table for more information.
- Rate: The rate to be expensed.
- Multiplier: The multiplier of the rate to be expensed.
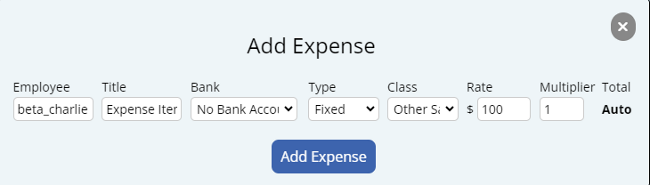
Amending or Declaring the Reportable Fringe Benefit Amount under STP
At the end of the FBT year or financial year, your accountant, bookkeeper, or salary packaging provider may give you a Reportable Fringe Benefits Amount, also known as RFBA, for one or more employees.
RFBA amounts are required to be reported through Single Touch Payroll as part of your STP finalisation.
This guide explains how to enter a RFBA amount in Microkeeper..
Before you begin this process, you will need to have the Grossed-up RFBA for the employee.
What is being entered?
A RFBA amount is a reporting amount. It is not ordinary wage payment to the employee.
To report the RFBA amount correctly, Microkeeper uses two payslip lines:
| Payslip Line | Purpose |
|---|---|
| Payment | Adds the RFBA amount onto the payslip temporarily |
| Expense | Removes the same amount and classifies it as a fringe benefit for STP reporting |
These two lines balance each out.
This means the employee's payslip can report the RFBA amount without changing their actual pay.
Expected result
After the RFBA amount is entered correctly:
| Item | Expected result |
|---|---|
| Total payments | Increased by RFBA offset payment |
| Total expenses | Increased by matching RFBA expense |
| STP Reporting RFBA amount | Updated |
| Gross Taxable | No change |
| Net Earnings | No change |
| Tax | No change |
| Employer super | No change |
| Leave accruals | No change |
Prerequisite - Obtaining the Current Reported RFBA
If RFBA has already been recorded during the financial year, check the current reported amount before adding an adjustment.
Use this calculation:
Grossed-up RFBA amount - Current reported RFBA amount = Adjustment needed
For example:
| Item | Amount |
|---|---|
| Grossed-up RFBA provided by accountant | $5000 |
| Already reported through STP | $1200 |
| Adjustment needed | $3800 |
Prerequisite Step 1 - Review the current reported RFBA figures through STP data
To check the current RFBA amount reported STP, use the STP data export.
After you have finished your final Payrun of the Financial Year you will download the current list of RFBA declared via STP.
Payroll > Payruns > Payslip > STP Lodge > Final Payrun > CSV Export or Review Data to view on web browser
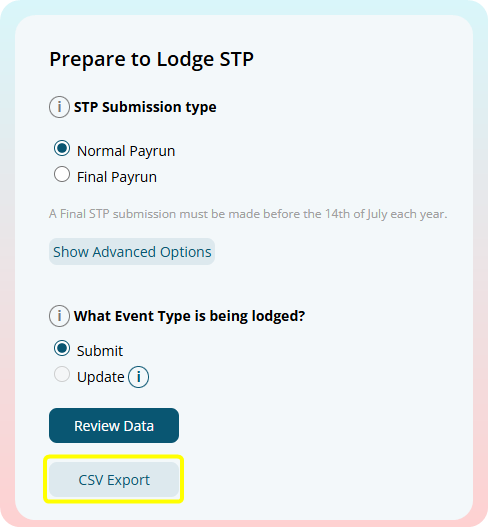
In the STP data, check the relevant RFBA and salary sacrifice amounts for the employee.
Microkeeper has four RFBA classes:
| Microkeeper Class | Reported as RFBA? | Fringe STP Type | Salary Sacrifice Type |
|---|---|---|---|
| Fringe Benefit - Exempt - Salary Sacrifice | Yes | Type X | Type O |
| Fringe Benefit - Taxable - Salary Sacrifice | Yes | Type T | Type O |
| Fringe Benefit - Exempt - Normal | Yes | Type X | None |
| Fringe Benefit - Taxable - Normal | Yes | Type T | None |
What the STP types mean
| STP Type | Meaning |
|---|---|
| Fringe Type X | Exempt reportable fringe benefits |
| Fringe Type T | Taxable reportable fringe benefits |
| Salary Sacrifice Type O | Salary sacrifice for other employee benefits |
Which amounts to check
If the RFBA was entered as Fringe Benefit - Exempt - Salary Sacrifice, check:
| STP Figure | What to check |
|---|---|
| Fringe Type X | Current exempt RFBA amount |
| Salary Sacrifice Type O | Current salary sacrificed other benefits amount |
If the RFBA was entered as Fringe Benefit - Taxable - Salary Sacrifice, check:
| STP Figure | What to check |
|---|---|
| Fringe Type T | Current taxable RFBA amount |
| Salary Sacrifice Type O | Current salary sacrificed other benefits amount |
If the RFBA was entered as Fringe Benefit - Exempt - Normal, check:
| STP Figure | What to check |
|---|---|
| Fringe Type X | Current exempt RFBA amount |
If the RFBA was entered as Fringe Benefit - Taxable - Normal, check:
| STP Figure | What to check |
|---|---|
| Fringe Type T | Current taxable RFBA amount |
Important note on RFBA salary sacrificed
If the RFBA is salary sacrificed, check both:
| Figure | Why |
|---|---|
| Fringe Type X or T | Reports the RFBA amount |
| Salary Sacrifice Type O | Reports the salary sacrificed other employee benefit amount |
If only the Fringe amount is checked, the RFBA may look correct while the salary sacrifice total is still incorrect.
See this ATO article on "Relationship between reporting RFBA and salary sacrifice type O"
Prerequisite Step 2 - Calculate the adjustments needed
Use the amount already reported to calculate the adjustment.
Required final amount - Current reported amount = Adjustment needed
For example, if the employee's required final taxable RFBA amount is $5000 and $1200 has already been reported as Fringe Type T:
| Item | Amount |
|---|---|
| Required final taxable RFBA | $5000 |
| Already reported as Fringe Type T | $1200 |
| Adjustment needed | $3800 |
Only enter the adjustment needed.
Step 1 - View the payslip of the Employee
The Amended/Grossed-up RFBA needs to be entered into the last Payrun of the fiscal year. An Adhoc Payrun can be generated, but ensure it is the latest payrun of the fiscal year.
Step 2 - Add the Grossed-up RFBA amount to the payslip
Use the "Add RFBA" button to automatically add the payment and expensive RFBA items onto the employees payslip.
- Open the Actions menu on the payslip
- Click Add RFBA
- Select Taxable or Tax Exempt
- Select Salary Sacrifice or Normal
- Enter the Grossed-up RFBA amount
- Click Add RFBA
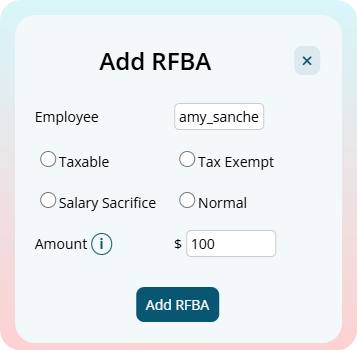
Two payslip items will be entered into the payslip:
| Payslip Line | Purpose |
|---|---|
| Payment | Adds the RFBA amount onto the payslip temporarily as "Extra" class |
| Expense | Removes the same amount and classifies it as a fringe benefit for STP reporting |
Breakdown of Fringe Benefit Classes
Microkeeper has four fringe benefit classes:
| Class | STP Fringe Type | Salary Sacrifice Type O | Use this when |
|---|---|---|---|
| Fringe Benefit - Exempt - Salary Sacrifice | Type X | Yes | The benefit is exempt and was provided through salary sacrifice |
| Fringe Benefit - Taxable - Salary Sacrifice | Type T | Yes | The benefit is taxable and was provided through salary sacrifice |
| Fringe Benefit - Exempt - Normal | Type X | No | The benefit is exempt and was not salary sacrificed |
| Fringe Benefit - Taxable - Normal | Type T | No | The benefit is taxable and was not salary sacrificed |
If you are unsure which class to select, confirm with your accountant, bookkeeper, or salary packaging provider.
See this ATO article on "Relationship between reporting RFBA and salary sacrifice type O"
Step 3 - Check and confirm the Payslip
The last step is to double-check the Payslip and STP data.
There should be no change to super or entitlements.
When you're ready, a Final STP submission can be made,
You will see that the Fringe Benefit Exempt (X) or Fringe Benefit Taxable (T) amount should have changed in the STP report.
In addition, if you reported Fringe Benefit - Salary Sacrifice you will see this in the Salary Sacrifice Type (O) Column.
The final Tax amounts should not have changed.
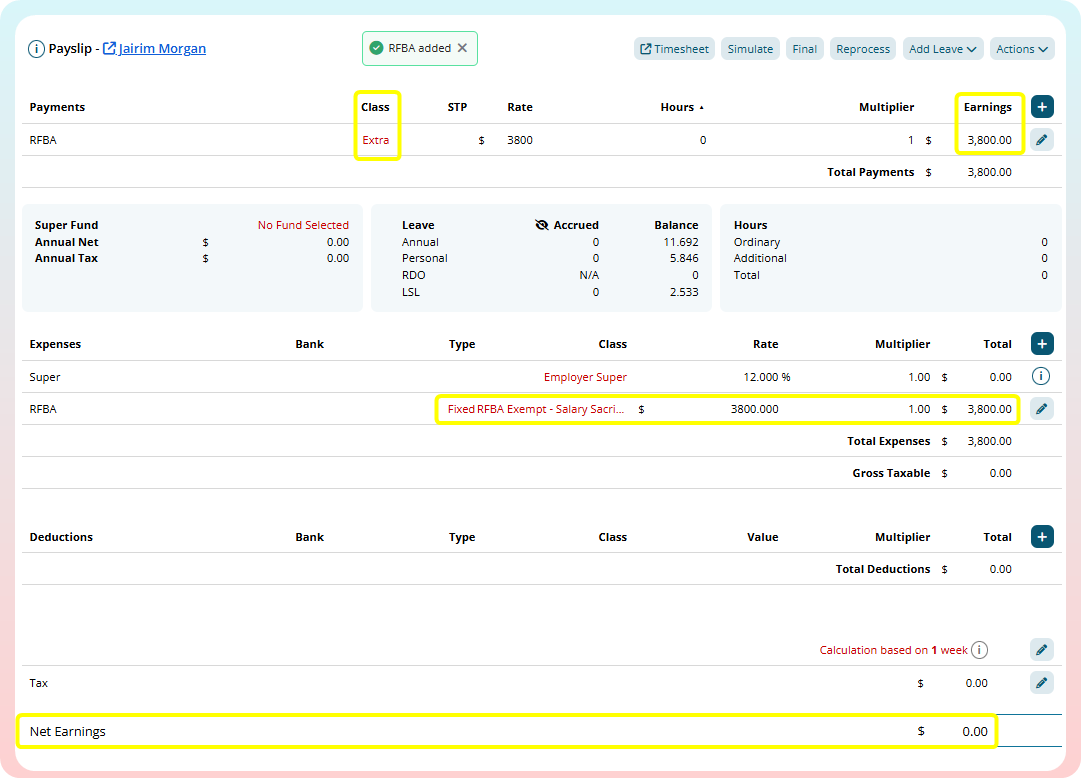
An automated Director's Fee payment can be created using an Extra Earnings Rule.
In this example we are setting up a employee to receive a flat $1000 weekly payment as a Director's Fee
Navigate to Menu > Settings > Payroll rules > Extra Rules, click the Create New Rule button to configure the allowance.
Key values to configure:
- Title: This will be the Payslip title of the allowance. For example "Director's Fee".
- Type: Select "Fixed".
- Employee/Group: Select who is eligible for this allowance. For example, "John Smith"
- Value: Enter the amount to be paid. For example "1000".
- Classification: Select "Bonus".
- STP Category: Select "Gross".
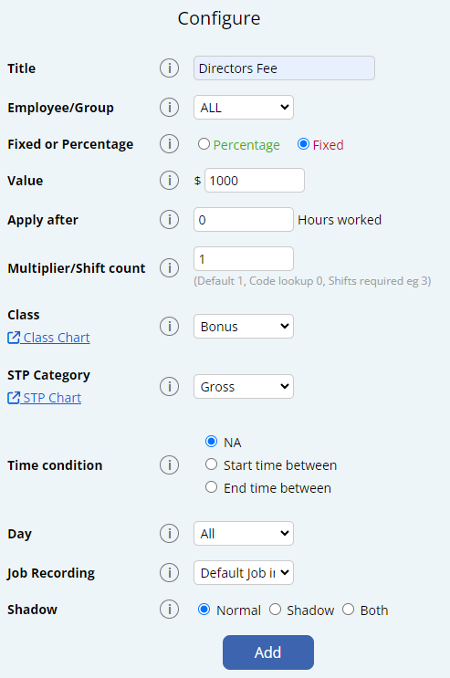
Inactive employees are intentionally excluded from entitlement reports.
This is by design because inactive staff don't contribute to the current business entitlement liability.
When you select "All Employees" in entitlement reports, it only includes active employees who should be factored into the current liability calculations.
1. Click the User button on the bottom left of the mobile app.
2. The side menu of your logged in accounts will open up.
3. Swipe left on your username and click the Logout button.
A financial year is a 12 month time period that is used for tax purposes.
For Australian Business' and Employees thhis starts on on 1 July and ends on 30 June.
This is also the span of time that all Payments have to fall into to be included in a year.
EG: A Payment made after the 1st of July will be included in the following Financial Year.
My Payrun Week 1 is saying it needs to be Week 53 but I am trying to pay for Week 1 of the new financial year?
The payment date determines which fiscal year a payment belongs to, not the work period. If you pay on July 1st or 2nd for work done in June, it counts towards the new fiscal year for tax purposes.
If your Payment Date is in the next fiscal year, your Payrun schedule will be displayed as 53 > 1 > 2 > etc.
My employees have worked in June pay period with my payment date being in July what financial year tax rate should they fall under?
From ATO PAYG payment summaries information page:
If salary and wages are accrued in the current financial year (prior to 30 June) but paid in the following financial year (on or after 1 July), the full amount of the payment will be taxed at the following financial year's tax rates and included in the following financial year's payment summary.
The Tax Tables are available on the ATO website which you can find here.
| Method Code | Clocking Event Type |
"/600 | Forgot to clock off |
605 | Mobile Clock |
606 | Fingerprint |
607 | Manual Entry |
609 | Quick Clock Page |
610 | Any Internet Device |
611 | NFC |
The Maximum Super Contribution Base is the highest amount of an employee's earnings that an employer is required to use when calculating minimum Superannuation Guarantee (SG) contributions.
If an employee earns above this base, the employer does not have to pay minimum SG contributions on the earnings above the limit.
From 1 July 2026
From 1 July 2026, the Maximum Super Contribution Base changed from a quarterly cap to an annual cap.
This change aligns with Payday Super, where employers must pay SG for each payday. Instead of applying a separate maximum earnings base each quarter, the employee's qualifying earnings are tracked across the financial year.
Once an employee's qualifying earnings reach the annual Maximum Contribution Base for the financial year, the employer can stop paying minimum SG contributions for that employee for the rest of that financial year.
| Income year | Maximum contribution base | How the cap applies |
|---|---|---|
| 2026-27 | $270,830 annual | Applied across the financial year, based on qualifying earnings paid to the employee. |
The ATO calculates the annual Maximum Contribution Base using this formula, rounded down to the nearest $10:
Concessional contributions cap 100 charge percentage = maximum contribution base
Up to 30 June 2026
For quarters up to and including the quarter ending 30 June 2026, the Maximum Super Contribution Base was a quarterly earnings amount.
| Income year | Maximum contribution base per quarter | Maximum SG payment per quarter |
|---|---|---|
| 2025-26 | $62,500 | $7,500.00 |
| 2024-25 | $65,070 | $7,483.05 |
| 2023-24 | $62,270 | $6,849.70 |
| 2022-23 | $60,220 | $6,323.10 |
| 2021-22 | $58,920 | $5,892.00 |
Source: Australian Taxation Office, Super guarantee rates and thresholds
How Microkeeper calculates this from 1 July 2026
From 1 July 2026, Microkeeper applies the Maximum Super Contribution Base as an annual financial-year cap, rather than spreading a quarterly cap across the pay periods in a quarter.
Microkeeper tracks the employee's qualifying earnings across the financial year. Super is calculated on each payday until the employee's qualifying earnings reach the annual Maximum Contribution Base.
For the 2026-27 financial year, the annual Maximum Contribution Base is $270,830.
For example, if an employee is paid weekly, Microkeeper does not divide $270,830 evenly across the weekly pay runs. The cap is not treated as a fixed weekly limit.
Instead, each payday is assessed against the employee's financial-year-to-date qualifying earnings.
If the employee has not yet reached the annual base, SG continues to calculate on qualifying earnings for that payday.
If that payday causes the employee to reach the annual base, SG is only calculated up to the remaining amount of the annual base.
Once the employee's qualifying earnings have reached the annual base, Microkeeper stops calculating minimum SG on further qualifying earnings for the rest of that financial year.
Example
An employee has already been paid $268,000 in qualifying earnings for the 2026-27 financial year.
The annual Maximum Contribution Base is $270,830.
This means the employee has $2,830 of the annual base remaining:
$270,830 - $268,000 = $2,830
If the employee is then paid another $5,000 in qualifying earnings, SG is only required on the remaining $2,830 of the annual base.
At an SG rate of 12%, the minimum SG for that payday would be:
$2,830 12% = $339.60
After this payday, the employee has reached the annual Maximum Contribution Base. Microkeeper will not calculate further minimum SG on that employee's qualifying earnings for the rest of the financial year.
What changed from the old method?
Before 1 July 2026, Microkeeper used the quarterly Maximum Super Contribution Base figure. The quarterly base was distributed across the number of pay periods in that quarter, and divided to align with your Pay Period.
For example, if a quarter contained 12 weekly payments, the quarterly cap was divided across those 12 payments, and then 1/12 of the cap was then applied to each Payment
From 1 July 2026, this per-quarter distribution method no longer applies. Microkeeper now uses the annual financial-year cap required for Payday Super.
Maximum Super setting in Microkeeper
Before 1 July 2026, the Maximum Super setting in Global Super Settings controlled whether Microkeeper paid super above the quarterly base or only up to the quarterly base.
For paydays from 1 July 2026 onward, Microkeeper applies the annual Maximum Contribution Base method automatically.
This means the old quarterly approach of dividing the base across the number of pay periods in the quarter is no longer used for current Payday Super calculations.
Leave continues to accumulate when an Employee is on:
- Paid leave such as paid annual leave and paid sick/carer's leave
- Long service leave
This error occurs when you application has timed out due to a Cloud Flare Network Error.
The best option is to wait a few minutes and the error will resolve itself.
Superannuation payments are remitted from "Precision CH".
This feature is accessed in the Global Settings, from Settings > General > Global and applies to all time clocked, the start and end time.
This rounds that clock time, to the nearest interval bracket selected by you.
For example, If you selected 15 minute rounding and Stephen was meant to start at 9:00
If Stephen clocked in at 09.05 it would be rounded down to 09:00am as that is the nearest 15 minutes interval, and he would be on time.
However if Stephen instead clocked at 09.12 his time would instead be rounded up to 09.15 as that is now the nearest interval.
No, unused Annual Leave, Long Service Leave and Sick Leave payments are not part of an employees ordinary time earnings for which super guarantee is paid on.
If you believe your account has been compromised, take the following steps immediately:
- Change Your Password: Use a strong, unique password that you haven't used before
- Change Your Email Address Password: The most common way accounts are compromised is via email address or mobile number.
- Enable Multi-Factor Authentication (MFA): If you haven't already, enable MFA on your Microkeeper account and on your email address accounts.
- Contact Support: Reach out to our support team immediately to report the issue. We can help secure your account and investigate any suspicious activity.
- Review Account Activity: Check your account for any unauthorized changes or actions, in particular check:
- Bank details are still correct
- Email address is still correct
- Date of Birth is still correct
- Mobile number is still correct
- Contact Our Support Team: Reach out to our support team immediately to report the issue. We can help secure your account and investigate any suspicious activity.
Employee Profile areas are accessible depending on your Access Control settings.
Your configured Access Level can be viewed at the top of the page when reviewing an Employee Profile.

| Section | Access Required |
|---|---|
| Personal Details | HR |
| Group Allocation | Controlled in Group config |
| Payment and Employment | Payroll |
| Entitlements | Payroll |
| Employee Tax | Payroll |
| Advanced Super Details | Payroll |
| Super Fund Details | HR or Payroll or Settings |
| Previously Accumulated | Payroll |
| Payslip Config | Payroll |
| Employee Display | HR or Rosters |
| Active Status | Payroll |
| Employee Clocking | HR or Payroll or Settings |
| Access Control | Payroll and Settings |
| Banking | Payroll |
| Availability | HR or Rosters |
| Custom Fields | HR |
| Personal Files | Files |
| Notes | Files |
If an employee doesn't choose their own super fund or have a stapled super fund, you can set them up with a Default Fund in their Employee Profile. *Make sure you have configured a Default Fund in the Beam Config.
Navigate to Menu > Settings > Employees > click Edit for the employee> in the Employee Profile - Super Fund Details
Configure their settings as:
- Super Fund: Select the Default Super fund from the dropdown list. i.e "Australian Super"
- Member Number: A placeholder value is set. This is determined by each super fund. i.e "000" or "UNKNOWN"
A request will be made when you process super via Beam. A member number will be allocated to the employee.
How to process an ETP payment to a death beneficiary
A death benefit employee termination payment to a dependant can be made in the system by adding the Death Beneficiary in as an employee and then processing an Adhoc Payrun for that newly added Death Beneficiary "Employee".
Prerequisite - Obtain the death benefit employment termination payment amount
It's recommended to first calculate the death benefit employment termination payment amount before moving on the next steps.
Here are 3 helpful ATO resources that can help you determine what falls under a death benefit ETP:
- When a worker leaves - Death of an employee
- Paying an ETP to a death beneficiary
- Death Benefit ETP - Payment to a dependant
It's recommended to first identify the ETP type code for STP purposes. Review the different ETP types here. Also see the ETP tax reporting limitation within the STP guide.
Any tax-free ETP payments will need the tax value to be adjusted as Microkeeper currently does not automatically calculate ETP tax-free payments
Step 1 - Set up the Death Beneficiary as an Employee in Microkeeper
Create a new employee and configure the employee with these key settings:
- Personal Details:
- Given Name
- Surname
- Date of Birth
- Gender
- Mobile Number
- Address
- Payment and Employment
- Entitlements
- Set all values to 0
- Set all values to 0
- Employee Tax
- Tax File Number
- Override Tax Scale: ATO-Defined - Death Beneficiary
- Active Status
- Start date: Set this to "01/01/1800"
(If the death beneficiary is also an employee on your payroll, you should report their actual commencement date, employment basis and tax treatment code.)
Step 2 - Create an Adhoc payrun for the Death Beneficiary and add death benefit ETP payments
Create an Adhoc payrun for the Death Beneficiary.
When configuring the Adhoc Payrun details, configure these key details:
- Adhoc: Ad hoc - Blank Payslips
- Staff: Select the Death Beneficiary employee
On the payslip, add the death benefit ETP payment as calculated from the Prerequisite step:
Click the Plus button located on the right side of the Payments area. An "Add Payment" window will appear.
Fill in the values as needed:
- Title: This will be the Title that appears on the employee's payslip. E.g. "ETP Payment"
- Job: The job allocation of the payslip item if needed.
- Class: The classification of the payslip item. Refer to this table for more information.
- STP: Select the ETP type code. See this table for descriptions of the ETP type code options.
- Rate: The rate to be paid.
- Hours: The number of hours to be paid.
- Multiplier: The multiplier of the rate to be paid.
Any tax-free ETP payments will need the tax value to be adjusted as Microkeeper currently does not automatically calculate ETP tax-free payments
Step 3 - Lodge the Payrun through to STP
Follow the standard STP lodgement steps.
Step 4 - Deactivate the Death Beneficiary
The Death Beneficiary employee can be terminated through their Employee Profile once all payments have been made.
Navigate to Navigate to Menu > Settings > Employees > click Edit for the employee> in the Employee Profile - Active Status, configure:
- Cessation Type: Deceased
- Active: Employee Terminated
Not allowing negative leave can be enabled in the Global Settings.
Menu > Settings > General > Global > Entitlement Settings - Negative Leave Balance
Select the "Do not allow negative" option.
Note: This setting will allow Employees to go into a negative balance up to the amount they can accrue in a single pay period.
When a refund of $0.00 for Super is received this will indicate that the Superannuation Fund was able to accept the funds successfully, but there may have been another error they want to bring to attention.
A suspended Microkeeper account can be reactivated via the Billing page.
Menu > Settings > Billing
Click the "Activate my Microkeeper account" to reactive the account.

Monthly billing will commence once the account has been reactivated.
Leave payslip items such as Annual Leave or Personal Leave will use an employees Default Job when costing those payslip items.
An STP Update Event can be lodged through Microkeeper in same area the Original Submission was made.
Go to Payroll > Payruns > Payslip.
Then select STP Lodge.
Scroll past the Submission Log, and in the Prepare to Lodge area, select:
- Normal Payrun
- Update.
Click Review Data to continue. Review the data that appears and confirm you have reviewed the Lodgment, and then Lodge STP.
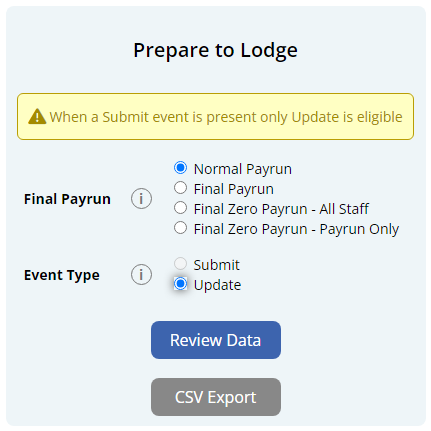
There are two ways to stop Leave from Accruing on Payments made to an Employee.
1. If you want only certain payments to accrue leave a Class on the Payment must be one that does accrue leave. These are: Overtime, Bonus or Extra. Refer to this table for more information.
2. Update the Employee's Entitlement Settings so they are not entitled to any leave.
A Car allowance as cents per km for business-related travel can be added as a payment item on the payslip.
Click the Plus button located on the right side of the Payments area. An "Add Payment" window will appear.
Below is an example of a common cents per km allowance:
John Smith is paid 88 cents per kilometre traveled for work purposes. He has travelled 10 kilometres.
- Title: The Title that appears on the employee's payslip. (e.g., "Car Allowance")
- Class: Allowance
- STP: Cents per KM
- Rate: The rate to be paid. (eg., "0.88")
- Hours: The number of km units to be paid.
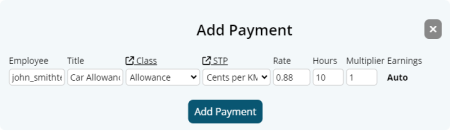

Timesheet software can be configured so employees across multiple Microkeeper organisations can clock in from the same Fingerprint scanner.
User Settings configuration for multiple organizations
When configuring the User Settings of the Timesheet software, set the Username with organizations separated by an "@" symbol.
Example:
| Username: | org1@org2 |
A setup like below will allow employees from both "org1" and "org2" to clock in from the same fingerprint scanner.
Important note on assigning Fingerprints with a multiple organisation configuration
When the Timesheet software is configured for multiple organisations, assigning fingerprints to employees will not be available.
Instead you will need to reconfigure the Username under User Settings to a single organisation to assign the fingerprint to that emplo
Microkeeper automatically adjusts rosters for daylight savings time changes.
If a timesheet recorded spans the time change, a manual adjustment may be required. This is common for overnight or early morning shifts.
- When clocks move forward: Move the end time back by one hour.
- When clocks move backward: Move the end time forward by one hour.
Example:
If the clock moved forward by one hour during a 4 hour shift.
- Original Shift: 00:00 to 05:00 (extra hour added)
- Modified Shift: 00:00 to 04:00 (5 hours - 1 hours = 4 hours total)
To calculate the rate of Leave Accrual, there are two formula's needed.
One to find out the total hours of leave per year, and the second to divide that into a weekly accrual.
First Formula:
Weeks of Leave per Year x Hours worked per week = Total Hours Accumulated per year
- How many weeks of that type of leave per year the employee receives.
Most Employees receive 4 weeks of Annual, and 2 Weeks of Personal. - How many hours the Employee is contracted to work per week.
Most business' have a Full Time 38 hour week, or a 40 hour week, but this can work for Part Time staff too, who may only work one or two days.
Second Formula:
Total Hours Accumulated per year / Weeks in a year (52) = Total Hours Accumulated per week
- Total Hours of Leave per year.
- How many weeks in a year, always 52.
An Example:
Emily has recently been promoted and now works full time, and we need to know that the Annual Leave is accruing correctly.
Emily now works 38 hours a week, and she receives 4 weeks of annual leave a year.
To work out the accrual the calculation is:
4 weeks of Annual Leave x 38 hours per week = 152 Hours per year.
152 hours per year / 52 weeks in a year = 2.923 hours per week.
For a Deduction such as Child Support to be allocated to a Bank Account, the bank details must first be entered into the Bank Details section.
Navigate to Menu > Settings > General > Bank Details > click Add Bank Account
- Nickname: Name to identify the bank account
- Group: Select "Deductions".
- Account Name
- BSB
- Account Number
- Bank Code
- APCA Code: Enter "0" for deduction bank accounts
- Reference: This is the reference ID that will appear on bank statements. If the bank that is receiving payments needs to know from whom specifically the payment is coming from then multiple Bank Detail records will need to be made each with a unique reference ID.
- Example: For Child Support payments to the DHS, create a Bank Detail record for each staff that pay child support with the unique Reference ID supplied by the DHS in the reference section.
Click "Add Bank Account" to complete.
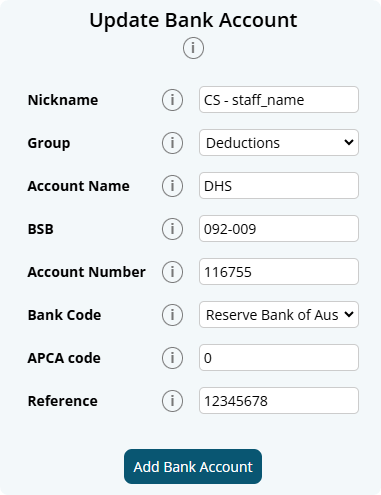
The newly added deduction bank account can now be selected as a configuration for Deduction Rules and also when adding a Deduction payslip item.
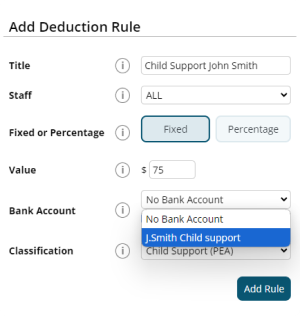
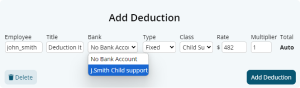
A locked payrun can be unlocked within the Payslip page.
Navigate to Menu > Payroll > click the Payslip button for the applicable payslip.
Within the Payslip, click Complete Payrun.
On the next Complete Payrun page, click the Unlock button to unlock the payrun.

Note: It is not recommended to make dollar value changes once payroll have been completed. An Adhoc payrun can be generated instead.
An adhoc payrun refers to a payroll process that occurs outside of the regular payroll cycle. This type of payrun is typically utilized for specific circumstances that require immediate payment or adjustments.
Common reasons for initiating an adhoc payrun include:
- Adjustments: Correcting errors from a previous payroll run.
- Additional Payments: Issuing bonuses, commissions, or other one-time payments outside the regular pay cycle.
A list of historical Leave requests can be downloaded on the Leave Review page.
Navigate to Menu > HR > Leave Review
Select the desired data range and any relevant filters (such as status or type) from the filter bar.
Once you have set your preferences, click the Export button to download a .csv export of Leave requests.
Yes, paid leave is counted as part of an employee's ordinary hours. Public holidays that fall on days an employee normally works are counted as ordinary hours, whether they work or not.
Employees details can be configured on their Employee Profile.
If an employees email or mobile number has been verified, only the employee themselves can change this through their Employee Console access.
To receive SuperStream data, your self-managed super fund (SMSF) needs an electronic service address (ESA).
An ESA is an alias that represents the uniform resource locator (URL) or internet protocol (IP) address of a messaging provider. It ensures you meet all technical requirements for interacting electronically across the super network. An email address is not an ESA.
You can get an ESA from an SMSF messaging provider or through your SMSF intermediary such as SMSF administrator, tax agent, accountant or some banks. Many of these options are no cost or low cost.
A workers compensation or work cover payment can be added as a payment item to the payslip.
Example:
John Smith is to be paid a workcover payment of 38 hours at their default rate of $25
Click the Plus button located on the right side of the Payments area. An "Add Payment" window will appear.
Fill in the values as needed.
- Title: Payment item title that appears on the payslip. (e.g., "Workcover Payment)
- Class: Select "Workers Comp Entitlement"
- STP Category: Select either "Gross" or "Workers Compensation". See the STP Quick Reference for more details.
- Rate: The rate to be paid. (e.g., 25)
- Hours: The number of hours to be paid. (e.g., 38)
- Multiplier: The multiplier of the rate to be paid. (e.g., 1)

To Unlock a processed Payrun, on the Payslips Page click "Complete Payrun" and under step 6, click Unlock
This is a limitation with the functionality with the "Tax Free Allowance" Class.
This will not affect the PAYG calculations on the Payslips.
How do I calculate my long service leave in South Australia as one week of leave for every X weeks of work?
In South Australia, the rate is 1 week of leave for every 40 weeks of work.
Most South Australia workers are entitled to 13 weeks of long service leave after 10 years of continuous service.
The accrual rate can be set to 1 week for every 40 weeks of work based on the calculation of:
- Total Service in Weeks: 10 years * 52 weeks = 520 weeks
- Weeks of Work per Week of Leave: 520 weeks of service / 13 weeks of leave = 40 weeks.
Custom Welcome Letter
The welcome letter email can be personalised with a custom message when sending out employees their login credentials.
Navigate to Menu > Settings > Employees > Welcome Letter > Customise Welcome Letter

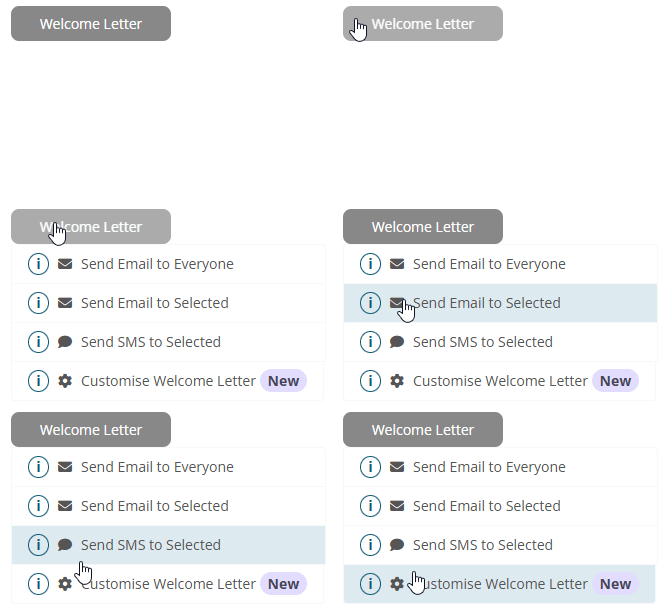
The Custom Welcome Letter page will display a preview of the welcome email sent to employees. The Custom Content in the blue text area can be edited by clicking the "Edit Content" button.
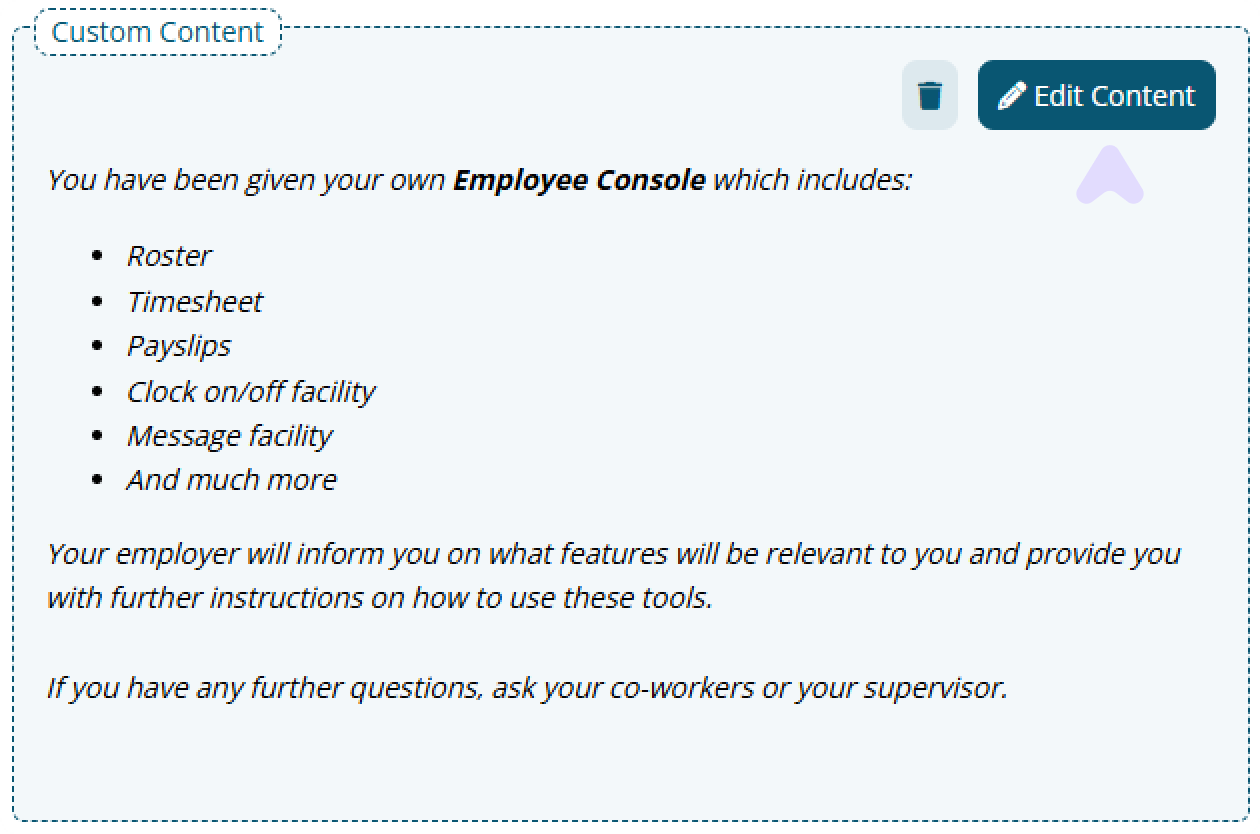
A text editor will appear allowing you to enter further instructions to the welcome email.
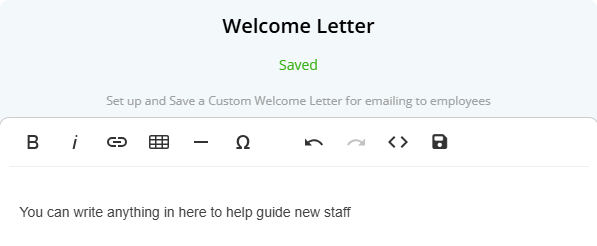
Click the Save button to confirm your changes and click outside the text modal to return to the email preview.
The "Test Email" button can be used to send a copy of the email to your email address.
How to upload a Personal Profile Picture
Navigate to Menu > Home > Employee Console - Complete your profile
- Under Profile Picture Upload, click the profile picture placeholder
- Click Upload Image
- Select a photo
- Adjust the framing and then click Save Image
How to replace a Personal Profile Picture
Navigate to Menu > Home > Employee Console - Personal Details
- Click the current profile picture
- Click Upload Image
- Select a photo
- Adjust the framing and then click Save Image
To enable early access to new features in Microkeeper:
Navigate to Menu > Settings > General > Global Settings - Developers - Early Access.
Microkeeper offers features in different development stages:
- Stable: The final version, fully tested and ready for public release.
- Early Access: A near-final version with minor risks, available for testing by opt-in users.
- Experimental: An unstable beta version primarily for internal testing. Expect bugs and instability.
How to enable Profile Pictures
Navigate to Menu > Settings > General > Global - System Settings - Profile Pictures
Configuration options:
- Disabled: Profile pictures are disabled. Admin and staff cannot upload.
- Admin Only: Only Managers with HR access can upload/manage.
- Enabled for Admin & Staff Access: Managers with HR access and staff can upload/manage.
- Required for Admin & staff Access: All users must upload a picture.
How to upload/replace a Profile Picture for a Staff user
Navigate to Menu > Settings > Employees > click Edit for the applicable employee > Under Personal Details
- Click the current profile picture
- Click Upload Image
- Select a photo
- Adjust the framing and then click Save Image
How to delete a Profile Picture
Only a manager can remove a profile picture. A replacement image must also exist.
Navigate to Menu > Settings > Employees > click Edit for the applicable employee > Under Personal Details
- Click the current profile picture
- Navigate to the picture you wish to delete using the side arrow buttons
- Click Delete Image and confirm
Skills can be exported on the Skills Review page.
Navigate to Menu > HR > Skill Review
Click the "Export" button to download the filtered skills data to a csv format.
Below is a breakdown on the Skills CSV file:
| Column Name | Description |
|---|---|
| Skill ID | Unique identifier for the skill record within the system. |
| Skill Title | The title of the skill being tracked. |
| Employee Username | The username of the employee who submitted the skill |
| Payroll ID | The employee's Microkeeper Payroll ID |
| Employee ID | If applicable, the employee's 3rd party ID |
| Employee Name | The full name of the employee who submitted the skill |
| Accepted by Employee | Status of the skill from the employee's side:
|
| Approved By | The name of the manager or administrator who approved the skill (if applicable). |
| Skill Expiry Date | The date the skill expires, if applicable. |
| Signed Date | The date the employee submitted or signed off the skill. This indicates completion but not necessarily approval. |
| Status | The overall status of the skill record:
|
| Number of Files Attached | The number of files uploaded as part of the skill submission. These files can be accessed within the system. |
| Response Value | Any text or number entered by the employee in the skill response field. Example: "136890" (e.g., a certification number) |
| Notes | Comments or system logs related to the skill submission. May include actions taken by administrators or employees. Example: "04/12/2024 - AdminUser - Set expiry to 10/09/2024" |
Extra Rules can be imported via CSV.
Prepare the CSV file formatted with columns in the exact order mentioned below:
Variable name | Description | Required | Accepted Formats | Example |
ERID | The ID of the existing rule if updating | FALSE | Numeric | 123 |
extraname | The name of the extra rule that will appear on payslips | TRUE | Alphanumerical | Night Shift Allowance |
eusername | Who the rule applies to | TRUE | "ALL" or specific employee usernames/group IDs | john_smith |
type | The type of extra rule | TRUE | "fixed" or "percent" | fixed |
value | The dollar amount ($10) or percentage value (0.75 for 75%) | TRUE | Decimal | 10.25 |
extraafter | Hours worked required before the rule applies | TRUE | Decimal | 0 |
ts_logic | How the rule applies to timesheets:
| TRUE | "na", "less", "equal", "great", "shift", "hours", "hrs_c", "hrs_m", "split" | na |
multi | The multiplier value or shift count threshold | TRUE | Intereger | 1 |
overtime | The payment classification:
| TRUE | "FALSE", "TRUE", "BONUS", "EXTRA", "ALLOW", "ALLO2", "WCE", "RBURS" | ALLOW |
stp_extra | STP Classification Chart | TRUE | String (from STP Classification Chart) | Other |
condition1 | When the rule applies based on time:
| FALSE | "0", "1", "2" | 1 |
bw_start | Start time for time condition | FALSE | HH:MM (24-hour format) | 19:00 |
bw_end | End time for time condition | FALSE | HH:MM (24-hour format) | 06:00 |
day | Day of week the rule applies to:
| FALSE | "", "Weekdays", or specific day names | Friday |
job | How jobs are recorded:
| FALSE | "0", "1", "2", or specific Job ID | 0 |
shadow | When the rule applies:
| FALSE | "0", "1", "2" | 0 |
day_v_shift | Whether to count days or shifts:
| FALSE | "0" or "1" | 0 |
Example CSV Format
ERID | extraname | eusername | type | value | extraafter | ts_logic | multi | overtime | stp_extra | condition1 | bw_start | bw_end | day | job | shadow | day_v_shift |
Extra Payment | ALL | fixed | 10 | 0 | na | 1 | ALLOW | 0 | 00:00 | 00:00 | 0 | 0 | 0 | |||
Night Shift Allowance | john_smith | fixed | 20 | 0 | great | 2 | ALLOW | Other | 1 | 19:00 | 06:00 | Weekdays | 1 | 0 | 0 |
Uploading the Extra Rules CSV File
Uploading the CSV File
- Navigate to Menu > Settings > Payroll Rules > Extra Rules
- Click the "CSV Transfer" button
- Select "Import CSV"
- Choose the prepared CSV file
A confirmation message will indicating the number of records that were successfully imported or updated.
Important Notes
- When updating existing rules, include the ERID in the CSV file
- For new rules, leave the ERID column blank
- Time values should be in 24-hour format (HH:MM)
- Make sure all required fields are populated
- Values should match exactly with the options listed above
Deductions and Expenses can be imported via CSV.
Prepare the CSV file formatted with columns in the exact order mentioned below:
Variable name | Description | Required | Accepted Formats | Example |
NRID | The ID of the existing rule if updating | FALSE | Numerical | 123 |
negtype | The type of rule:
| TRUE | "deduction" or "expense" | expense |
name | The name of the rule that will appear on payslips | TRUE | Alphanumerical Maximum 40 Characters | Sal Sac John Smith |
eusername | Who the rule applies to:
| TRUE | "ALL", username, or @groupID | john_smith |
value | The dollar amount ($10 or percentage value (3.75 for 3.75%) | TRUE | Decimal | 200 |
overtime | The classification of the rule:
| TRUE | "", "SUPER", "FEES", "GIVE", "FRINGE", "FRING2", "CS1", "CS2" | SUPER |
fixed | Whether the value is fixed or percentage:
| TRUE | "0", "1", "2", "3", "4" | 0 |
BDID | The bank account ID for automatic payments:
| FALSE | "0" or bank account ID | 0 |
Example CSV Format
NRID | negtype | name | eusername | value | overtime | fixed | BDID |
expense | Sal Sac John Smith | john_smith | 200.000 | SUPER | 0 | 0 | |
deduction | Union Fees | @1223 | 20.000 | FEES | 0 | 0 | |
deduction | Child Support | ALL | 3.750 | CS1 | 1 | 2602 |
Uploading the CSV File
- Navigate to Menu > Settings > Payroll Rules > Deduction Rules
- Click the "CSV Transfer" button
- Select "Import CSV"
- Choose the prepared CSV file
Important Notes
- When updating existing rules, include the NRID
- For new rules, leave the NRID column blank
- Bank account IDs can be found in the Bank Settings section
- Employee usernames and group IDs can be found in the respective sections
- Expenses are Pre-tax while Deductions are Post-tax
Account Codes can be imported via CSV.
Prepare the CSV file formatted with columns in the exact order mentioned below:
Variable name | Description | Required | Accepted Formats | Max Length | Example |
AID | The ID of the existing account if you want to update it | FALSE | Numeric | NA | 55655 |
ABNID | The ABN ID associated with the account | TRUE | ABN | 11 | 5 |
account_code | The account code that matches the accounting suite | TRUE | String | 16 | 6-1010 |
account_note | The description of the account from accounting suite | TRUE | Alphanumerical | 100 | Wages - Administration |
Example CSV Format
AID | ABNID | account_code | account_note |
55655 | 5 | 6-4100 | Payroll - Wages |
165236 | 5 | 2-1355 | Superannuation Payable |
Uploading the CSV File
- Navigate to Menu > Payroll > Reports > Accounting Export
- Click the "CSV Transfer" button
- Select "Import CSV"
- Choose the prepared CSV file
Important Notes
- When updating existing accounts, include the AID in the CSV file
- For new accounts, leave the AID column blank
- Make sure all required fields are populated
- Account Codes should match the accounting software's codes
- Account Codes should be unique per record
- The ABNID can be found by going to the ABN settings area or exporting the current accounts and comparing
A Leading Hand Allowance can be set up to be paid automatically to an employee every payrun using an Extra Earnings Rule.
In this example, we are setting up a Leading Hand Allowance that is paid to an employee who is part of the Leading Hand group. When the employee is assigned to the group, their payslip will automatically have $30 added per payrun
Navigate to Menu > Settings > Payroll rules > Extra Rules, then click the Create New Rule button to configure the allowance.
Key values to configure:
- Title: This will be the Payslip title of the allowance. For example "Leading Hand Allowance".
- Type: Select "Fixed".
- Employee/Group: Select who is eligible for this allowance. For example, the group "Leading Hand".
- Value: Enter the amount to be paid, e.g., "30.00" or as per the applicable rate.
- Classification: Select "Allowance".
- STP Category: Select Task (or confirm the appropriate STP category based on ATO guidance or your award).
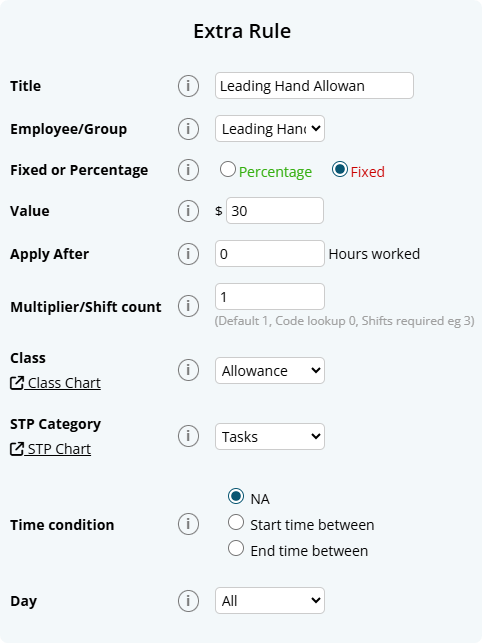
Employee Profile Directory
The Staff Directory page allows you to manage staff profiles in Microkeeper. From this central hub, you can add new employees, send welcome letters, and manage employee profiles.
Navigate
Menu > Settings > Employees
Viewing Staff in the Staff Directory list
The main table displays key information for each employee:
Quick Access
- Edit Button: Opens the full Employee Profile
- Select Checkbox: Choose employees for welcome letter actions
Employee Information
- Name and Username
- Profile completion percentage with error details
- Contact information (email and phone)
- Push notification status
- Address (hover for full details)
- Basic Hours
- Employment Type
- Active status
Profile Completion
The completion percentage indicates how much of the required employee information has been filled:
- Hover over the percentage to see missing or incorrect information
- Common issues include:
- Unsigned Tax File Number Declaration
- Unverified email or mobile
- Missing Next of Kin details
- Invalid TFN
- Unverified availability

Quick Action Tools
The Quick Action Toolbar on the Employees page provides key functions for managing employee data and access:
- Welcome Letter: Send login credentials to employees:
- Send Email to Everyone: Sends welcome letters to all employees who haven't received one
- Send Email to Selected: Sends only to checked employees
- Send SMS to Selected: Sends credentials via SMS to selected employees
- Customise Welcome Letter: Create a custom welcome letter for your employees
- More Actions:
- Employee Keys: Manage Employee Public Key used to uniquely identify an employee
- Propagate Data: Copy settings across multiple employees
- Access Control Overview: Displays all employees Access Control settings.
- Export Employees: Export employee data for backup or analysis
- Add Staff: Create a new employee profile
- Import Employees: Bulk import employee data

Finding Employees
Search and Filter Options
The search bar provides multiple ways to locate employees:
- Group Filter: Filter employees by assigned groups
- Search Fields:
- ID (Username, Payroll ID, Employee ID)
- Given Name
- Surname
- Mobile Number
- Email Address
- Start Date
- Tax File Number (Exact match)
- Active Status: Toggle to show/hide inactive employees

Direct Debit: Must be submitted by 3:30 PM AEST on 20 June 2025 (5 business days before EOFY).
My new employee on working holiday maker has earnt more then 45000 in their previous employment but their first payslip is being taxed at 15 percent?
The very first payrun generated for a Working Holiday Maker will be taxed at 15% regardless of the value entered in the Pre-accumulated Gross Earnings.
The second payrun of the employee will total the Annual Gross Earnings and apply the relevant Working Holiday Maker tax table.
How do I calculate my long service leave in New South Wales as one week of leave for every X weeks of work?
In New South Wales, the rate is 1 week of leave for every 60 weeks of work.
Most New South Wales workers are entitled to 2 months (8.667 weeks) of long service leave after 10 continuous service.
The accrual rate can be set to 1 week for every 60 weeks of work based on the calculation of:
- Total Service in Weeks: 10 years * 52 weeks = 520 weeks
- Weeks of Work per Week of Leave: 520 weeks of service / 8.667 weeks of leave = 60 weeks.
How do I calculate my long service leave in Queensland as one week of leave for every X weeks of work?
In Queensland, the rate is 1 week of leave for every 60 weeks of work.
Most Queensland workers are entitled to 8.667 weeks of long service leave after 10 continuous service.
The accrual rate can be set to 1 week for every 60 weeks of work based on the calculation of:
- Total Service in Weeks: 10 years * 52 weeks = 520 weeks
- Weeks of Work per Week of Leave: 520 weeks of service / 8.667 weeks of leave = 60 weeks.
How do I calculate my long service leave in Western Australia as one week of leave for every X weeks of work?
In Western Australia, the rate is 1 week of leave for every 60 weeks of work.
Most Western Australia workers are entitled to 8.667 weeks of long service leave after 10 continuous service.
The accrual rate can be set to 1 week for every 60 weeks of work based on the calculation of:
- Total Service in Weeks: 10 years * 52 weeks = 520 weeks
- Weeks of Work per Week of Leave: 520 weeks of service / 8.667 weeks of leave = 60 weeks.
How do I calculate my long service leave in Tasmania as one week of leave for every X weeks of work?
In Tasmania, the rate is 1 week of leave for every 60 weeks of work.
Most Tasmania workers are entitled to 8.667 weeks of long service leave after 10 continuous service.
The accrual rate can be set to 1 week for every 60 weeks of work based on the calculation of:
- Total Service in Weeks: 10 years * 52 weeks = 520 weeks
- Weeks of Work per Week of Leave: 520 weeks of service / 8.667 weeks of leave = 60 weeks.
How do I calculate my long service leave in Australian Capital Territory as one week of leave for every X weeks of work?
In Australian Capital Territory, the rate is 1 week of leave for every 60 weeks of work.
Most Australian Capital Territory workers are entitled to 6.07 weeks of long service leave after 7 continuous service.
The accrual rate can be set to 1 week for every 60 weeks of work based on the calculation of:
- Total Service in Weeks: 7 years * 52 weeks = 364 weeks
- Weeks of Work per Week of Leave: 364 weeks of service / 6.07 weeks of leave = 60 weeks.
How do I calculate my long service leave in Northern Territory as one week of leave for every X weeks of work?
In Northern Territory, the rate is 1 week of leave for every 40 weeks of work.
Most Northern Territory workers are entitled to 13 weeks of long service leave after 10 years of continuous service.
The accrual rate can be set to 1 week for every 40 weeks of work based on the calculation of:
- Total Service in Weeks: 10 years * 52 weeks = 520 weeks
- Weeks of Work per Week of Leave: 520 weeks of service / 13 weeks of leave = 40 weeks.
There are two ways Services Australia may ask to deduct child support from employees - either a Notice to Commence Child Support Deductions or Notice to Pay Money Directly to Child Support Registrar Pursuant to Section 72A.
- Notice to Commence Child Support Deductions (issued under section 45).This is the everyday order for an employee's ongoing child-support. You withhold the exact dollar amount (or percentage of net pay) shown on the notice but only after the employee keeps at least the current Protected Earnings Amount (PEA).
- Notice to Pay Money Directly to the Child Support Registrar pursuant to section 72A (often called a garnishee). This is used to recover child-support arrears. You must withhold exactly what the notice demands and the PEA safety-new does not apply.
Microkeeper offers two classification selections when configuring a child support deduction to support this:
- Child Support PEA = Protected Earnings Amount. An amount that is protected from a Child Support Deduction. This amount is updated on the first day of each year and is maintained by Microkeeper
- Child Support 72A = Clause 72A means PEA does not apply.
You can reset an employees password on the Employee Directory page using the "Reset" button.
- Navigate to Menu > Settings > Employees
- On the right of the employees username, click the "Reset" button
- Click "Ok" on the confirmation window. The employees password has now been reset and a welcome letter can be sent with their default password.
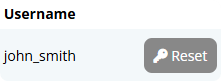
Yes, to obtain a Leave Liability report run the Entitlement Summary report.
Go to > Payroll > Reports.
Select the period required.
Then run the Entitlement Summary report, which includes a Liability column.
The CSV export will allow for adjustments and upload to your accounting suite.
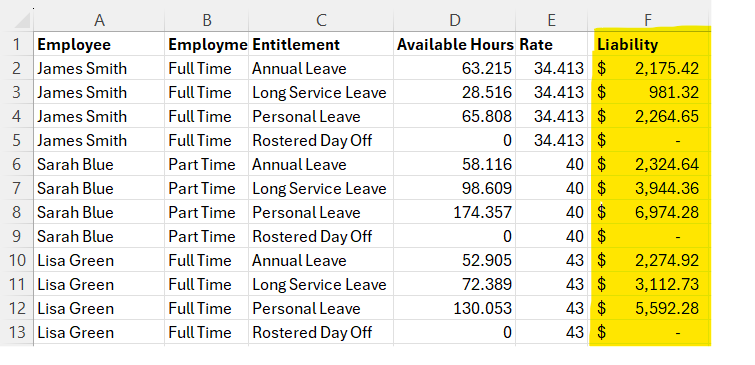
Default Roster is an option to calculate how Leave Request and Public Holidays are to be paid out to employees.
The Default Roster is based off the Standard Work Week selected in the Global Settings,
This is a Monday to Friday work week, with a 09:00 am start time for each working day
This is selected under Settings > General > Global > System Settings.
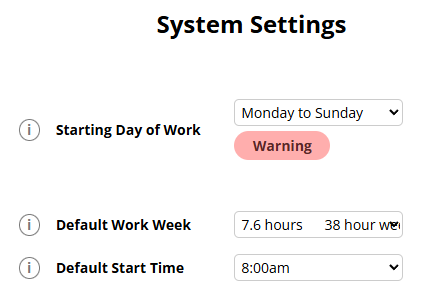
Group Static Roster is an option to calculate how Leave Requests and Public Holidays are to be paid out to employees in that Contracted Hours group.
The Group Static Roster is set by the group the Employee is added to.
This allows you to set one Roster for multiple staff who have the same Contracted Working hours.
To see the Current applicable Group Static Roster for an employee:
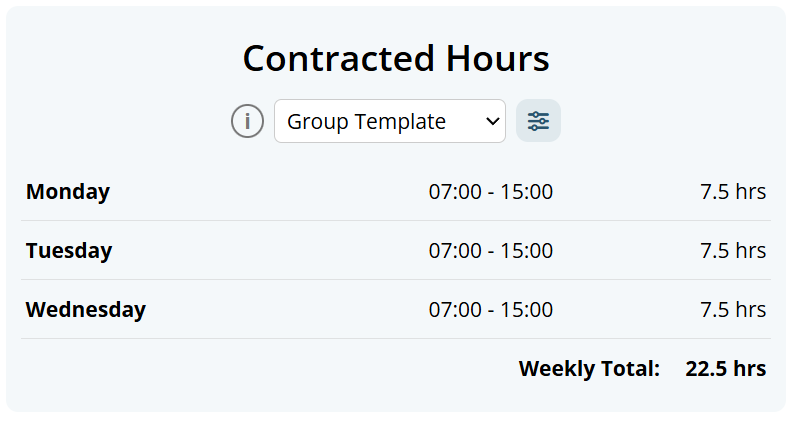
Steps:
- Go to Employee Profile > Contracted Hours.
- Set the employee's Contracted Hours type to Group Template (Group Static Roster).
- Make sure the employee is assigned to one Contracted Hours group.
- Click the Contracted Hours Update button.
- Review or enter the group roster shifts by day (Start, Finish, Location, and Role if required).
- Save.
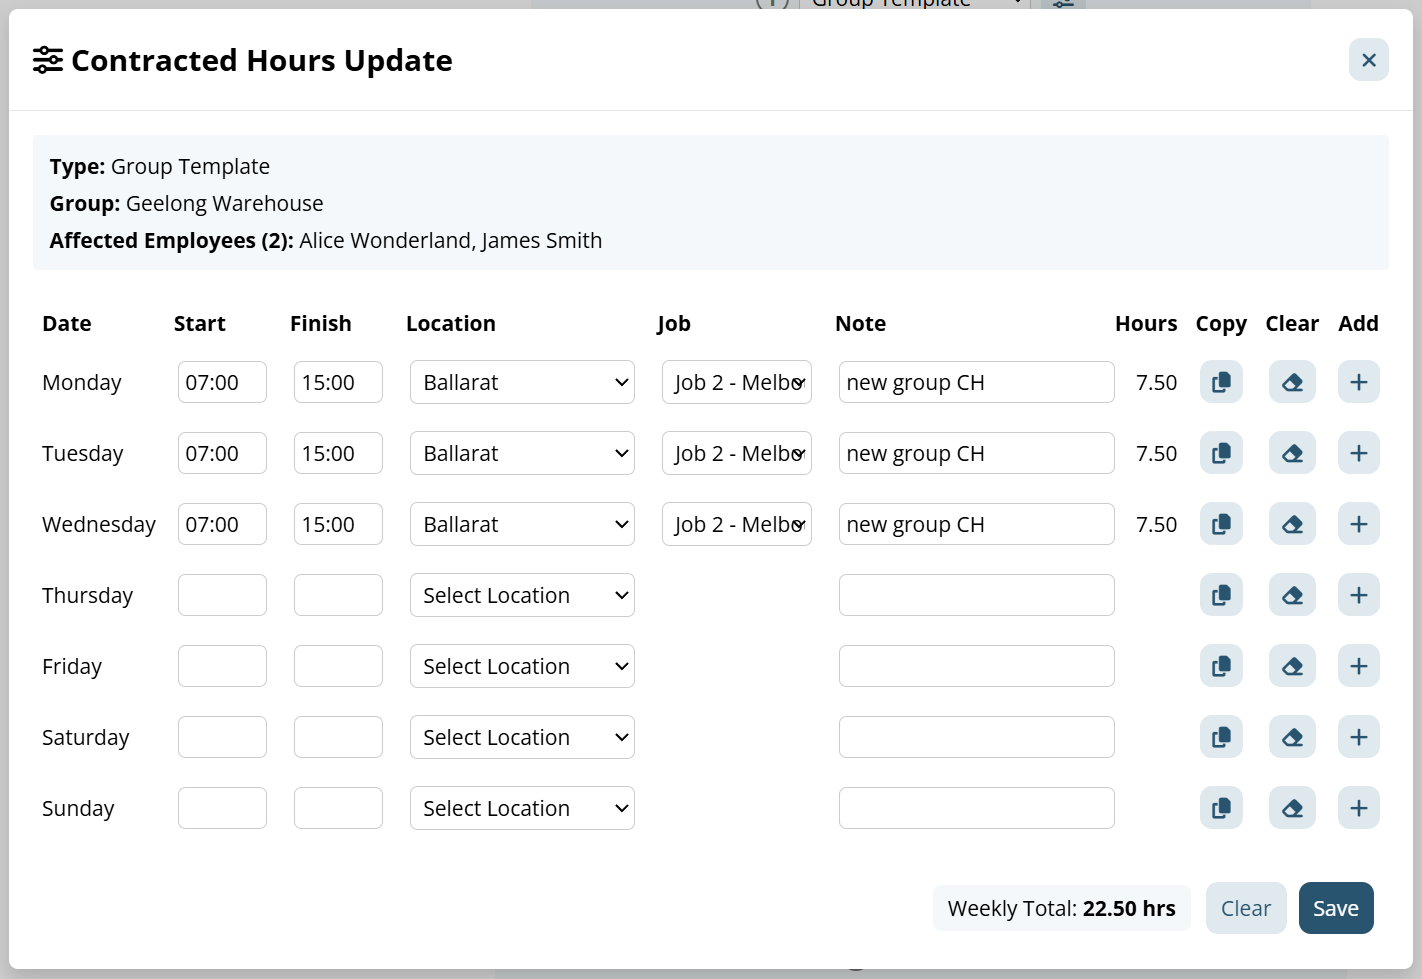
Notes :
- Group Static Roster only works when the employee is in exactly one Contracted Hours group.
- If an employee is in no Contracted Hours group, or in more than one, the roster cannot be applied until groups are corrected.
- Changes to a Group Template affect all employees in that group.
To learn how to setup a new Contracted Hours Group.
Individual Static Roster is an option to calculate how Leave Requests and Public Holidays are to be paid out to employees.
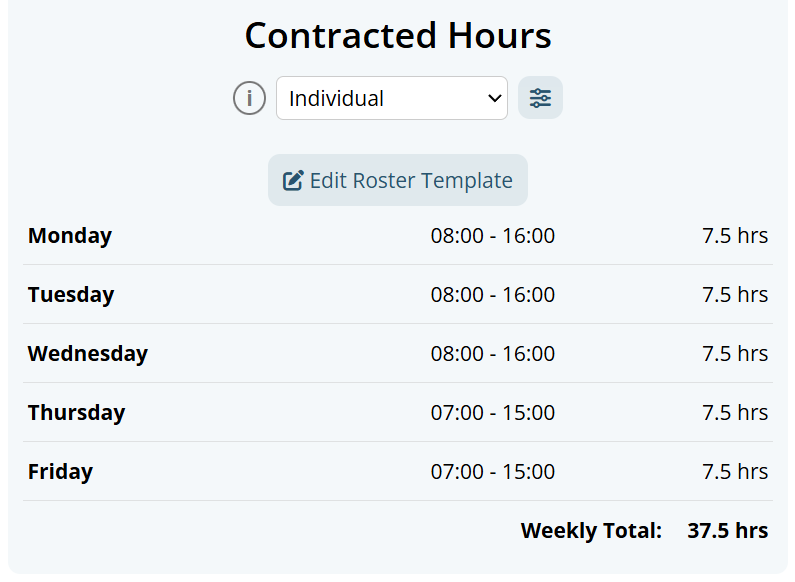
Steps:
- Go to Employee Profile > Contracted Hours.
- Set the employee's Contracted Hours type to Individual (Individual Static Roster).
- Click the Contracted Hours Update button.
- Enter or edit the employee's shifts by day (Start, Finish, Location, and Role if required).
- Save.
- Confirm the weekly total shown in Contracted Hours.
The Roster Calendar is a module to create a week long schedule of work hours of work for your employees. To see more about this feature you can visit our guide here.
This Roster can also be used to reflect an employee's Contracted Roster Hours as well in the Employee Profile, ensuring that only the hours the Employee is Rostered for on a weekly basis are paid as Leave or Public Holidays.
The Contracted Hour setting is used to calculate how many hours are to be paid while an employee is on leave or Public Holiday payments.
The Contracted Hour selected should also reflect the hours the Employee is Contracted to work on a weekly basis.
Contracted Hours can be configured in the Employee Profile. Navigate to Menu > Settings > Employees > edit > Employee Profile - Contracted Hours
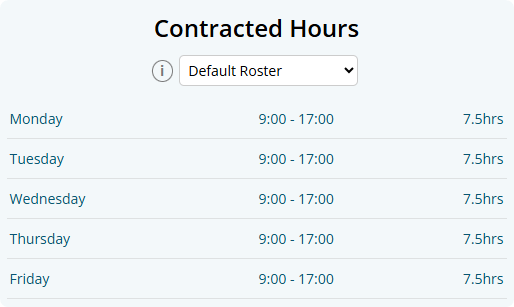
There are four different options to configure this:
- Default Roster
This is the built in option by Microkeeper and will work for those working your Standard Work Week, and is based off a 09:00 start time each day. - Group Static Roster
This is set by the group the Employee is added to. To see this Group's Roster, go to the Employee Profile, then under Contracted Hours select Edit Roster Template, then the Rostered Shifts with the Group - Individual Static Roster:
This will trigger based on each individual shift in the Static Roster Template that is assigned to the employee.
To see this go to the Employee Profile, then under Contracted Hours select Edit Roster Template, and the Employee's Roster will display. - Roster Calendar
This will use the employee's rostered shifts in the current week's Roster Calendar.
A shift must exist in the Roster Calendar for leave or public holiday payments to be calculated.
If an employee will be on leave, you should still create the shifts they would normally work or are contracted for.
Prerequisites
- You must have access to Group Configuration.
- The group Access must be set to Contracted Hours.
- Group Name is required.
- If Auto Add is enabled, only one Contracted Hours group can use Auto Add at a time.
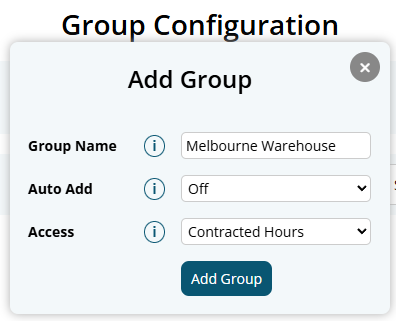
Steps
- Open Group Configuration.
- Select Add Group.
- Enter a Group Name.
- Set Auto Add to Off or Auto Add.
- Set Access to Contracted Hours.
- Select Add Group to save.
- In the Groups list, tick the checkbox for the group you want to work with.
- In Employee Allocation, choose any filters you need.
- Select Display to load employees.
- Allocate employees to the selected Contracted Hours group.
Notes:
- An employee can only belong to one Contracted Hours group at a time.
- If you move an employee to a different Contracted Hours group, they are automatically removed from the previous Contracted Hours group.
Once you have the Contracted Hours Group with staff in it, you can go to the Employee Profile of one of the staff and update the Group Roster Template from here
If an employee has a formal salary sacrifice arrangement via an Expense payment item (e.g., novated lease, health insurance, mortgage payments), the salary sacrifice amount is deducted from gross pay before child support is calculated.
Microkeeper automatically applies the Protected Earnings Amount (PEA) check to ensure the employee's take-home pay doesn't fall below the minimum set by Services Australia.
Example Salary Sacrifice and PEA in Microkeeper
| Step | Details | Amount |
|---|---|---|
| Gross fortnightly pay | $2,400.00 | |
| Less salary sacrifice | Expense Item: Mortgage, car lease, health insurance, school fees | - $900.00 |
| Tax withheld | Example only | - $96.00 |
| Remaining pay | $1,404.00 | |
| PEA set aside | Current fortnightly PEA | - $1,068.46 |
| Available for child support | $335.54 | |
| Child support requested | $398.00 | |
| Amount deducted in Microkeeper | $335.54 | |
| Net pay to employee | $1,068.46 |
In this case, Microkeeper will only deduct $335.54, as deducting the full $398 would leave the employee below the PEA. The unpaid $62.46 will be collected directly by Services Australia from the employeeyour payroll does not need to do anything further unless a new notice is received.
Source: Adapted from Services Australia Notice to commence child support deductions
Accidentally overlapped Super Payment Periods.
This can happen if the payment period you selected for a Superannuation payment inadvertently included a pay run for which super has already been paid.
There are two ways to resolve this:
- Contact the Super Funds: The most direct method is to individually contact the superannuation funds involved and request a refund for the duplicate payment.
- Adjust in a Future Pay Period (using negative super figures):This method involves creating temporary negative super figures in your payroll system to offset the overpayment in a future super payment.
Process for Option 2 (Adjustment in a Future Pay Period):
- Identify the Double Payment: Determine the exact amount that was overpaid.
- Create an Ad-hoc Pay Run: In an upcoming super period that has not yet been paid, create an Ad-hoc Pay Run with a payment date within that period.
- Do NOT Send Reports: It's crucial not to send or make any reports using this data, as your payroll data is currently incorrect.
- Add Negative Super Amounts: Apply the identified overpayment amount as a negative super figure to this Ad-hoc Pay Run, using the "Add Super" button.
- Pay the Super: Proceed with paying the superannuation for this adjusted period.
- Remove the Ad-hoc Pay Run: Once the Superannuation is paid, delete the Ad-hoc Pay Run that contained the negative super amounts.
- Data Accuracy: Your payroll data should now be accurate again.
The Employee Profile is divided into multiple sections, each requiring specific Access Control permissions. The sections you can access depend on your assigned Access Control settings.
Access Level Indicators
When viewing an Employee Profile, you'll see an access indicator at the top showing which access types you have:
- Payroll - requires Payroll - Medium Access or above
- Roster - requires Roster - Read Only or above
- HR - requires HR - Review or above
- Files - requires Files
Here's a complete breakdown:
HR-Related Sections (Requires HR Access)
1. Personal Files
- Upload and manage personal documents for the employee
2. Custom Fields
- Custom fields created by the employer for additional employee information
3. Personal Details
- Store personal information about the employee (name, contact details, etc.)
4. Group Allocation
- Allocate staff to different groups within the organization
- Note: Access depends on group configuration settings
5. Employee Display
- Controls what an employee can see in the system
6. Employee Clocking
- Configure how the employee clocks on and off (NFC, fingerprint, facial recognition, etc.)
7. Availability
- Set employee availability times for roster planning
Payroll-Related Sections (Requires Payroll Access)
8. Payment and Employment
- Details required for salary calculations (pay rates, employment type, etc.)
9. Contracted Hours
- Set the employee's contracted working hours
10. Entitlements
- Entitlement calculations for the employee (leave, overtime, etc.)
11. Employee Tax
- Tax settings used to calculate employee tax deductions
12. Advanced Super Details
- Advanced superannuation details that impact super payments
13. Previously Accumulated
- Import previously accumulated figures from other payroll systems
14. Payslip Config
- Controls what information is displayed on employee payslips
15. Active Status
- Employee active status, start and termination dates
16. Banking
- Banking details for salary payments and ABA file generation
17. Address
- Employee address and work timezone settings
Multi-Access Sections (Requires Multiple Access Types)
18. Super Fund Details
- Employee superannuation fund details
- Note: Any one of the three access types will grant access
19. Access Control
- Configure what areas of Microkeeper the employee can access
- Note: Requires BOTH Payroll - Full Access and Settings access
With the introduction of Multi ABN support, Access Control now includes Payroll Team management that works alongside your existing Access Control settings. This allows you to control which payroll team members have access to specific Pay Cycles within your organization.
Navigate to Menu > Settings > General > Global - ABN and Pay Cycles to configure Payroll Team access.
Understanding Payroll Team Access
When you have multiple ABNs in your organization, you can now control which payroll team members have access to each individual Pay Cycle. This is separate from but works in conjunction with your existing Access Control settings.
Two Types of Payroll Team Access:
- Whole Payroll Team - All users with Payroll Access can see and process this Pay Cycle
- Selected Users - Only specific payroll team members can access this Pay Cycle
How It Works
1. Payroll Team Selection
When creating or editing a Pay Cycle, you can choose who has access:
- Select "Whole Payroll Team" to give all payroll users access
- Select "Selected" to choose specific team members from a list of users with Payroll Access
2. Access Control Integration
This system works with your existing Access Control settings:
- Users must first have Payroll - Full Access or Payroll - Medium Access in their Employee Profile
- Only users with payroll access will appear in the selection list
- This provides an additional layer of control beyond the basic payroll access levels
3. Pay Cycle-Specific Access
Each Pay Cycle is linked to a specific ABN, but access control is applied per Pay Cycle:
- Payroll team members can be given access to specific Pay Cycles only
- This allows for separation of payroll processing between different Pay Cycles, even within the same ABN
- Users can only see and process Pay Cycles they have been specifically assigned to
Practical Examples
Example 1: Single ABN Organization
If you have one ABN with multiple Pay Cycles (e.g., Weekly and Monthly), you can:
- Give all payroll team members access to both Pay Cycles
- Or assign specific team members to specific Pay Cycles for specialized processing
Example 2: Multi ABN Organization
If you have multiple ABNs (e.g., Main Business and Subsidiary), you can:
- Assign different payroll team members to different Pay Cycles within each ABN
- Ensure sensitive payroll information is only accessible to authorized team members
- Maintain clear separation between different Pay Cycles, even across different ABNs
Access Control Hierarchy
The complete access control system now works in this order:
- Basic Access Control - User must have appropriate access levels (Payroll, Settings, etc.)
- Payroll Team Access - User must be assigned to specific Pay Cycles
- Pay Cycle Access - User can only access Pay Cycles they have been specifically assigned to
Managing Payroll Team Access
Adding Users to Pay Cycles:
- Go to Menu > Settings > General > Global - ABN and Pay Cycles
- Click Edit on the Pay Cycle you want to modify
- Select Selected under Access
- Choose the specific payroll team members from the list
- Click Update to save changes
Viewing Current Access:
In the Pay Cycles table, you can see:
- Access column shows "Whole Payroll Team" or lists specific users
- Staff column shows how many employees are assigned to each Pay Cycle
- Click on staff numbers to manage group assignments
Important Notes
- Linked Users: Users from linked accounts (other businesses) with payroll access can also be assigned to Pay Cycles
- Microkeeper Staff: Microkeeper support staff cannot be assigned to Pay Cycles for security reasons
- Active Users Only: Only active users with payroll access appear in the selection list
- One Pay Cycle Per Employee: Each employee can only be assigned to one Pay Cycle at a time
Troubleshooting
If a payroll team member can't see a Pay Cycle:
- Check they have Payroll - Medium Access or above in their Access Control
- Verify they're assigned to the specific Pay Cycle in ABN and Pay Cycles settings
- Ensure the Pay Cycle is not hidden
- Check they have been assigned to the specific Pay Cycle
If you can't assign someone to a Pay Cycle:
- Ensure they have payroll access in their Employee Profile
- Check they are an active employee
- Verify they're not Microkeeper staff (who cannot be assigned)
This system provides granular control over payroll access while maintaining the security and flexibility of your existing Access Control framework.
Navigating to the Dashboard
Navigate to the Dashboard from the launchpad's Dashboard link or via the main navigation bar under
Home > Dashboard to view.
Understanding the Dashboard Components
The dashboard is made up of three main areas:
- Dashboard Cards: These are individual blocks of information that you can show, hide, and reorder.
- "To Review" Sidebar: A navigation panel (on the left for desktop, collapsible at the top for mobile) that shows a count of items needing be be actioned, like approval of timesheet data, leave requests, or skills.
- Header: Top right of the header contains the navigation button to the Activity Log, and the Dashboard Settings button used to open the Dashboard settings panel and configure the dashboard layout.
How to Customize Your Dashboard
You have full control over which cards appear on your dashboard and in what order.
- Open the Dashboard Settings Panel
Click the Dashboard button in the top-right corner of the header. This will open the Dashboard Settings panel. - Show or Hide Cards
In the Dashboard Settings" panel, you will see the named tiles of each card. Click on the tile itself or use the checkbox to toggle its visibility. A checked box means the card will be shown. - Reorder Cards
To prioritise what you see, click and hold the grip icon next to a card's name and drag it up or down in the list to your desired position. - Save Your Changes
You must click the Apply button at the bottom of the panel to save your configuration. The page will then reload with your new dashboard layout.
Available Dashboard Cards
The cards you can add to your dashboard depend on your user access levels. If you don't see a particular card in your Dashboard Settings panel, it's likely because you don't have the necessary permissions or you turned off the visibility during configuration.
In order to adjust permissions: navigate using the navigation bar to Settings > Employees, click on edit button of the employee you would like to manage permissions for and click on access control in the sidebar.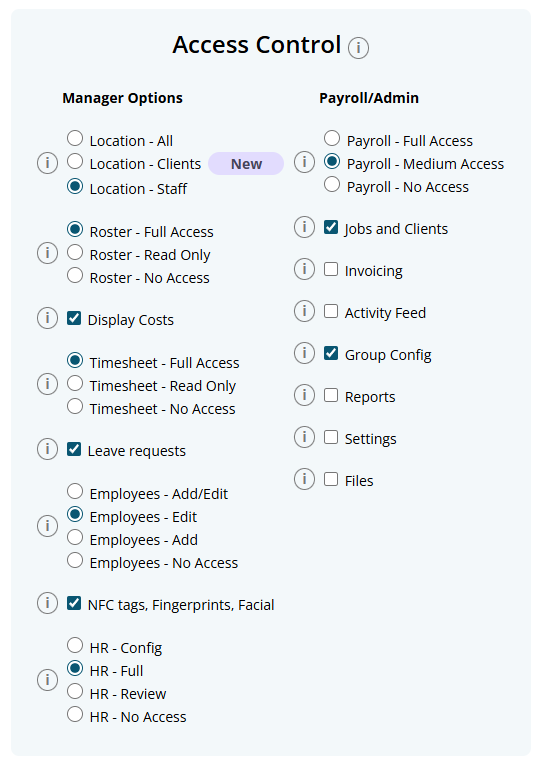
Displays a summary of your active employees (clocked in, clocked out, on leave).
Required Access: Settings or Employees - Add/Edit
Shows who is scheduled work hours from the roster on a per day basis.
Required Access: Roster - Full Access or Read Only
Lists approved leave requests for the near future.
Required Access: Leave requests
Compares rostered hours to logged timesheet hours for the week.
Required Access: Timesheet and Roster
Shows a list of employees with upcoming birthdays.
Required Access: Settings or Employees - Add/Edit
Displays any open roster shifts that are available for bidding.
Required Access: Roster - Full Access
Troubleshooting
If your dashboard isn't appearing as you expect, check these common issues.
- A card is missing from my Dashboard Settings list.
Each card requires a specific user permission to be visible. For example, to see the 'Today's Roster' card, you must have 'Roster' access. Check your permissions under your employee profile in Access Control. - My dashboard is empty.
This screen appears when all your available cards are hidden. Click the message on the screen or the Dashboard settings button to open the settings panel and enable the cards you wish to see. - I toggled a card on, but it's not on my dashboard.
After making changes, you must click the Apply button at the bottom of the settings panel to save and view your new layout. - I can't see the "To Review" section.
This section only displays links if you have access to the relevant access levels (e.g., Timesheets, Leave, or Skills).
A laundry allowance can be set up to be paid automatically to an employee every payrun using an Extra Earnings Rule.
In this example, we are setting up a Laundry Allowance that is paid to every employee that is entitled to it. When an employee is assigned to the group, the payslip will automatically add $1.20 per shift up to a maximum of $5.98 per week.
Navigate to Menu > Settings > Payroll Rules > Extra Rules, then click the Create New Rule button to configure the allowance.
Key values to configure:
- Title: This will be the Payslip title of the allowance. For example "Laundry Allowance".
- Type: Select "Fixed".
- Employee / Group: Select who is eligible for this allowance. For example, the group "$ALLW - Laundry".
- Value: Enter the amount to be paid, e.g, "$1.2" or as per the applicable rate.
- Apply After: Enter the hours worked as "0.1".
- Multiplier Count: Enter the default value of "1"
- Classification: Select "Allowance".
- STP Category: Select Laundry (or confirm the appropriate STP category based on ATO guidance or your award)
- Timesheet Lookup: Select Days in the drop down and select "Equal (=)"
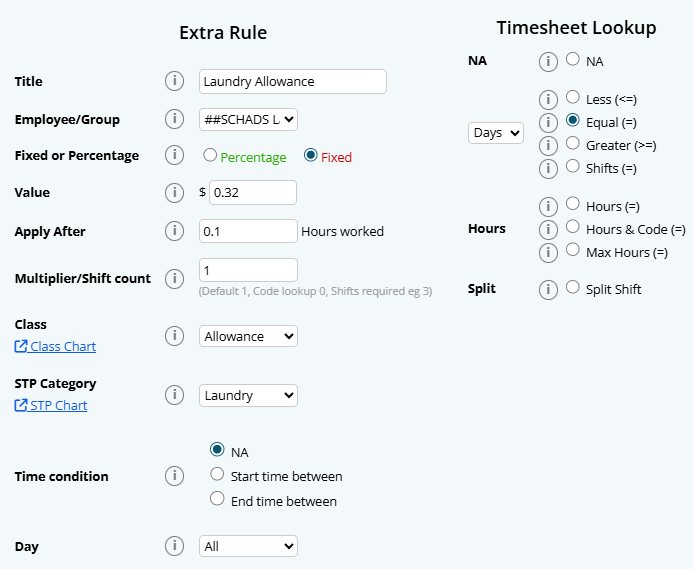
In this instance, you will need to set up similar rules for the following days of the week. The only variables to each day will be the following:
Day 2:
- Value: Enter the amount to be paid, e.g, "$2.4" or as per the applicable rate.
- Multiplier Count: Enter the default value of "2"
Day 3:
- Value: Enter the amount to be paid, e.g, "$3.6" or as per the applicable rate.
- Multiplier Count: Enter the default value of "3"
Day 4:
- Value: Enter the amount to be paid, e.g, "$4.8" or as per the applicable rate.
- Multiplier Count: Enter the default value of "4"
Day 5:
The final day is set to "Greater (>=)" to only pay up to 5 days in the week.
- Value: Enter the amount to be paid, e.g, "$5.98" or as per the applicable rate.
- Multiplier Count: Enter the default value of "5"
- Timesheet Lookup: Select Days in the drop down and select "Greater (>=)"
Please note that this rule applies to a weekly pay cycle. Longer pay cycles will require more rules to be set up for each day of the cycle.
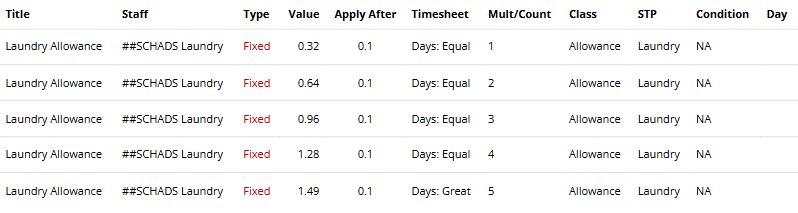
This FAQ explains why the Entitlement Breakdown Report may show a "possible error" message and what to do next.
Why do I see "possible error"?
Microkeeper flags scenarios that can misalign leave balances.
Common causes include:
- Opening balance edited: A leave opening balance was added or changed.
- Historical payrun adjusted: Example, leave type changed from Annual to Personal in a past run.
- Out-of-order processing: Payruns were processed or reprocessed out of sequence.
- Duplicate payment date: Two payruns share the same payment date.
What should I do if the message appears on the most recent payrun?
Do nothing immediately. Run your next scheduled payrun and recheck the report - most cases resolve automatically.
Why errors often fix themselves
Balances often self-correct on the next payrun. For example, a -27 hours "Possible Error" paired with a +27 hours entry will cancel out, indicating the system has self-corrected.
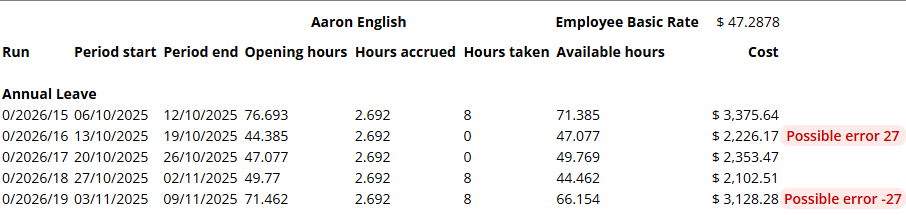
What should I do if the message persists after the next payrun?
First, check if this is your expected result. The "possible error" may be intentional based on actions you've taken.
For example, if you increased an employee's leave balance by 20 hours by editing an opening balance, and the report shows a +20 hours "possible error" on that payrun, this matches your expectation and can be safely ignored.
If the error doesn't match any action you've taken and you're not sure why it appeared, contact Microkeeper Support with the employee and report affected.
Yes, Microkeeper offers the ability to enforce MFA (Multi-Factor Authentication) for all users in the organisation account.
Navigate to Menu > Settings > General > Global - System Settings - MFA Required
MFA requirements can be configured at different access levels:
Admin Access (Recommended)
MFA is required for users with administrative privileges. This includes anyone who has access to:
- Settings
- Reports
- Files
- Group Config
- Activity Feed
- Invoicing
- Jobs and Clients
- Payroll
Manager Access
MFA is required for users with management-level responsibilities. This includes anyone who has access to:
- Rosters
- Timesheets
- Employees
- Leave requests
- HR
- Display Costs
- NFC tags. Fingerprints and Facial registration
All Staff
When enabled at this level, MFA is required for all employees regardless of their access permissions
You can increase the GPS radius setting through the Global Settings. The GPS radius setting determines how far staff can be from a location's GPS coordinates when clocking in via the mobile app.
To change the GPS radius:
- Navigate to Menu > Settings > General > Global - Timesheets
- Under the "GPS Radius" field, enter the desired radius in metres (range: 40 to 1000 metres)
Working Holiday Maker (WHM) tax is fully automated in Microkeeper. Once configured, all tax calculations happen automatically during payroll processing
Setup an employee for WHM tax
Select "Working Holiday Makers" as the Tax Scale in the employee profile.
- Menu > Settings > General > Employees > edit Employee Profile
- Under Employee Tax - Tax Scale, select "Working Holiday Maker"
If the employee has previously worked in the fiscal year, update their opening balance's gross earnings
- Menu > Settings > General > Employees > edit Employee Profile
- Under Opening Balances - Pre Gross Earnings, enter the total pre gross earnings from the employees previous employment in the fiscal year
How the WHM tax works
Microkeeper uses a progressive tax system based on cumulative pre-tax gross income for the fiscal year
- Tracks Income: Retrieves the previously accumulated annual gross total from the most recent previous payrun
- Determines bracket: Uses cumulative annual gross income to date to select the correct tax bracket
- Calculates tax: Applies the appropriate rate automatically
Tax Brackets (2025/2026)
- $0 - $45,000: 15%
- $45,000 - $135,000: 30%
- $135,000 - $190,000: 37%
- $190,000 +: 45%
Note: The very first payrun of any WHM maker will always be taxed 15% regardless of their opening balance
ERR127 means that Beam does not have a current direct debit authority on file that matches the bank details provided.
To resolve this error, you will need to complete the Beam configuration process again and re-sign the direct debit authority, making sure you proceed all the way to the final step.
Even if you have previously configured Beam and your bank details are correct, the direct debit authority may be missing, expired, or not fully completed, and must be re-signed to create a valid authority in Beam's system.
| Code | Description |
|---|---|
| nul/600 | Forgot to clock off |
| 605 | Mobile Clock |
| 606 | Fingerprint |
| 607 | Manual Entry |
| 609 | Quick Clock Page |
| 610 | Any Internet Device |
| 611 | NFC |
| 615 | CSV Import |
To Authorise a Static IP Address' to prevent Employee's clocking hours from Unauthorized Networks, you can follow the below steps.
- Go to Settings > General > Security
- Enter a Description and the IP Address.
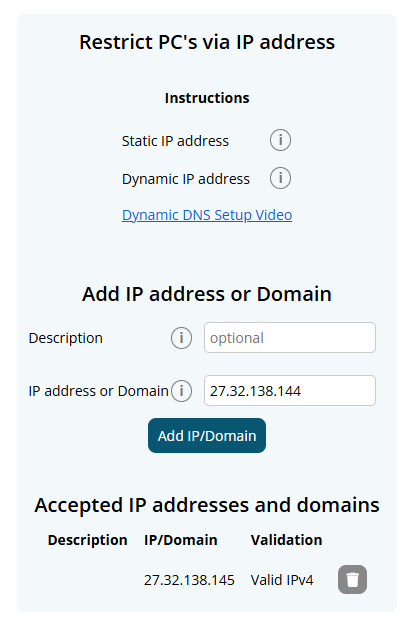
The IP Address field will automatically fill with the current networks' IP Address.
For Dynamic IP Address' setup we have a video tutorial here.
STP submissions report year-to-date amounts based on the settings currently applied to an employee's profile.
If an employee's tax scale was changed directly from Working Holiday Maker (WHM) to Australian Resident on the existing profile, all earnings for the current financial year would be reported under the new income stream type, including historical earnings.
By terminating the existing profile and creating a new one, this ensures that:
- Historical earnings continue to be reported correctly as WHM
- Future earnings are reported under the new income stream type
This approach ensures accurate STP reporting and compliance.
The ATO uses the latest STP submission as the source of truth.
So if you:
- Lodge a Final STP submission for the financial year
- Then lodge another pay run as a normal STP event
the normal STP will override the final STP and effectively unfinalise the fiscal year.
To avoid this, do all your normal STP pay runs first and only submit the Final STP as the last lodgement for the year.
An NFC tag can be reassigned on the NFC & Fingerprint page.
Navigate to Menu > HR > NFC & Fingerprint and click View all NFC tags.
In the list of allocated tags, click Reassign Tag next to the relevant employee.
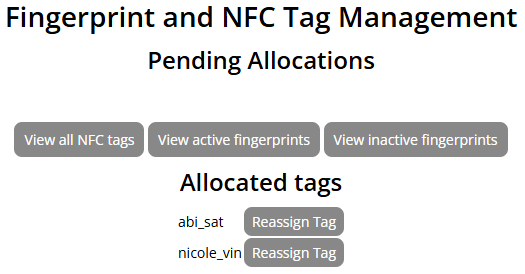
You can now select the new employee to assign the tag to, click Set to confirm.
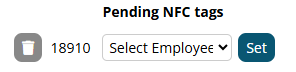
This warning appears when an employee has a Termination Date and Cessation Type set in their employee profile, but their status has not yet been updated to Employee Terminated.
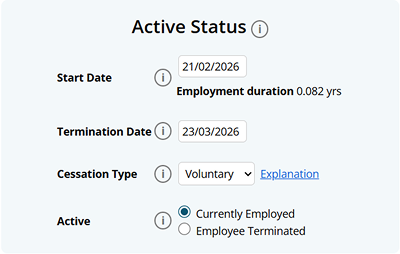
This typically means the employee has not had a final payslip processed yet.
To resolve this, navigate to the employee's payslip for their final pay period and run Final.
There are two steps to Assigning NFC Tags to an Employee:
- Enrolling a NFC tag.
Place the NFC tag on the on the NFC reader.
Once the NFC tag has been successfully scanned, a "NFC tag added" window will display a match ID.
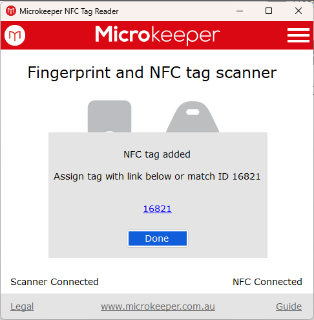
- A registered fingerprint or NFC tag can be assigned through the Microkeeper Portal.Navigate to Menu > HR > NFC & Fingerprint
Note: Access Control - NFC tags, Fingerprints, Facial is required.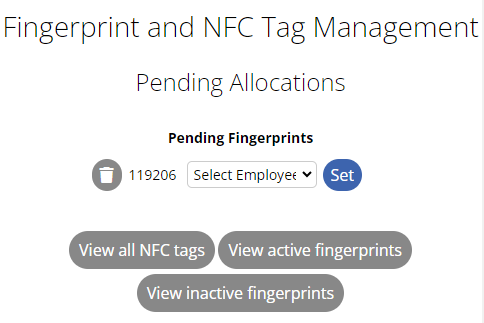
Use either the link from the Microkeeper Timesheets app or the temporary ID number, to identify the employee
Select the employee and click the Set button.
Click the Edit Button on the Timesheet Entry
Select the break you want to Skip
This payment method often also called Pro-Rata Timesheet Allocation is a way to distribute fixed salary hours across different Jobs, based on the actual time clocked at each.
Essentially, the total paid hours remain fixed (e.g, 40 hours), but the "pie" is sliced according to the ratio of the tracked timesheet hours, across different areas worked.
For Example:
| Job | Timeshet Hours | Percentage of Total | Calculation | Allocated Paid Hours |
| Job A | 20 hrs | 40% | 0.4040 | 16 hours |
| Job B | 30 hrs | 60% | 0.6040 | 24 hours |
| Total | 50 hrs | 100% | 40 hours |
This is able to be set in the Employee's Profile. Under Settings > Employees > Edit > Payment and Employment . Salary
You need to tell the ATO that Microkeeper has permission to send them data. You do this through ATO Access Manager.
Step 1: Copy Software ID
- Go to Settings > General > Global > Single Touch Payroll
- Copy your Software ID.
Step 2: Log In
- Go to the ATO Access Manager.
- Log in using your myGovID. (Note: You must be the "Principal Authority" or an "Authorised Administrator" in RAM to do this).
Step 3: Nominate Your Software
- On the left-hand menu, select My hosted SBR software services.
- Click the button Notify the ATO of your hosted service.
Step 4: Search and Link
- Search for Microkeeper
- Click on our ABN link once it appears in the search results.
- Enter the Software ID (SSID): Paste the ID you copied from your payroll software in Phase 1.
- Click Next, review the details, and click Save.
Pro Tip: If you find the online portal confusing, you can also link your software by calling the ATO directly on 1300 852 232. You'll need your ABN and that Software ID handy.
If you are entering your hours manually or editing a shift, you can assign a code directly from your employee console:
Log into Microkeeper and navigate to Rosters > Timesheet
Find the day and shift you want to update.
Look for the Task, Project, or Cost Code dropdown menu next to the start/end times.
Select the correct code from the list.
Click Save or Update at the bottom of the page.
How to export timesheet data from the Timesheet page
Timesheet data can be exported from the Timesheet page.
Navigate to Menu > Rosters > Timesheet
Apply the required filters, such as year, week, location, group, employee, employee status, job, client, day, or timesheet status.
Click CSV Export, then select Export CSV.
Below is a breakdown of the Timesheet page CSV file
| Column Name | Description |
|---|---|
| Employee | The employee's full name. |
| Date | The date of the timesheet entry. |
| Clock on | The shift start time. |
| Clock off | The shift end time. |
| Break | The unpaid break duration, in minutes, applied to the timesheet row. |
| Hours | The net paid hours for the row after unpaid breaks are deducted. |
| Job | The job title linked to the timesheet entry, if applicable. |
| Note | The note or description recorded against the timesheet entry. |
How to export timesheet data from Reports
Timesheet data can also be exported from the Reports page.
Navigate to Menu > Reports
Select the required reporting period, date range, pay cycles, and group.
Find Timesheet Export.
Select Export as... > CSV
Below is a breakdown of the Reports Timesheet Export CSV file
| Column Name | Description |
|---|---|
| Employee Name | The employee's full name. |
| Username | The employee's Microkeeper username. |
| Payroll ID | The employee's payroll ID. |
| Employee ID | The employee's third-party employee ID, if applicable. |
| Date | The date of the timesheet entry. |
| Clock On | The shift start time. |
| Clock Off | The shift end time. |
| Original On | The original clock-on time before editing, if applicable. |
| Original Off | The original clock-off time before editing, if applicable. |
| Who Changed On | The user who changed the clock-on time, if applicable. |
| Who Changed Off | The user who changed the clock-off time, if applicable. |
| Unpaid Breaks | Unpaid break minutes calculated for the timesheet row. |
| Paid Breaks | Paid break minutes calculated for the timesheet row. |
| Hours | Net hours after unpaid breaks are deducted. |
| Job ID | The internal Microkeeper job ID linked to the timesheet entry. |
| 3rd Party Job ID | The third-party job ID linked to the job, if applicable. |
| Job Title | The title of the job linked to the timesheet entry. |
| Client ID | The client ID linked to the job, if applicable. |
| Client Business | The client business name linked to the job, if applicable. |
| Client Contact | The client contact name linked to the job, if applicable. |
| Approved | The approval status value recorded against the timesheet entry. |
| Who Approved | The user who approved the timesheet entry, if applicable. |
| Method On | The clock-on method. |
| Longitude On | The clock-on longitude, if GPS data is available. |
| Latitude On | The clock-on latitude, if GPS data is available. |
| Accuracy On | The clock-on GPS accuracy, if GPS data is available. |
| Method Off | The clock-off method. |
| Longitude Off | The clock-off longitude, if GPS data is available. |
| Latitude Off | The clock-off latitude, if GPS data is available. |
| Accuracy Off | The clock-off GPS accuracy, if GPS data is available. |
| Note | The note or description recorded against the timesheet entry. |
Note on breaks
The Reports Timesheet Export does not consolidate timesheet rows together for Break Rule application. This means that is two shifts are adjacent, such as 09:00-12:00 and 12:00-15:00, the Reports export will calculate Break Rules against each row separately rather than treating them as one joined shift. For timesheet data with consolidated shifts, please use the Timesheet page CSV export.
No, you not lose direct access. A cancelled, deactivated or Suspended Microkeeper account cannot access account data.
To regain access, you must reactivate your account, which will subject you to standard billing for that monthly reactivation period.
Microkeeper recommends to export all necessary reports before cancellation to avoid additional monthly charges.
Yes. If you post payroll journals in your own accounting system (and are not using Microkeeper's built-in Accounting Export to Xero, MYOB, Reckon, etc.), you can pull the payroll detail you need with the Developer API and build your own export or GL file on your side.
Note: if we don't have your accounting system supported, contact our support team to see if it is on our roadmap
You do not need Microkeeper account codes, journal descriptions, or tracking categories. You apply your own general ledger mapping to the amounts and descriptions returned by the API.
Before starting, complete the Hello World tutorial and read Process and get payroll data via developer API especially the section Retrieving Payroll Data or a List of Payruns.
Which API action to use
Use get_payroll to download completed payrun data in JSON.
Use get_payrun_list only if you need a lightweight list of payruns (dates and identifiers) without full payslip detail for example, to let a user pick a payrun before calling get_payroll.
How this differs from Microkeeper Accounting Export
Microkeeper's Accounting Export report is designed to push pre-mapped journal lines into connected accounting software. It stores GL accounts and tracking against pay types inside Microkeeper.
get_payroll returns the same underlying payroll information as payslips and payroll reports payments, expenses, deductions, tax, and net broken down line by line. Your application decides how to group amounts and which accounts to use.
Step 1 Request payroll data
Set the mk_action and mk_data variables.
| Variable name | Values and example |
| mk_action | get_payroll |
| mk_data | By payment date range (up to 365 days) { "start_date":"2025-07-01", "end_date":"2025-07-31" }By specific payrun(s) { "payrun_id":[{ "PCID":0, "year":2018, "run_id":48 }] }Optional limit to certain staff { "start_date":"2025-07-01", "end_date":"2025-07-31", "EmployeeID":["A111","A222"], "eusername":["john_smith"], "EID":[3,4] } |
Important
- Only payruns that have finished processing are returned. If a payrun is still calculating, the API will return an error until it is complete.
- Request the same pay cycle and date range you would use when running payroll in Microkeeper. For a single payrun, using payrun_id is often clearer than a wide date range.
Step 2 Data to use for your export
The response contains one or more payruns under data runs. Each payrun has run_data (header) and payslips (one record per employee).
Payrun header run_data
Use these fields for journal dating and references:
| Field | Typical use in your export |
| payment_date | Journal or payment date (YYYY-MM-DD) |
| period_start / period_end | Pay period covered by the run |
| PCID, year, run_id | Unique payrun reference (e.g. in memo or batch ID) |
| period | weekly, fortnightly, semi-monthly, monthly |
| pay_cycle_title, abn, abn_name, abn_trading | Entity / pay cycle labelling (may be omitted on legacy accounts check before use) |
Line detail pay_list, exp_list, ded_list
For GL mapping, most integrators work from the line lists on each payslip rather than only the payslip totals.
| List | What it contains | Fields commonly used for mapping |
| pay_list | Wages and other payments | note, value, hours, date, LID, ROID, JID, class, rate, mult, STP |
| exp_list | Employer expenses (e.g. super guarantee, salary sacrifice) | note, value, class (e.g. SUPER3 for employer SG) |
| ded_list | Employee deductions | note, value, class (e.g. FEES, GIVE, SUPER) |
note is the pay or deduction description (e.g. Basic Rate, Super-Job C, Union Fees). Map this together with class and cost centre IDs to your own accounts.
value is the dollar amount for that line.
LID, ROID, and JID are Microkeeper Location, Role, and Job IDs. Use them in your mapping rules, or resolve to names in Microkeeper (Jobs, Locations, etc.) if your export needs readable labels.
Refer to the Payments Classification Chart for payment class values returned on pay_list (e.g. Normal, Overtime, Allowance).
Payslip totals tax and net
Each payslip also includes summary fields useful for balancing your journals:
| Field | Typical use |
| payment, expense, taxable | Reconcile to summed pay_list / exp_list |
| deduction | Reconcile to ded_list |
| tax | PAYG withholding for the employee sum across payslips for a run-level PAYG line if required |
| net | Net pay sum for a wages payable / bank clearing line |
| hours | Total hours for the period |
Employee identifiers eusername, EID, and EmployeeID are included if you need per-employee exports or to match staff in your system.
Super and leave (optional)
super_fund_detail fund name, ABN, and USI keyed by super_fund on each payslip.
leave_accrual leave accrued and balances for the payrun (if your reporting needs them). Standard accounting exports usually focus on pay_list, exp_list, ded_list, tax, and net.
Step 3 Build your export
Microkeeper returns data per employee per payrun. Your application typically:
1. Loops through each payrun in runs.
2. Uses run_data.payment_date (and optionally period_start / period_end) on every journal line.
3. Groups pay_list, exp_list, and ded_list lines by the combination you care about for example note + class + JID, or by employee if you export separately.
4. Sums value for each group and assigns your own GL accounts.
5. Adds run-level lines from summed tax (PAYG) and net (wages payable) if your chart of accounts expects them.
This is the same information you would review on payslips in Microkeeper; the API simply delivers it in a structured format for your software.
Tips and limitations
Processing payroll via API If you use add_payroll as well, remember that totals you send may differ from payslip totals after Microkeeper calculates super, leave, and other rules. Use get_payroll after processing for an accurate picture for export. See the note in the main payroll API guide under Response for add_payroll.
Super on add_payroll Do not send super as a payment when processing payroll; Microkeeper calculates it. When getting payroll, employer super appears on exp_list (often with class SUPER3).
Locked payruns Locked payruns cannot be reprocessed via add_payroll; get_payroll can still be used to read historical data.
Date range A single request can cover up to 365 days. For large employers, request one payrun or a narrow date range per call.
Related guides
Process and get payroll data via developer API (full field reference for get_payroll)
How do I set up a per-kilometer rule?
Navigate to Settings > Payroll Rules > Extra Rules and configure a new rule with these settings:
Rule Name (Code): Enter a name ending with @ and no spaces (e.g., Drive@). This acts as the trigger code.
Group: Select the employee group this rule applies to.
Rate: Enter the dollar amount paid per kilometer (e.g., 0.85 for 85c/km).
Apply after: 0
Timesheet shift exist: NA
Multiplier: 0
Classification: Allowance
How do employees log their kilometers?
Add the code and the number of kilometers directly into the timesheet notes for that shift using the format Code@KM.
Example: To pay an employee for 50 kilometers, type Drive@50 into their shift notes. Microkeeper will automatically multiply 50 by your preset rate and add the total to their payslip.
Most payroll reports are based on pay periods, not the pay period dates.
The pay period shows when the employee worked. The payment date shows when the wages were paid. For reporting tax, STP, super and financial year totals, the payment date is usually the date that determines which month, quarter, or financial year the pay belong to.
Example: if the pay period is Monday 24th June to Sunday 30th June, but the payment date is Monday 1st July, that pay will usually appear in July and the new financial years reports. This is expected for work performed in June.
You do not need to change your pay period to make reporting line up with the month end. Keep the pay period as actual dates worked, and use the payment date when checking reports that are based on wages.
In most cases, payroll reports use the payment date. The pay period records when the work was performed, but the payment date determines which month, quarter or financial year the pay is reported in. For example, a June pay period paid on 1 July will generally appear in July/new financial year reports.
Why doesn't my Final STP export match Payroll Summary Gross Taxable?
The Final Payrun STP CSV export and the Payroll Summary report present payroll information differently.
The Final STP export splits payments into STP reporting categories, while Payroll Summary shows one Gross taxable figure for each employee.
They can reconcile exactly, but only after you:
- add the correct STP payment amount columns;
- include all payment types and continuation rows for the employee;
- subtract values from Salary Sacrifice - Amount, but not Super - Amount; and
- check Payments Data for payments intentionally excluded from STP, such as reimbursements and
SKIP-classified payments.
Important: Payroll Summary Gross taxable may include a payment that is deliberately excluded from STP. A difference does not automatically mean payroll data was not sent to the ATO.
How to compare the reports
For the employee in the Final STP CSV export, add the following payment amount columns:
+ OTE Gross column V
+ INB exempt foreign income column W, if used
+ Overtime column X
+ Bonus Commissions column Y
+ Directors Fees column Z
+ CDEP Payment column AA
+ Leave - Amount column AC, including every leave type
+ Lump Sum - Amount column AF
+ Termination - Tax-free Amount column AI, if applicable
+ Termination - Taxable Amount column AJ, if applicable
+ Allowance - Amount column AN
- Salary Sacrifice - Amount column AR
= Comparable STP payment total
Include every amount for the employee. Some STP categories can continue onto the rows immediately below the employee with a blank Username.
For example, an employee may have both:
- Leave - Type C cash out of leave; and
- Leave - Type O other paid leave.
Add the adjacent Leave - Amount for both types. Continue including STP rows until the next populated Username.
The same rule applies when there are multiple leave, lump-sum, termination, allowance or salary-sacrifice entries. Add every applicable Amount value for the employee, including values on continuation rows.
Then compare the result with the value under the Gross taxable heading in the employee's Payroll Summary row.
The position of the Payroll Summary Gross taxable column can change when additional expense columns are included. Find the column by its heading rather than relying on a fixed column letter.
If there is still a difference, use the Payments Data report to check for:
- Reimbursements: payments where Class in column R is
RBURS. These are excluded from STP but may still appear in Payroll Summary Gross taxable. - SKIP items: payments where STP Cat in column S is
SKIP. These are excluded from STP and may still affect Payroll Summary.
Use the signed value from Total in column W when adding Payments Data adjustments.
Do not add these STP fields to gross taxable
- Deduction - Amount column AP
- Super - Amount column AT
- Fringe - Amount column AV
- Leave, lump-sum, termination, allowance or salary-sacrifice type fields
- Descriptions, dates or financial-year fields
- Termination - PAYG Withheld column AK
Important: Only subtract values from Salary Sacrifice - Amount in column AR. Do not subtract Super - Amount in column AT.
For termination payments, use the actual Termination - Tax-free Amount and Termination - Taxable Amount fields only. Do not add the ETP PAYG withholding amount to gross taxable.
Worked example
| OTE Gross | $48,250.00 |
| INB exempt foreign income | $0.00 |
| Overtime | $2,180.50 |
| Bonus Commissions | $1,500.00 |
| Directors Fees | $0.00 |
| CDEP Payment | $0.00 |
| Leave - Type C | $1,000.00 |
| Leave - Type O | $2,240.75 |
| Lump Sum - Amount | $1,800.00 |
| Termination payment amounts | $0.00 |
| Allowance - Amount | $420.00 |
| Less Salary Sacrifice - Amount | ($5,200.00) |
| Comparable STP payment total | $52,191.25 |
| RBURS reimbursements from Payments Data | $175.50 |
| SKIP payments from Payments Data | $45.00 |
| Payroll Summary Gross taxable | $52,411.75 |
| Difference after RBURS and SKIP check | $0.00 |
How should I compare PAYG tax?
Compare Payroll Summary Taxes with:
STP PAYG tax column T
+ Termination - PAYG Withheld column AK, from every applicable termination row
= Comparable PAYG tax
The main STP PAYG tax column may be lower when an employee has an ETP because that withholding is reported separately in Termination - PAYG Withheld.
Recommended check
- Confirm the Final STP CSV export and Payroll Summary cover the same financial year and employee or group scope.
- Find the employee in the STP export using Username.
- Include the employee's main row and every continuation row until the next populated Username.
- Add the applicable STP payment amount columns, including every Leave - Amount for all leave types.
- Subtract only Salary Sacrifice - Amount. Do not subtract Super - Amount.
- Compare the result with Gross taxable in Payroll Summary.
- If a difference remains, filter Payments Data for Class = RBURS and STP Cat = SKIP.
- Add the signed Total values for those Payments Data rows.
- If the residual equals the RBURS and SKIP payments, the difference is explained.
- If a residual remains, review the affected employee's payment classifications and STP categories.
The error: Validation errors from Beam Error - EE053 - The provided Electronic Service Address (ESA) is not valid - USI (SMSF Name). This appears when the ESA attached to the SMSF is invalid.
To resolve this issue we recommend to:
- Confirm ESA Details: Contact the employee to confirm that the Electronic Service Address (ESA) provided for their SMSF is correct.
- Update SMSF Settings: Once you have the correct ESA details, update the SMSF settings in your system.
- Navigate to Menu > Settings > General > Super Settings.
- Ensure that the ESA is correctly entered for the SMSF.
- Verify with the Fund: If the issue persists, contact the SMSF directly to verify that all details, including the ABN and ESA, are accurate and up-to-date.
Note for ESA's Superchoice or Australia Post:
The SMSF listed there has an ESA that have been recently been retired - https://www.ato.gov.au/individuals-and-families/super-for-individuals-and-families/self-managed-super-funds-smsf/smsf-newsroom/changes-to-the-register-of-smsf-messaging-providers
- Superchoice ESA retired 5 May 2026
- Australia Post ESA retired 30 June 2026
The SMSF will need to be configured with the new correct ESA. The employee themselves or their tax agent/accountant will know the changes to their new ESA.
You can update this on the Super Setting page - Navigate to Menu > Settings > General > Super Settings once you have the new ESA provider
To Enroll an Employees Fingerprint into Microkeeper,
- Open the Microkeeper Timesheet Software on the device and click the hamburger menu in the top right corner.
- Select Enroll Employee.
- Have the employee press their finger firmly and evenly onto the scanner 4 times (like pushing in a thumbtack), then repeat the process with a second finger.
- Note the number provided by the software upon completion.
- Log in to the Microkeeper website, navigate to HR > NFC & Fingerprint, and assign the pending number to the corresponding employee
An APCA code (also known as a Direct Entry Number) is a unique six-digit number provided by your bank to identify your business when creating electronic direct debits, payroll files (ABA files), and bulk credit transactions.
An APCA code is only required if you will be paying employee wages using an ABA file. It is not required if you are only using the bank account for super payments or deductions.
If you do not require an APCA code, simply enter 0 in the APCA Code field.
Redoing a partial super refund when the total refunded does not equal the total in the reprocess report
Sometimes a super refund is only for part of the original super payment.
For example, the original payment may have included:
- Employer SG
- Salary Sacrifice
- Member Voluntary / After Tax
But the fund may only refund one or two of those amounts.
When this happens, the Redo may be blocked because the system is trying to redo the full original super amount instead of only the refunded amount.
You will see an error message that says "The total refunded (XX.XX) does not equal the total in the reprocess report, this will need to be review and processed manually"
Example
Original super payment:
- Employer SG: $97.19
- Salary Sacrifice: $20.00
- Member Voluntary: $30.00
- Total: $147.19
Refund received:
- Salary Sacrifice: $20.00
- Member Voluntary: $30.00
- Total refunded: $50.00
The system may try to redo $147.19, but only $50.00 was refunded.
To fix this, temporarily remove the amount that should not be redone.
In this example, the Employer SG amount of $97.19 was not refunded, so temporarily add -$97.19 super.
Steps
- Create a temporary Ad Hoc Pay Run.
- Use a payment date within the same super period.
- Use Actions > Add Super.
- Add a negative super amount for the part that was not refunded.
- Run the super Redo again.
- Check that the report total matches the refund amount.
- Process the redo.
- Delete the temporary Ad Hoc Pay Run.
Quick rule
The redo report needs to match the refund amount.
If the report is too high, temporarily subtract the super amounts that were not refunded.
Example:
- Report shows: $147.19
- Refund is: $50.00
- Difference: $97.19
- Add temporary super adjustment: -$97.19
Then redo the payment for $50.00.
To create an allowance with a Fixed amount per Payslip, you create it within the "Extra Earnings" rules area
You can follow these steps:
- Navigate to Settings > Payroll Rules > Extra Rules.
- Create a new rule (or view existing templates like Laundry, Mobile, or Driving Allowance for guidance).
- When configuring the rule:
- Set the Title for the allowance.
- Select the Employee (or group) the allowance applies to.
- Select Fixed to set the amount type.
- Enter the fixed amount as the Value.
- Review the Payments Classification to ensure the correct tax and superannuation are applied.
- Select the appropriate STP category for that payment.
- Once saved, this will automatically be added to every payslip created for that employee.
Note: Allowances are automatically applied based on your pay period (e.g., Fortnightly).
Once a Group has been created, employees can then be allocated to the new or existing Groups.
First go to Manage > Groups.
Then select the Group to allocate employees by selecting the checkbox next to the Group name under the Groups list.
Multiple Groups can be configured at the same time by checking them all.
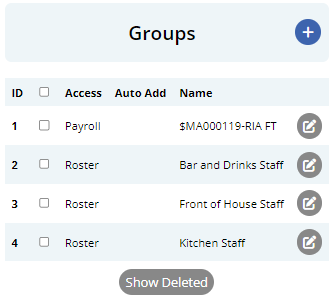
Select the Groups to configure and move to the Employee Allocation and click the Display button to start allocating employees to the selected Groups.
Filters are available to streamline the allocation process -
- Status: Display between Active or Inactive employees
- Employee: Display specific employees
- Groups: Display a specific Group of employees
Select the checkbox to the right of an employees name to assign them to the Group.
You can also use the "Change All" button, to Add or Remove all Staff displayed from the Group.
If you are configuring multiple Groups, hovering over the selection box will indicate which Group you are configuring.
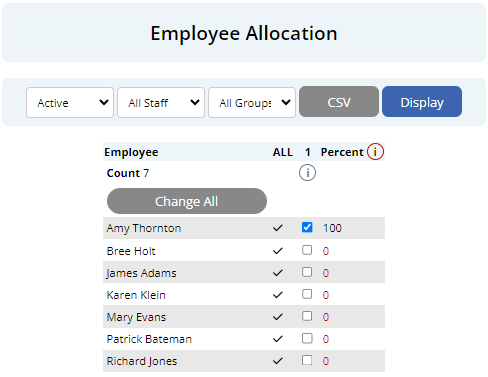
NOTE: Employees can also be allocated to groups on their Employee Profile.
STP and Payroll Summary show the same payroll tax in different ways. Payroll Summary shows one "Tax" total, while the STP report splits withholding across PAYG tax and Employment Termination Payment (ETP) tax. If the gross taxable figures reconcile between the two reports, the tax figure often reconciles once the STP tax categories are added together.
How to compare the reports
Payroll Summary Tax should be compared against the relevant STP tax fields:
+ PAYG tax
+ Termination tax (ETP PAYGW)
= STP comparable tax
An example may show:
| PAYG tax | $9,420.00 |
| Termination tax (ETP PAYGW) | $1,180.00 |
| Comparable STP Tax | $10,600.00 |
| Payroll Summary Tax | $10,600.00 |
| Difference | $0.00 |
Why is tax split on STP?
Payroll Summary stores one tax amount per pay run. When an employee has a taxable termination (ETP) payment, STP reports part of that tax against the termination payment and the remainder as normal PAYG tax. Adding both STP tax amounts brings you back to the Payroll Summary Tax total.
My numbers are not lining up?
- Check you are adding PAYG tax and Termination tax together, not comparing Payroll Summary Tax to the PAYG column alone
- Small differences can occur from rounding when tax is split between PAYG and termination
- Foreign Tax Paid on STP is separate from Payroll Summary Tax and should not be included in this comparison
Microkeeper requires you to enter the employee's salary before super, rather than the total super-inclusive package.
To calculate the pre-super salary, divide the total package by 1 plus the applicable Super Guarantee rate.
Example: $100,000 package inclusive of super
Using a 12% Super Guarantee rate:
| Calculation | Amount |
| Total package, including super | $100,000.00 |
| Calculation | $100,000 1.12 |
| Salary entered into Microkeeper | $89,285.71 |
| Expected annual super | $10,714.29 |
| Total salary plus super | $100,000.00 |
Enter $89,285.71 per annum as the employee's salary in Microkeeper.
Microkeeper will then calculate super on that salary.
Do not enter the full $100,000 as the salary, as Microkeeper would calculate super in addition to it, resulting in total remuneration of approximately $112,000.
The pre-super salary should generally be reviewed at the beginning of each financial year when the Super Guarantee rate or relevant super thresholds change.
For high-income employees, the Maximum Super Contribution Base may also affect the calculation.
After a STP submission has been successfully submitted through Microkeeper, your STP log should be updated with the status "Successful".
The successful STP submission can be found on your ATO portal via MyGov or ATO Online services.
Go to the "Employees" section
Select STP Reporting
Select the correct fiscal year the STP report was made
You should be able to see that the STP submission made through Microkeeper is on the list.
Expand the STP submission and check the "Submission ID". This should match the "Message ID" displayed on Microkeeper.
Roster shifts can be imported via CSV from the Roster Calendar.
- Navigate to Menu > Rosters > Roster Calendar.
- Select the relevant week and locations.
- Click More Actions.
- Optional: Select Export CSV to download a correctly formatted template containing the current roster data.
- Select Import CSV and choose your CSV file.
- Review the number of existing shifts that will be replaced.
- Click Confirm import or Confirm overwrite to complete the import.
Prepare your CSV file with the following columns in the exact order shown. The first row must contain column headings and will not be imported. If an optional field is not required, leave its column blank.
- Employee (Required): Enter the employee's Username, EID, or EmployeeID. Microkeeper will attempt to match the employee using any of these identifiers.
- Date (Required): Enter the shift date in DD/MM/YYYY format.
- Start Time (Required): Enter the shift start time in HH:MM format.
- End Time (Required): Enter the shift end time in HH:MM format.
- Location (Required): Enter the Location Title or LID.
- Role: Enter the Role Title or ROID. This field is required when the selected location uses roles.
- Job (Optional): Enter the Job Title, JID, or Third Party ID.
- Break Start Time (Optional): Enter the time the break begins in HH:MM format.
- Note (Optional): Enter any additional information for the shift.
- Hide (Optional): Enter 0 to make the shift visible or 1 to hide the shift. If left blank, the shift will be visible.
Important: Microkeeper determines the affected date range using the earliest and latest shift dates in the CSV. Existing shifts for every location included in the CSV will be replaced throughout that date range. You will be shown the number of existing shifts affected before confirming the import.
The maximum date range allowed in one CSV import is 62 days.
Example CSV format:
| Employee | Date | Start Time | End Time | Location | Role | Job | Break Start Time | Note | Hide |
|---|---|---|---|---|---|---|---|---|---|
| john_smith | 17/08/2026 | 09:00 | 17:00 | Melbourne Office | Supervisor | Client Support | 12:30 | Opening shift | 0 |
| 1234 | 18/08/2026 | 08:30 | 16:30 | Warehouse | Storeperson | 12:00 | 0 |
The ATO uses STP reports to pre-fill PAYG withholding labels W1 and W2. However as advised by the ATO, the primary source of data should be the software and payroll records.
As STP data in Microkeeper is submitted YTD date, we will always provide an up to date total amount to the ATO when submitting STP data.
You can review the data we are sending to the ATO via STP before processing the submission.
Reasons why the ATO activity statement may not match the STP in Microkeeper:
- Update Events - Update STP events will not display with a value on the ATO's activity statement.
- Multiple Submit Events - Multiple submit events for the same Payrun will show as duplicate values on the ATO's activity statement.
- Missed STP - Submissions that have not been lodged to the ATO will not be included in PAYG withholding pre-fill
Skills and Personal Files are both used for employee documents, but they serve different purposes.
Use Skills when the same document or process applies to many staff, or when the employee needs to upload a file themselves.
Use Personal Files when the document is specific to one employee and is issued by HR or admin for that person to sight and sign.
When to use Skills
Use the Skills Matrix if:
- The document or process is reused across a group of staff
- Employees need to upload a certificate, licence, or other file
- The skill needs an expiry date, reminder emails, or manager approval
- Only placeholder values change between employees, such as a standard employment contract
Examples: First Aid Certificate, Working With Children Check, RSA, site induction, drivers licence, reusable contracts.
Navigate to Menu > Settings > Skills Configuration to set up a skill.
When to use Personal Files
Use Personal Files if:
- The document is unique to one employee
- The employee only needs to sight and sign
- The content is not a reusable template shared across staff
Examples: Disciplinary Action, Performance Review, Incident Report, a one-off employee contract, Workers Compensation documents.
Navigate to Menu > Settings > Employees > click Edit for the applicable employee > within the Employee Profile, Personal Files.
How do I set up and pay subcontractors in Microkeeper?
Microkeeper supports paying subcontractors through payroll, including calculating super where required. You can also pay their invoices through your accounting software and use Microkeeper to process only their super contributions.
What is the difference between an employee and a subcontractor?
An employee works in your business under an employment relationship. A subcontractor generally operates their own business and provides services to yours.
Having an ABN, issuing invoices or being registered for GST does not automatically make someone a contractor. The classification depends on the arrangement, including control over the work, financial risk and the ability to delegate. Refer to Fair Work's independent contractor guidance if you need help determining the relationship.
Some contractors are also entitled to super. Confirm the correct classification, withholding treatment and super obligations with your accountant or adviser before configuring their profile. Selecting an employment type in Microkeeper does not determine their legal status.
How do I set up a subcontractor?
Navigate to Menu > Settings > Employees > Edit for the person.
Under Payment and Employment > Employment Type, select:
| Employment Type | How Microkeeper handles it |
|---|---|
| Sub-Contractor | Supports contractor payments without automatically calculating super. |
| Sub-Contractor with Super | Supports contractor payments and calculates super on eligible payments using the configured super settings. |
Selecting either option displays the contractor ABN and Business Name fields. These details appear on the contractor payment document. If Business Name is blank, their name is used.
Also review:
- Payment settings: Enter the agreed rate and select how payments will be calculated.
- Tax Scale: Select Sub-Contractor where the contractor handles their own income tax and no PAYG withholding applies. Employment Type and Tax Scale are separate settings.
- Banking: Enter their bank details if you intend to pay them through the payroll ABA file.
- Super details: For contractors receiving super, enter their fund and member details and review the applicable super settings.
- Entitlements: Review the leave settings, especially when changing an existing employee to a contractor.
If PAYG withholding applies, including under a voluntary agreement, contact support before using the standard contractor setup.
Can I pay subcontractors through Microkeeper?
Yes. Both contractor employment types support payments through payroll.
Configure their payment settings, process the relevant payrun and review the resulting payslip. For Sub-Contractor with Super, check that the correct payments attract super.
Contractor payments with positive net pay are included in the wages ABA export. Contractor status does not automatically exclude them.
If you also record their invoice in accounting software, reconcile it against the payroll payment so the invoice is not paid twice.
How does Microkeeper handle GST?
Microkeeper does not have a dedicated payroll GST field or payment class. Record contractor invoices and their GST treatment in your accounting software.
Where invoices include GST, the straightforward workflow is to pay them through your accounting software and use Microkeeper for any required super contributions.
GST is excluded when calculating contractor super. Do not enter a GST-inclusive invoice total as an ordinary payment and assume Microkeeper will separate the GST automatically. See ATO guidance on contractor super.
Can I process only their super through Microkeeper?
Yes. If their invoices are paid elsewhere:
- Set their Employment Type to Sub-Contractor with Super and confirm their super fund details.
- Include them in the relevant payrun and open their payslip.
- Ensure the payslip does not also include the invoice payment.
- Select Add Super > SG and enter the compulsory super contribution amount.
- Check that the super total is correct and the payslip net pay is $0.00.
- Complete the separate super payment process as normal
Add Super creates two offsetting Fix Super entries so super can be calculated without increasing net pay. Leave these entries in place; you do not need to create them or select their payment classes manually.
How do I keep a super-only contractor out of the wages ABA file?
Check that their payslip has $0.00 net pay. Zero-net payslips are excluded from the wages ABA export.
Also check for separate expenses or deductions assigned to bank accounts, as these can generate their own ABA payments.
Removing personal bank details is not an exclusion method. If the contractor has net pay but missing bank details, Microkeeper will show an error and prevent the ABA file from downloading.
Are subcontractors included in STP reporting?
Microkeeper excludes profiles set to Sub-Contractor or Sub-Contractor with Super from STP reporting. Selecting an STP category on a payslip payment does not override that exclusion.
Super payments through Beam are a separate process from STP reporting.
If a contractor has a withholding agreement or has previously been reported through STP, confirm the required treatment with your accountant and contact support before changing their setup.
When should contractor super be paid?
Eligible contractor super is subject to the current Payday Super requirements. Contributions generally need to reach the fund within seven business days after payday, allowing time for clearing-house processing.
Paying contractor invoices outside Microkeeper does not remove the need to process their super on time. Refer to the ATO's current Payday Super guidance.
Leave Blockouts
Use Leave Blockouts to mark busy periods when leave requests should display a warning or be blocked. Blockouts do not cancel leave that was already requested or approved, and they do not change payroll.
Users with Leave access can view blockouts. Settings access is required to add, edit, deactivate, or delete them.
Open Leave Blockouts
- Navigate to Menu > HR > Leave Review
- Click "Blockouts" to open the Leave Blockouts page
Add a blockout
- Select Add Blockout.
- Optional: select a template under Start from a template. Review all pre-filled settings before saving.
- Enter a clear Title, such as Christmas Period or EOFY Freeze.
- Enter an optional Message. If left blank, Microkeeper uses the standard message for the selected severity.
- Choose the Severity.
| Severity | Effect |
|---|---|
| Warn only | Staff see a warning but can still submit the request. |
| Block staff | Staff are blocked. A manager can still submit the request on behalf of an employee. |
| Block staff and managers | Staff and managers are blocked. A user with Settings access can still submit on behalf of an employee. |
- Choose who is affected under Applies to:
- All staff applies the blockout to everyone.
- Selected groups and staff lets you choose one or more groups and/or individual staff. An employee only needs to match one selected group or be named directly.
- Choose the date method:
- Fixed dates: enter a start and end date in dd/mm/yyyy format.
- Every year: choose the start and end day and month. If the end date is earlier than the start date, the period continues into the following year. For example, 15 Dec to 15 Jan.
- Choose which Leave typesare affected:
- All except Personal Leave
- All leave types
- Choose to select specific active leave types.
- Leave the active switch on if the blockout should apply immediately.
- Select Save Blockout.
The new blockout appears in the list with its dates, affected staff, and leave types.
How blockouts affect leave requests
When a leave request matches an active blockout by employee, leave type, and date, Microkeeper applies the selected severity.
- Warn only displays a warning before the request is submitted.
- Block staff prevents staff from submitting the request, but managers can submit on their behalf.
- Block staff and managers prevents both staff and managers from submitting the request. Settings access can submit on behalf.
If more than one active blockout matches a request, the highest severity applies. Leave that has already been requested or approved is not changed, and approved leave is paid as normal.
Manage existing blockouts
- Use Search Blockouts to find a rule.
- Select the pencil button to edit it.
- To deactivate a blockout without deleting it, turn off the active switch and select Save Blockout. The blockout remains visible with an Inactive label.
- To permanently remove it, open the blockout, select Delete, and confirm.
Common mistakes
- Choose Block staff and managers if managers must also be prevented from submitting requests.
- When using Selected groups and staff, select at least one group or employee.
- When using Choose under Leave types, select at least one leave type.
- Fixed dates require both a start and end date in dd/mm/yyyy format.
- Use Every year for recurring periods such as Christmas shutdowns.
- Check that the active switch is on. An inactive blockout does not apply to new requests.
- Blockouts control leave-request behaviour; they do not alter payroll or existing leave.
Onboarding Review
Onboarding Review shows which employees have completed onboarding, what information is still missing, and which onboarding steps are causing the most follow-up. Use it to review staff progress, focus on payroll-critical information, send eligible Welcome Letters, and export the results.
What this guide covers
- Open Onboarding Review and select a staff cohort.
- Review onboarding progress by employee.
- Find common outstanding steps by field.
- Focus the report on payroll-critical information.
- Read the completion trend graph.
- Send Welcome Letters and export report data.
- Understand the statuses, limits, and report calculations.
Open Onboarding Review
- Navigate to Menu > Settings > General > Employees.
- Click the Staff Added card. The card opens Onboarding Review.
The page requires Settings access or Employee Access set to Add/Edit or Edit. Managers with location-scoped access only see employees within their managed scope.
Page overview
When Onboarding Review opens, the page is arranged into these areas:
- Exclude staff and Exclude steps adjust which employees and onboarding requirements are included.
- Completion by month view recent onboarding completion trends.
- Staff by start date choose the date period for the employee table and cohort totals.
- Summary cards see staff started, completion, outstanding work, and Welcome Letter counts.
- By Employee and By Field switch between employee follow-up and bottleneck analysis.
- Search and CSV actions find records or export the current report.
Select the staff cohort
The Started filter controls which employees appear in the report tables and page totals. Choose one of the available periods:
- Last month the default period.
- Yesterday.
- Last 4 days.
- Last 7 days.
- Last 30 days.
- Last 3 months.
- Starting in the next 30 days useful for preparing for upcoming starters.
- Everyone still outstanding includes recent and upcoming employees who still have work outstanding.
- Custom enter a From and To date.
The report groups staff by their employee start date. It does not use the date of the employee's last profile update.
Click Apply after changing the period.
Exclude staff from the report
Use Exclude staff to remove categories from the employee table, cohort totals, graph, and CSV results. The separate Never sent a Welcome Letter total is based on the full managed scope and is not changed by the selected cohort or these exclusions. Available categories include:
- No longer active
- Never started
- Fully onboarded
- Never sent a welcome letter
- No valid email
- Unsubscribed from email
- Reminders finished
Select one or more categories, then click Apply.
Exclude onboarding steps
Use Exclude steps when you want to focus the report on particular requirements. The available steps are built from the onboarding requirements found in the selected staff data.
You can exclude individual steps or choose Not Payroll Critical. This preset removes non-payroll steps from the report and leaves the information identified as necessary to pay and report an employee, including:
- Date of birth
- Home address
- Tax File Number Declaration
- Tax File Number
- Bank details
- Super fund
- Super member number, when applicable
Excluding a step changes the progress, completion, and outstanding percentages shown in the report. It does not remove the step from the employee's onboarding requirements.
Review progress by employee
The summary cards provide a quick view of the selected report:
- Staff started the number of staff in the selected cohort after exclusions.
- Fully onboarded the number and percentage with no included steps outstanding.
- Steps outstanding shown when Everyone still outstanding is selected; the total number of incomplete steps.
- Never started staff with every currently included onboarding step outstanding.
- Never sent a Welcome Letter the number of eligible managed staff who have not received their Welcome Letter.
The Never sent a Welcome Letter count can include eligible staff outside the selected start-date period. It is based on the manager's full managed scope because the Send to all action is not limited to the selected cohort.
Use the By Employee tab
- Select By Employee.
- Review the list, which is sorted by the highest number of outstanding steps first.
Use the By Field tab
- Select By Field
- Review the list, which is sorted by which fields have the outstanding count
Use Add Super on the employee's payslip to add a one-off extra superannuation payment when the week ending payrun already exists. This adds either Super Guarantee (SG) or Reportable Employer Super Contributions (RESC). It does not create a new ad-hoc payrun.
Add the extra superannuation to the existing payrun
- On the employee's payslip.
- Click Actions, then Add Super.
- Set Type:
- SG Super Guarantee. This is the default.
- RESC Reportable Employer Super Contributions.
- Enter the extra superannuation Amount. Use a negative amount to subtract from the super total.
- Click Add Super.
What appears on the payslip
Microkeeper adds two balancing payslip items so the extra super is calculated without changing the employee's net pay. They cancel each other out and can be ignored:
- SG two Fix Super items.
- RESC a RESC item and a RESC Liability item.
This updates the super amount on the payslip. Paying the contribution is done through the regular Pay Day super process.
If this is not an extra employer SG or RESC amount
- For concessional / before-tax salary sacrifice or non-concessional / after-tax employee super, use an Expense or Deduction instead of Add Super. See the Deduction and Expense Rules guide and How do I add a before tax salary sacrifice super contribution.
How do I calculate my long service leave in Victoria as one week of leave for every X weeks of work?
In Victoria, the rate is 1 week of leave for every 60 weeks of work.
Most Victoria workers are entitled to 2 months (8.667 weeks) of long service leave after 10 continuous service.
The accrual rate can be set to 1 week for every 60 weeks of work based on the calculation of:
- Total Service in Weeks: 10 years * 52 weeks = 520 weeks
- Weeks of Work per Week of Leave: 520 weeks of service / 8.667 weeks of leave = 60 weeks.