Microkeeper Biometric Timesheet Software
Microkeeper Timesheet Software allows employees to clock their worked hours using Fingerprint or NFC tag technology.
Important information before you begin
Windows PC Requirements
| PC running windows 7, 8, 10 or 11 |  |
| Reliable internet connection |  |
| Fingerprint scanner or NFC reader with NFC tags | Pricing |
Downloading Microkeeper Timesheet Software
Installing and setting up the Microkeeper Timesheet Software
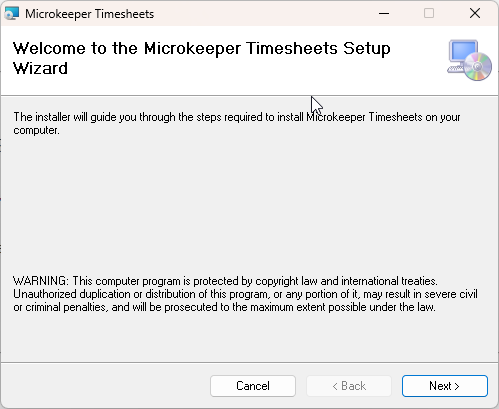
Run the Microkeeper Timesheets installation software after downloading.
Proceed through the Microkeeper Timesheets Setup Wizard.
Connect either the Fingerprint Scanner and/or the NFC reader to the PC.
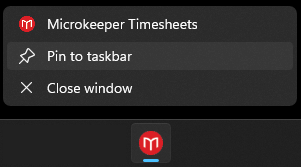
Run Microkeeper, Right click > Pin to the start bar
Configuring the User Settings
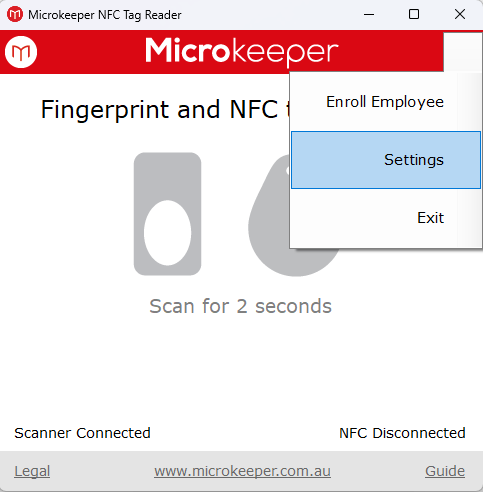
Click the hamburger Menu on the top right to open the menu options > click Settings

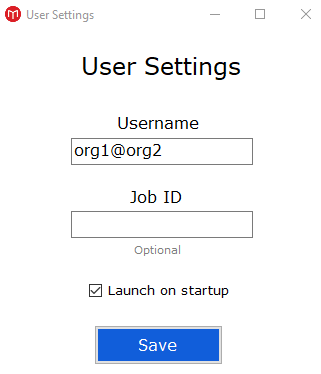
In the User Settings window configure -
- Username: The Username of the Business. This can be found in Menu > Settings > General > Global - Developers > under Username.
- Job: If the hours of worked need to be assigned to Jobs enter the Job ID.
How to find Job ID - Navigate to Menu > Manage > Jobs.
Then in the list of jobs, hover the mouse over the ID number of the job you wish to track, and a small box containing the Job ID will appear. EG The below Job ID is 1234.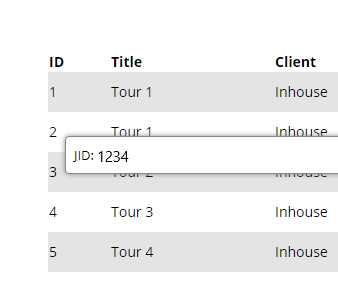
Enrolling an Employee to the Microkeeper Timesheet Software
First time employees must be enrolled to the Microkeeper Timesheet Software. There are different instructions depending on their clocking option.
Enrolling a new Fingerprint for an Employee
Click the menu > Enroll Employees
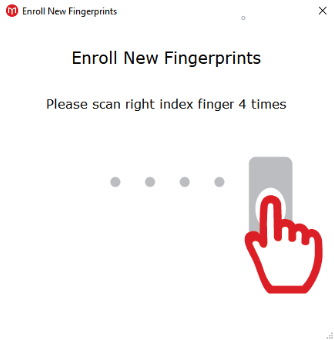
An "Enrol New Fingerprint" window will pop up prompting you to scan the employees fingerprint.
For comfort and reliability, it is recommend that you use the index finger.
- Place the entire pad of your finger not just the tip or the side of your finger on the centre of the oval window of the fingerprint reader.
- Apply steady, even pressure on the oval window. Do not roll or swipe your finger
- Hold your finger on the oval window until you see the light under the window blink. This indicates that the fingerprint reader has scanned your fingerprint.
- When the light blinks, lift your finger from the oval window. If the fingerprint reader scans your fingerprint, as indicated by the blink, but the Microkeeper software does not authenticate you after several attempts, try re-enrolling your fingerprint.
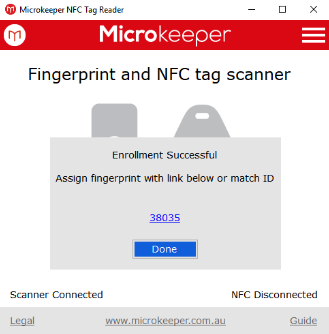
Once the fingerprint has been successfully scanned, an "Enrolment Successful" window will display a match ID.
See Assigning a Fingerprint or NFC tag to an Employee on instructions on how to allocate the match ID to an employee.
Enrolling a NFC tag to an employee
Place the NFC tag on the on the NFC reader.
Once the NFC tag has been successfully scanned, a "NFC tag added" window will display a match ID.

Assigning a fingerprint or NFC tag to an employee
A registered fingerprint or NFC tag can be assigned through the Microkeeper Portal.
Navigate to Menu > HR > NFC & Fingerprint
Note: Access Control - NFC tags, Fingerprints, Facial is required.
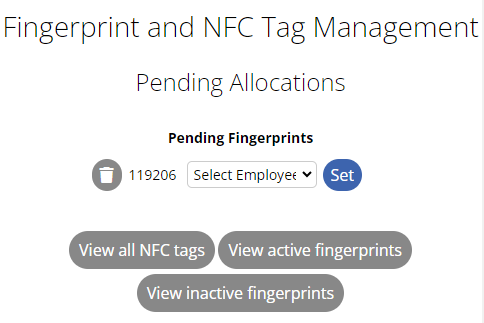
Use either the link from the Microkeeper Timesheets app or the temporary ID number, to identify the employee
Select the employee and click the Set button.
Clocking on and off with Microkeeper Timesheet Software
Ensure the Microkeeper Timesheet software is open and running.
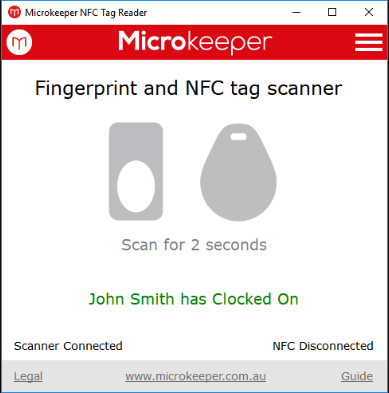
Place finger on scanner or place NFC tag on NFC reader
If successful the employee will be clocked on or off
If unsuccessful an error message will be displayed
Feel free to call Microkeeper if you have any issues
Setting up Multiple Organisations
Timesheet software can be configured so employees across multiple Microkeeper organisations can clock in from the same Fingerprint scanner.
User Settings configuration for multiple organisations
When configuring the User Settings of the Timesheet software, set the Username with organisations separated by an "@" symbol.
Example:
Username: org1@org2
A setup like below will allow employees from both "org1" and "org2" to clock in from the same fingerprint scanner.
Important note on assigning Fingerprints with a multiple organisation configuration
When the Timesheet software is configured for multiple organisations, assigning fingerprints to employees will not be available.
Instead you will need to reconfigure the Username under User Settings to a single organisation to assign the fingerprint to that employee.
Troubleshooting the Fingerprint Scanner
- Place the finger high on the glass and press down firmly
- Make sure that the Fingerprint scanner is clean and dry.
- Make sure fingers are dry if they are wet or use a moisturizer if they are too dry.
- Check the condition of fingerprints. Scar tissue and wrinkles can change the fingerprint. A fingerprint may have to be removed and then registered again.
Maintenance of the Fingerprint Scanner
The condition of the fingerprint reader affects its ability to obtain a good quality scan of a fingerprint. To maintain the fingerprint reader, the oval window should be cleaned periodically as follows:
- Press the sticky side of a piece of adhesive cellophane tape across the oval window, and then peel it away.
- Alternatively, dampen a cloth with warm water and gently wipe the oval window.
- Do not rub the oval window with an abrasive material, including paper.
- Do not poke the oval window coating with your fingernail or with any other item, such as a pen.
- Do not submerge the fingerprint reader in liquid.
- Do not spray liquid on the fingerprint reader or allow liquid to drip inside.
- Do not use the fingerprint reader if it has incurred damage, such as a cracked of frayed cord or broken connector.
- Using anything other than the above method will void the warranty
- If you are unsure consult a Microkeeper team member before cleaning
Damaged Scanner
How can you determine if the fingerprint scanner has been damaged?
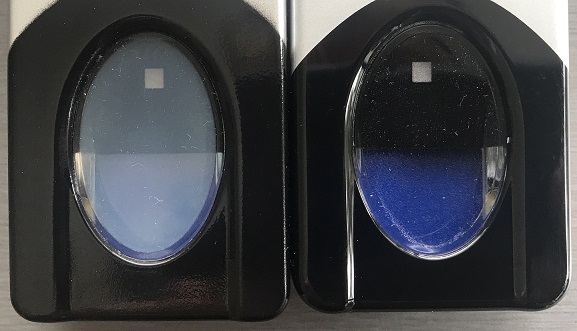
Both scanner were in operation for 2 years.
The scanner on the left is cloudy, is has been cleaned with a corrosive that has damaged the scanning window, it will not be able to detect fingerprints.
The scanner on the right is clear, it's working as expected.