Locations
Locations are used to set up and manage distinct areas of work within the business.
These can be physical locations like different stores, offices or work sites. Or they can be organizational structures such as departments, teams or project groups.
Navigate
Menu > Settings > General > Locations
What are Locations used for?
Rostering and Workforce Management:
Multiple Locations can be set up to define different work areas or departments in the organization, allowing a clear breakdown structure to help manage the workforce.
Groups of employees can be assigned to specific locations to help streamline the rostering purposes.
Each Location can be allocated a corresponding colour to help create visual distinction between locations.

Clocking hours through Geofencing:
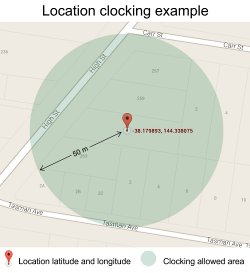
GPS coordinates can be configured to create a geofenced area where employees can clock in and out of their shifts.

Manager Designation:
Locations can be associated to one or many managers. Managers can be configured to only access the employees attached to their managing Locations such as handling, timesheet approvals, rostering or managing leave approvals.
Job tracking:
A location can be assigned a job, if an employee clocks on at a location the job assigned to that location will be attached to that timesheet entry.
This allows the business to track how many hours have been worked at what location.
Creating a New Location
Click the Add Location button to begin configuring the new Location.
Configuring the Location Settings
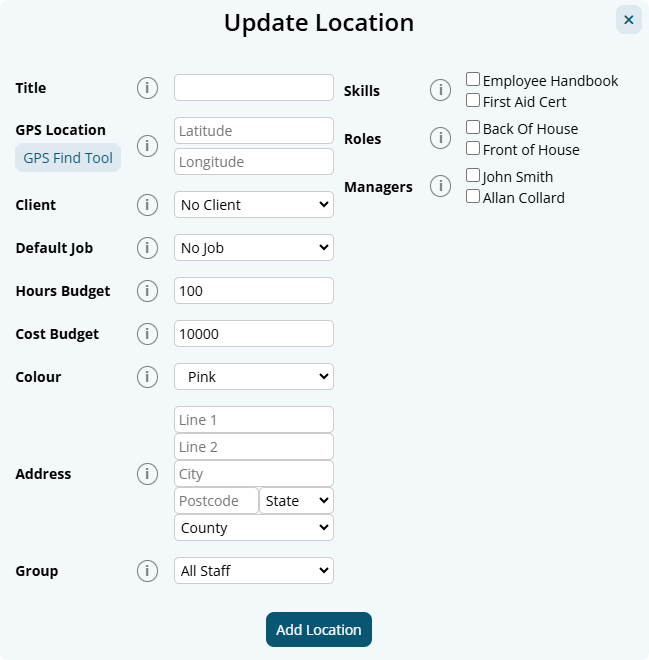
Review and configure the Location Settings:
Note: Only Title is required to create a Location.
- Title: The name of your location.
- GPS Location: Latitude and longitude coordinates of the location.
- Use the GPS Find Tool to search for the latitude and longitude
- Client: Assign the location to a specific client.
- Default Job: Set a default job for the location.
- Hours Budget: Set a default budget in hours for this location.
- Cost Budget: Set a default budget as a monetary value.
- Colour: Assign a colour to the location.
- Address: Input the physical address of the location.
- Group: Assign a group of staff to this location.
- Skills: Select required skills for working at this location.
- Roles: Add roles specific to this location.
- Managers: Assign managers to oversee this location.

Managing existing Locations
Editing a Location
To edit an existing Location:
- Find the Location in the list.
- Click the Edit button next to the Location name.
- Make necessary changes in the Edit Location modal.
- Save your changes.
Removing a Location
To remove a Location:
- Click the Archive button on the right side of the Location.
- Confirm the archive when prompted.
Note: Archived locations are archived under the Archived Locations list. You can view and restore archived locations if needed by clicking the "View Archived Locations" button and clicking Reactivate location.
The deleted locations and relative roster data will no longer show up anywhere throughout the Microkeeper system.