Roster Calendar
The Roster Calendar is used to create, manage and optimise employee scheduled hours of work for employees.
Navigate
Menu > Rosters > Roster Calendar
An Overview of the Roster Calendar Interface
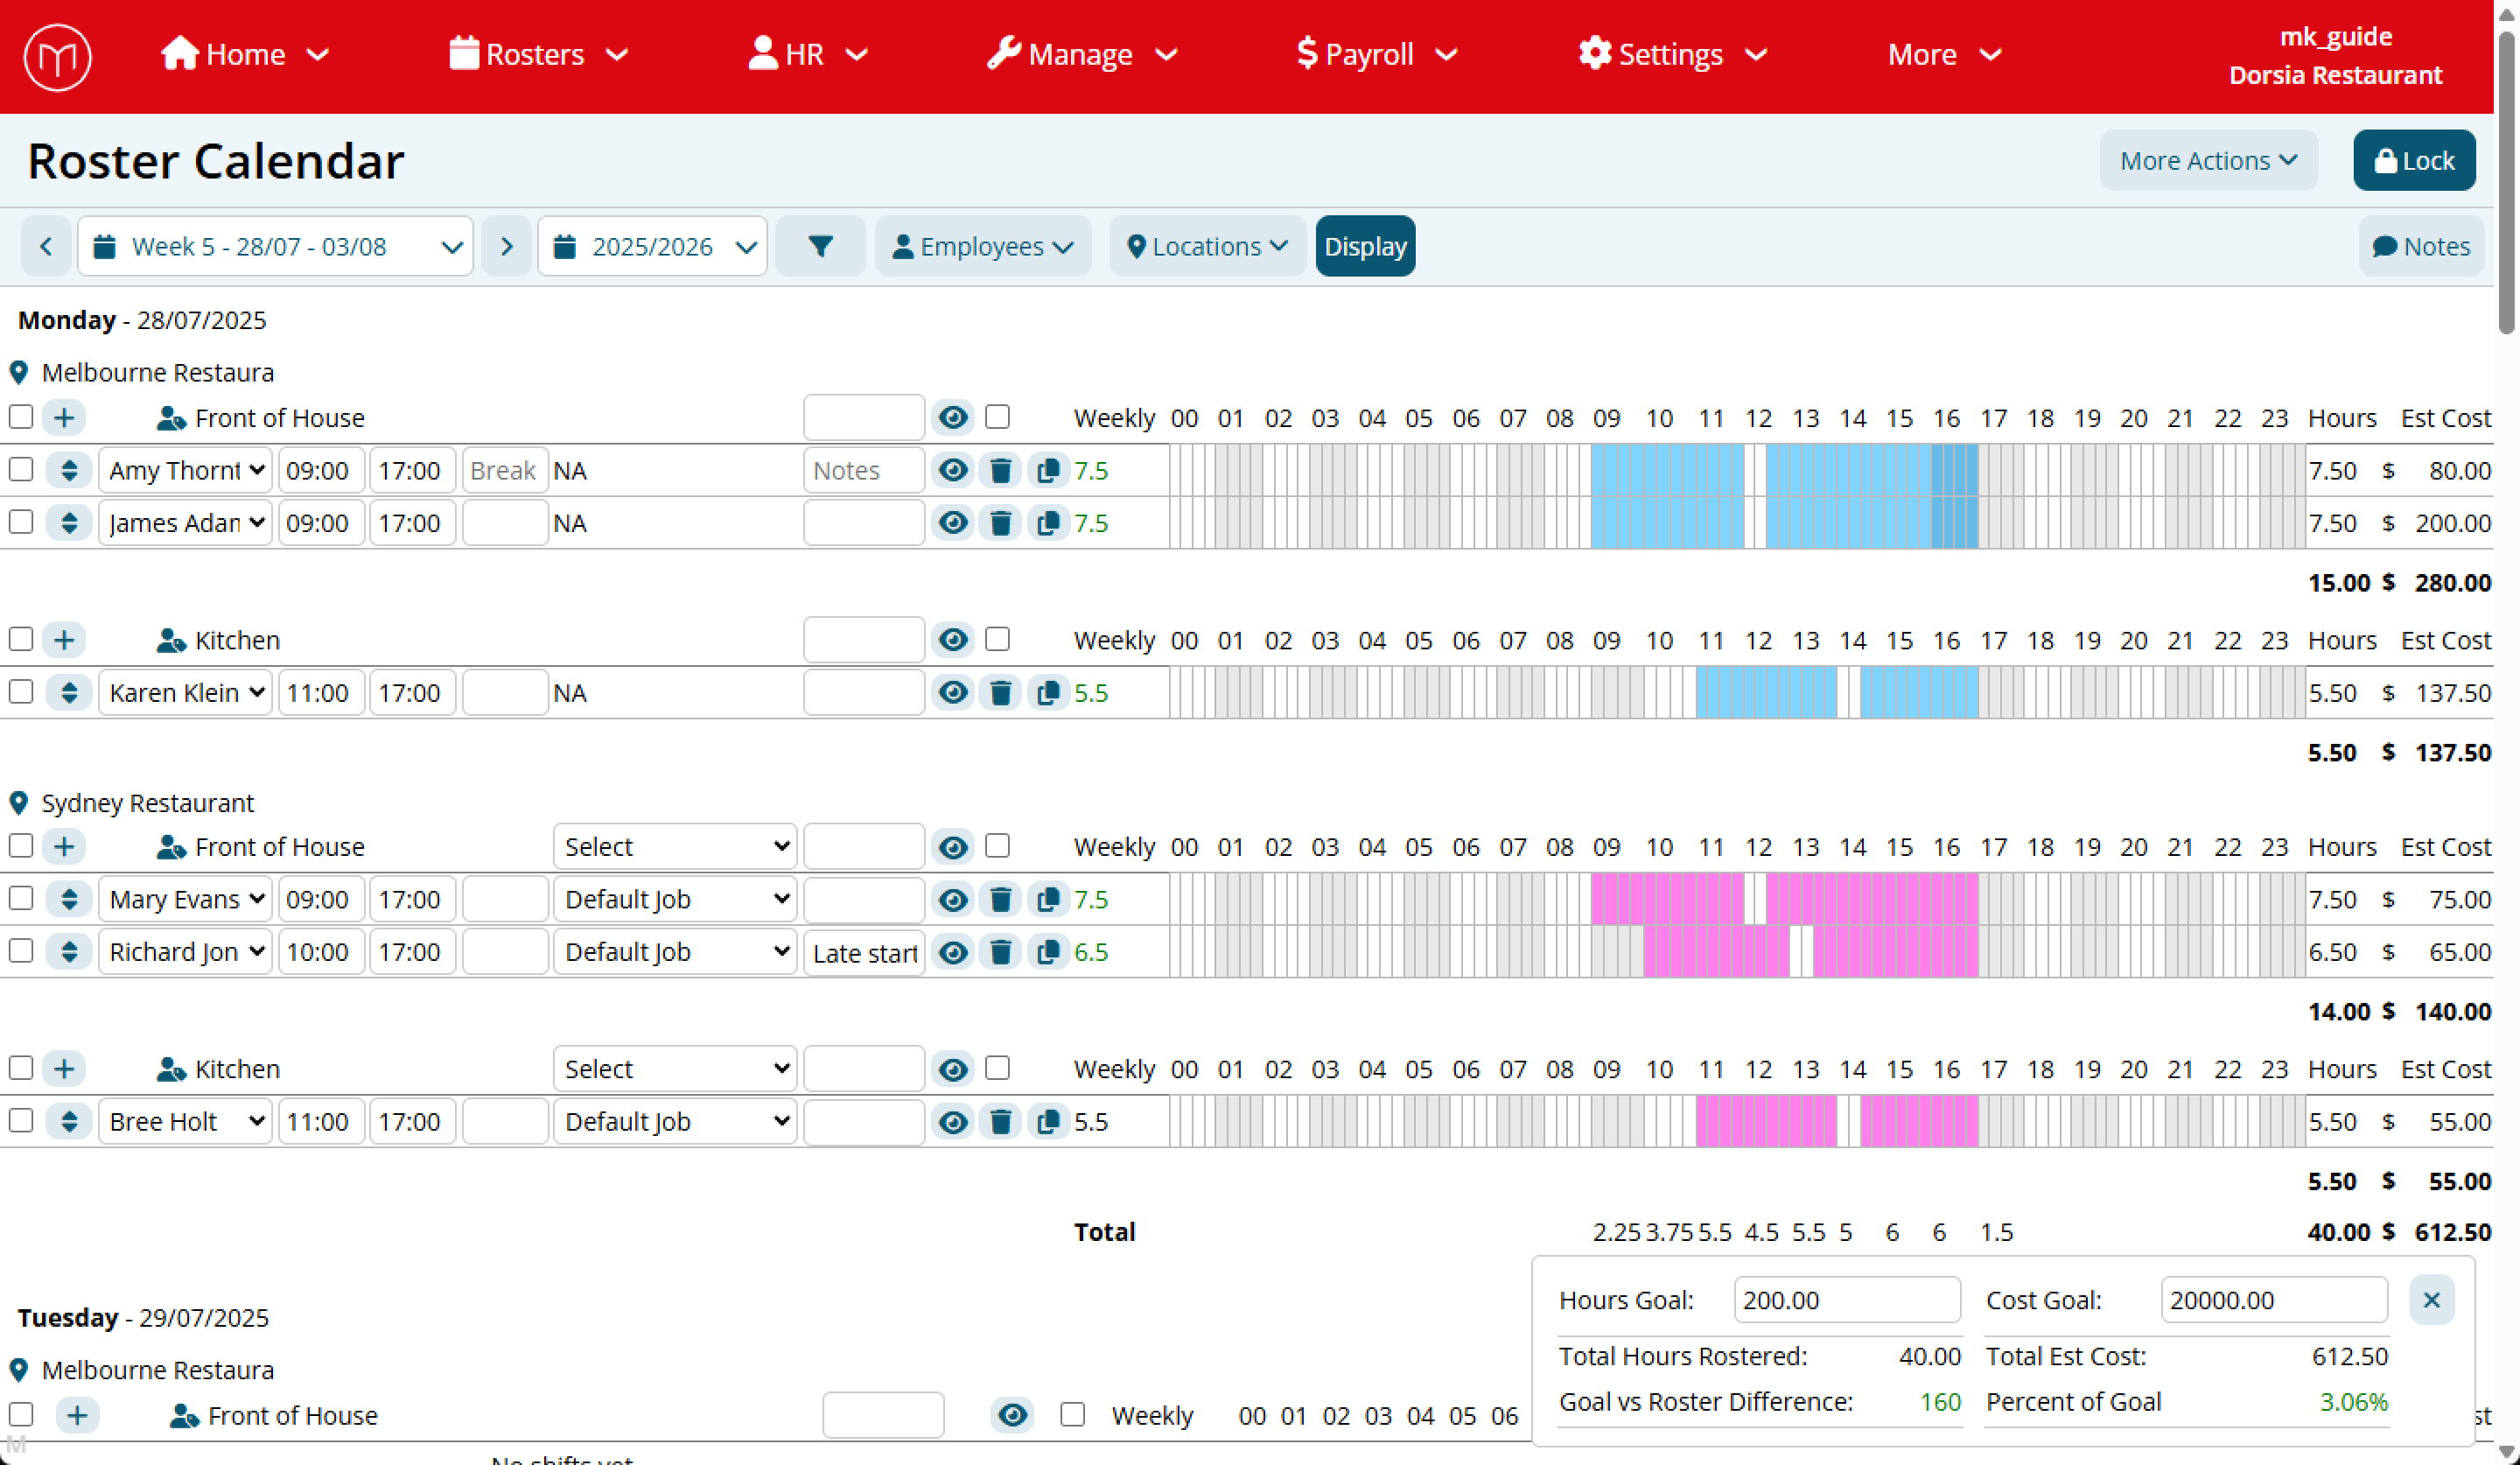
The Roster Calendar interface is divided into several key sections:
Calendar Control Bar

The top of the Roster Calendar module has calendar controls that allow for:
- Period selector
- Filter controls for days, employees, shift type and locations
- Extra display options
Page Action Buttons

The top right of the page contains action buttons allowing you to:
- Lock/unlock the roster and publish to staff
- Cloning the week to another or template
- Notify staff
- Export options
- Roster Auction Tool
Calendar Area
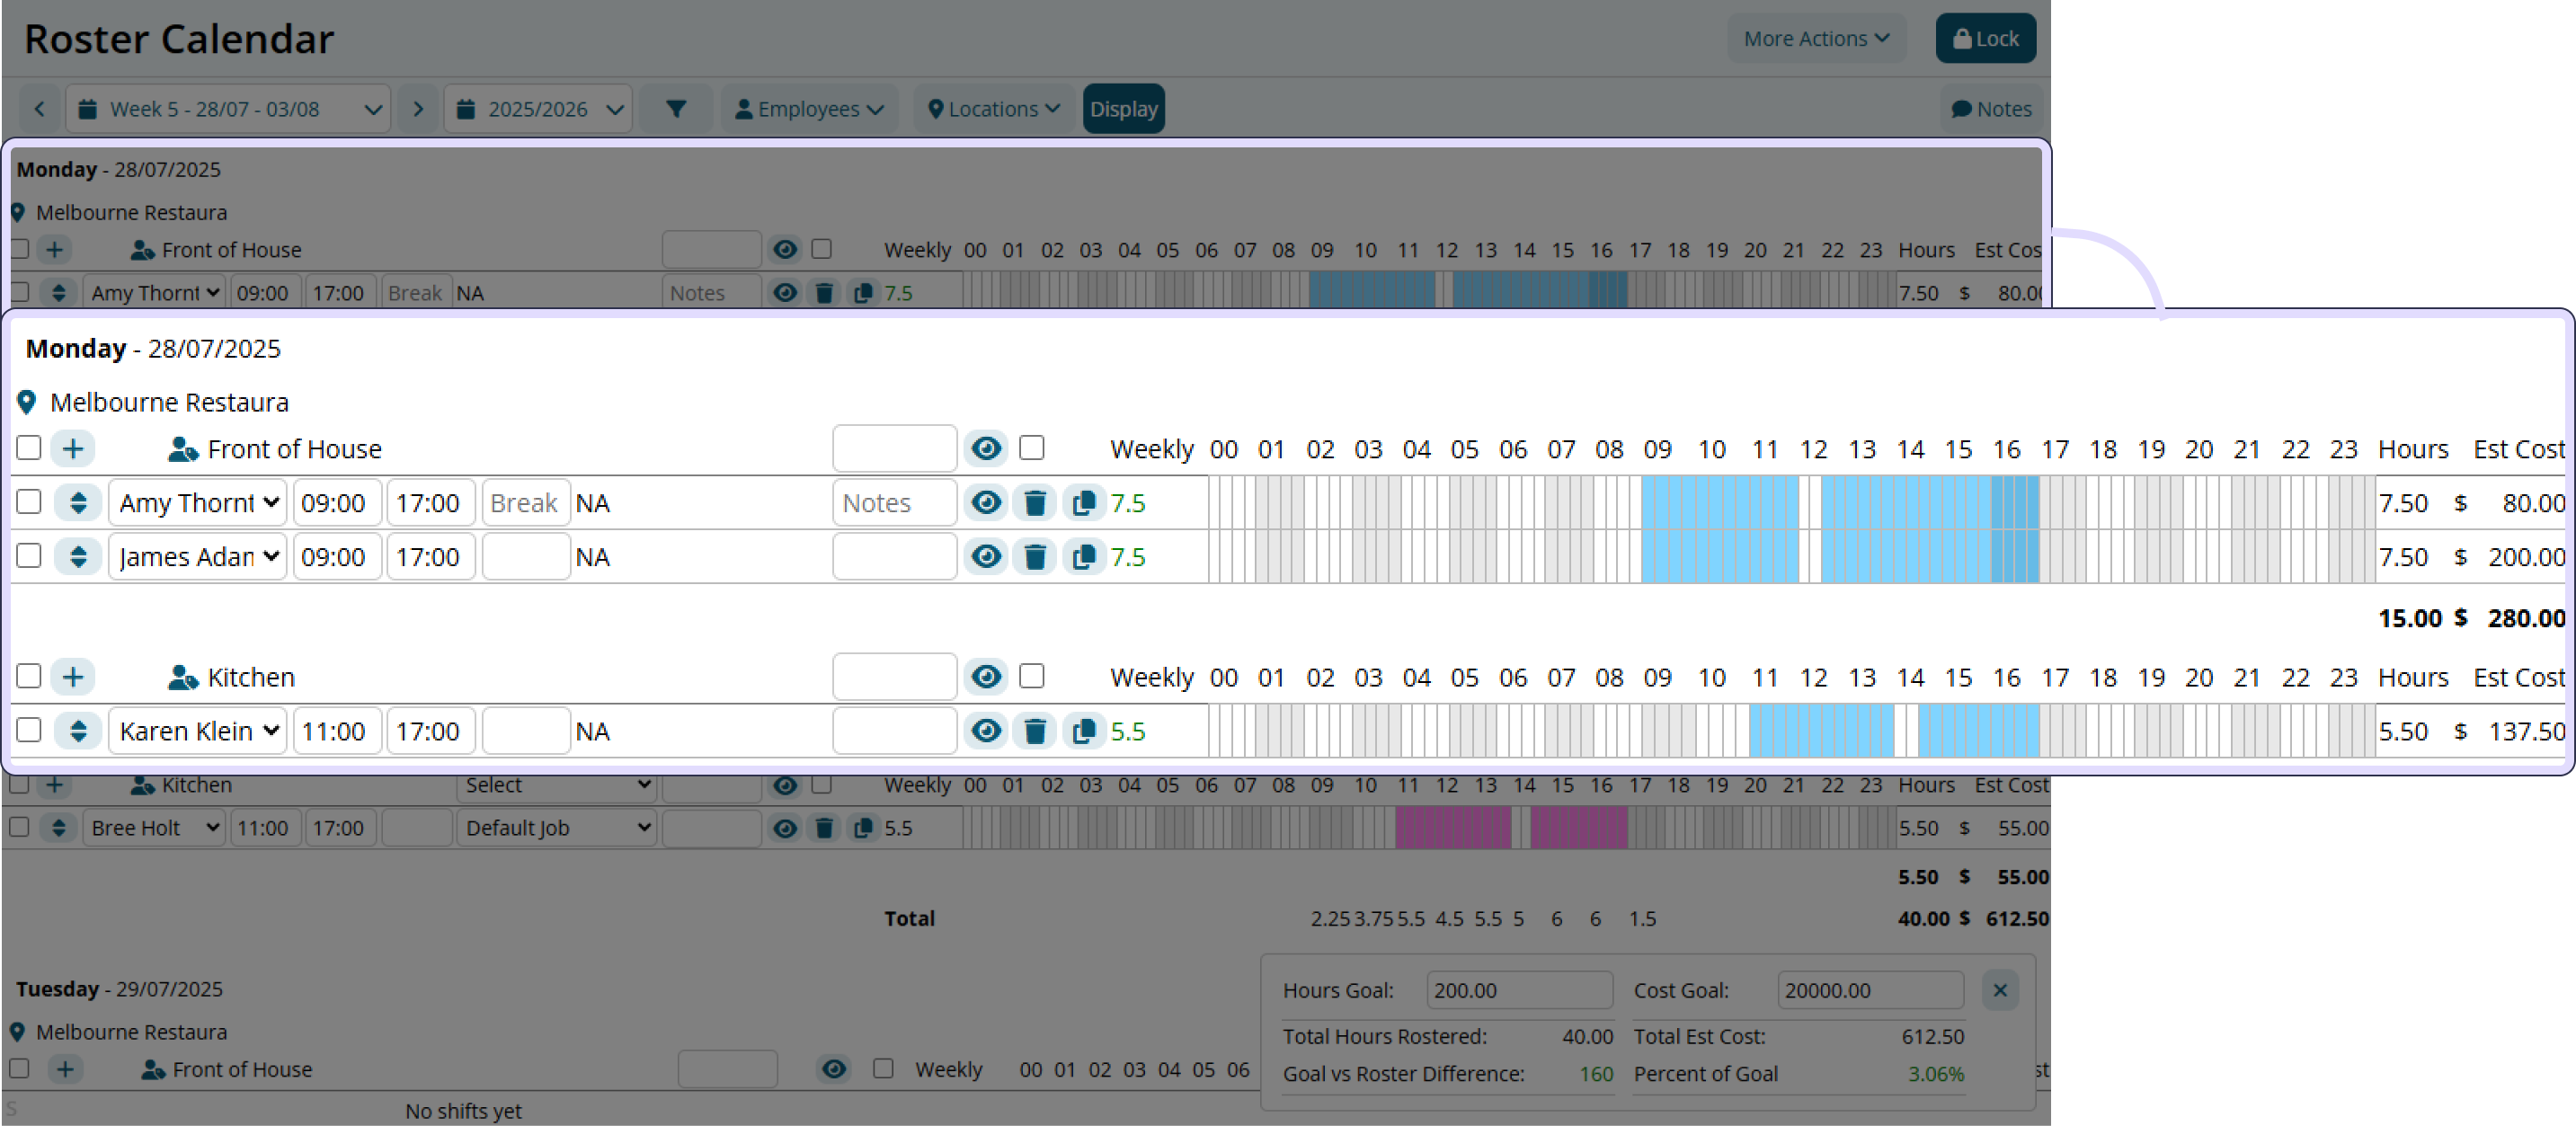
The main area of the page allows for creating and managing roster shifts.
- Daily sections for each day of the week for Locations and Roles
- Timeline view showing 24-hour periods
- Shift entry and management tools
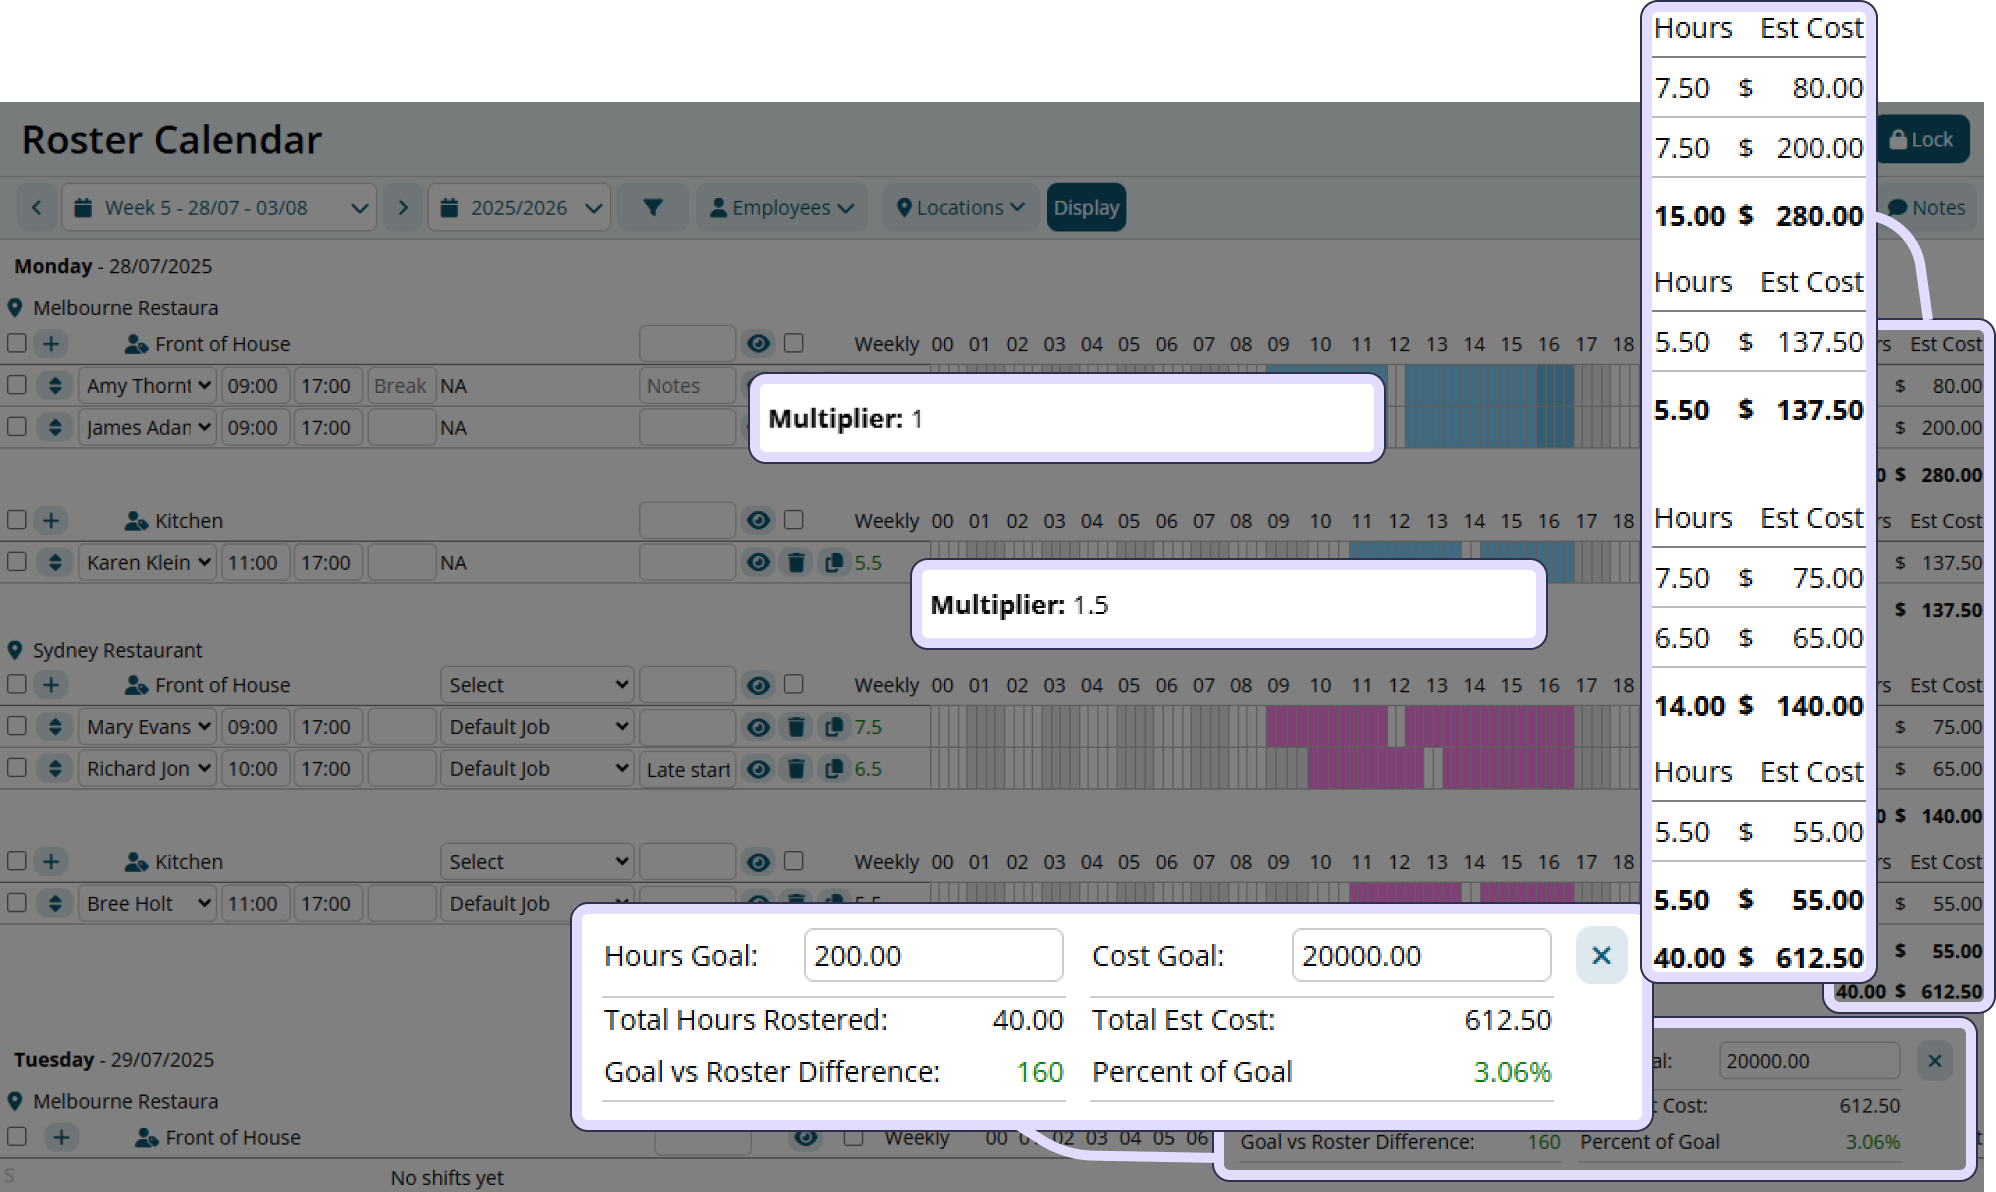
Roster Budgets
Cost and Hours budgets can be shown to help manage resources while scheduling hours.
How to Create a Rostered Shift
Creating a rostered shift begins with selecting your filters and week and then creating a shift in the main roster calendar area.
1. Selecting the Roster Week and Configuring the Filters
Use the dropdown selection or arrow buttons to select the rostering Week and Year. Dates are organised by Fiscal weeks and years.

Further filters that can also be configured:
Locations: Select the location/s to display.

Employees: Selected employees rostered shifts to view.
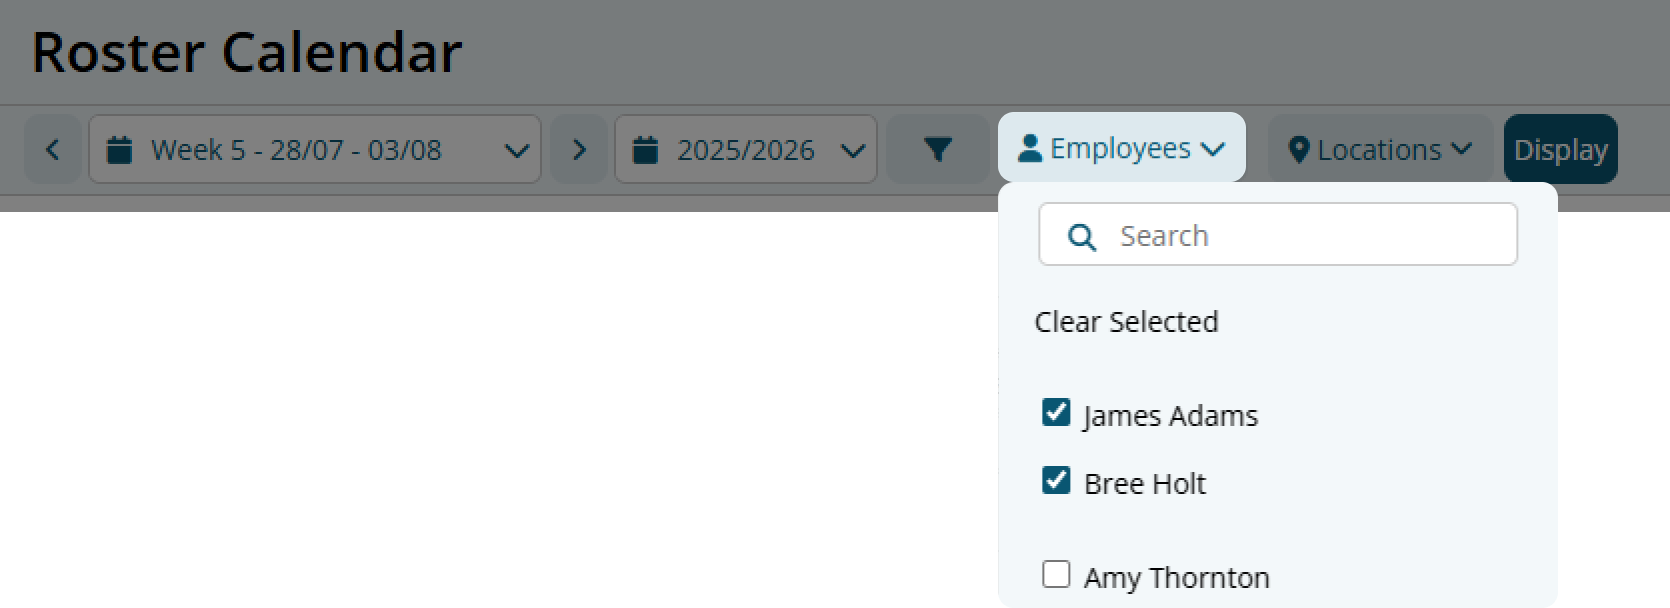
Advanced Filters can be found by clicking the Filter button. Options include:
Day Filter: The days to display.
Display:
- Graphics: Toggle display of the 24 hour visual breakdown
- Shift Costs: Toggle display of roster costing
- Edit Locked: Allow editing of a locked roster
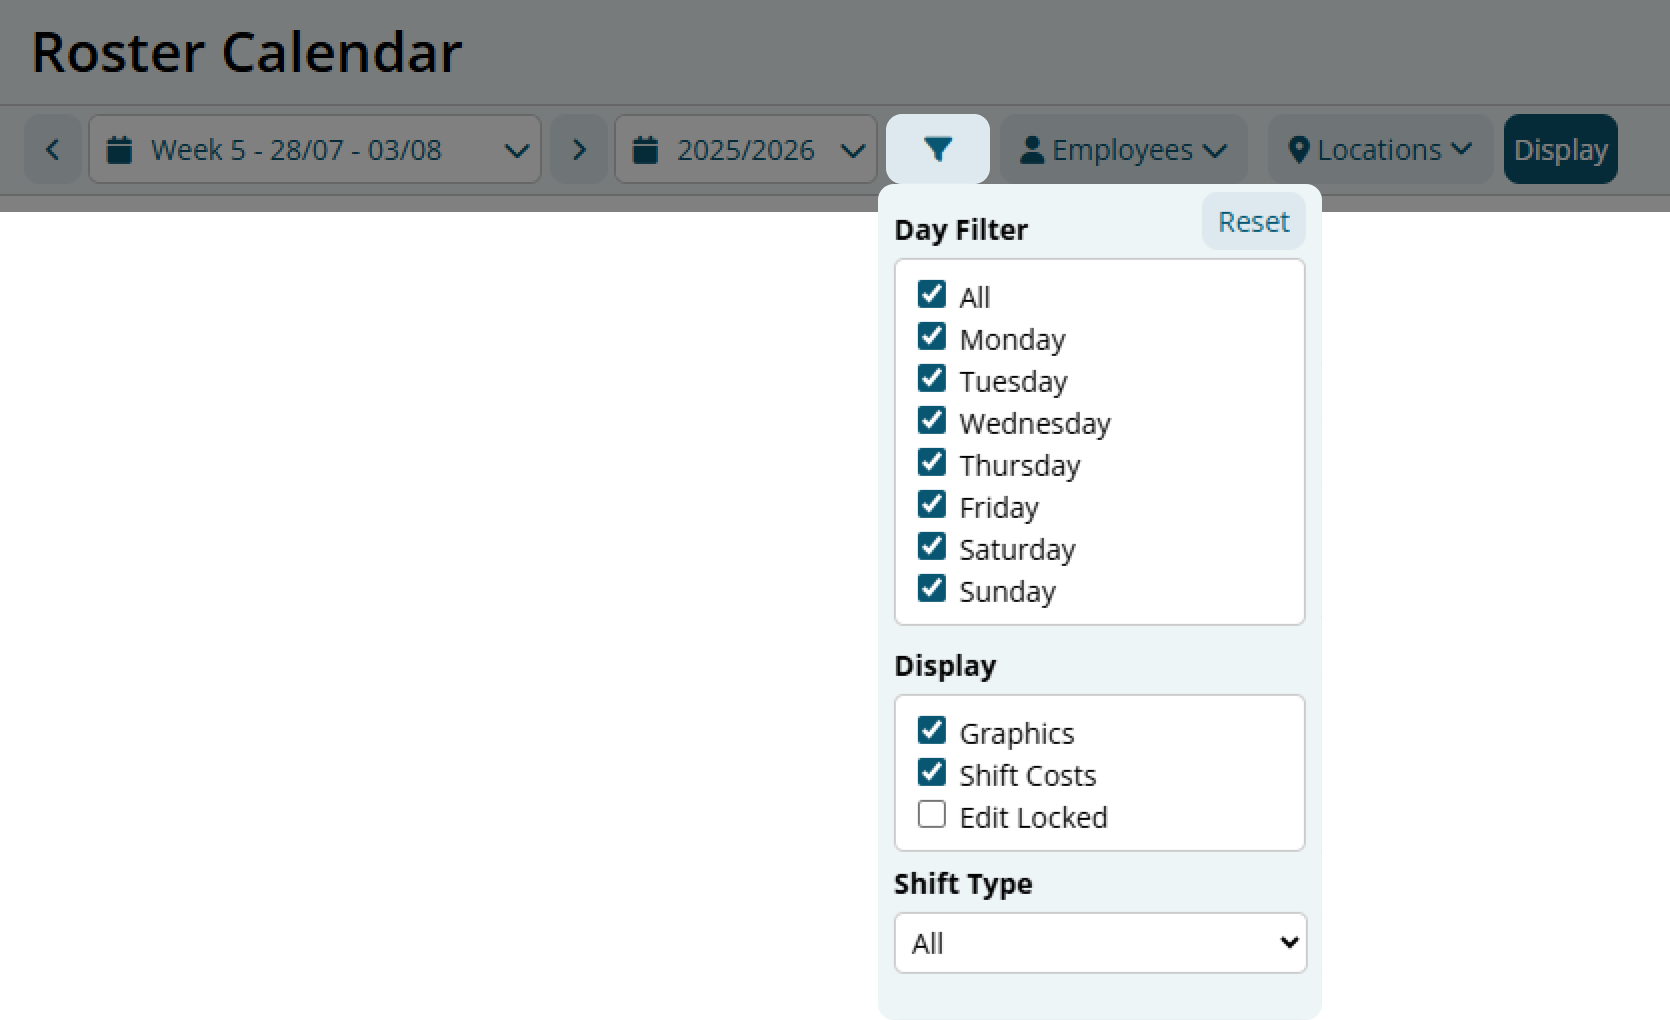
Click the "Display" button to confirm your filters to display the Roster Calendar Area
Once your filters have been confirmed, the Roster Calendar Area will display with the Locations (and Roles) selected.
2. Add a New Rostered Shift
A rostered shift can be created in the Roster Calendar Area.
Click the Plus button for the Location you wish to create a rostered shift.
A new empty rostered shift will appear. These details of the shift must be entered:
- Employee: Select the employee assigned to the shift.
- Start Time: Enter the rostered start time of the shift.
- End Time: Enter the rostered end time of the shift.

Additional options are optional. Here is a full breakdown of the rostered shift area:
- Date: The scheduled day of the shifts.
- Location: The Location title of the shifts.
- Roles: The Role title of the shifts (if applicable).
- Select All Shifts (checkbox): Select all shifts for this location.
- Select Single Shift
- Add Shift: Plus button to add a new shift to the location.
- Copy Location/Role: Copy all shifts in the Location/Role. The paste button is shown next to the Location/Role title once copied.
- Status: The status of shift if roster confirmation is enabled. Pending, Accepted or Declined.
- Reorder Control: Drag a shift up or down in position.
- Employee: Staff member assigned to the shift.
- Start Time: The rostered shifts start time.
- End Time: The rostered shifts end time.
- Break Time: The rostered shifts break time start.
- Job Selection: The assigned Job to the shift (if applicable).
- Notes: Write a note for the shift. This is visible to the staff.
- Hide: Hide the shift from the staff's roster view.
- Delete: Delete the shift.
- Copy Single: Copy the shift. The paste button is shown next to the Location/Role title once copied.
- Bulk Job Selection: Assign a Job to all shifts in the Location/Role.
- Bulk Notes: Write notes for all shifts in the Location/Role.
- Bulk Hide: Hide all shifts for the Location/Role.
- Highlight Location: Highlight the shifts for the Location/Role on the staffs roster view.

As details are entered, the shifts are automatically saved and ready to be published.
How to Publish a Rostered Shift
A roster can be finalised and made available to staff by locking the roster. Once a roster has been locked, edits to the roster are disabled.
Click the "Lock" button at the top of the page.

After locking, the "Send Roster Notification" window will appear. This allows you to notify staff of their rostered shifts through multiple notification types:
- Microkeeper Mobile App (push notification)
- SMS
Select the notification option and choose to notify:
- All Rostered Staff: everyone with a shift in the selected week and locations.
- Only Updated Shifts: only staff whose shifts have changed since the last notification.
Click "Send" to dispatch notifications, or "Skip" if you don't wish to notify staff at this stage.
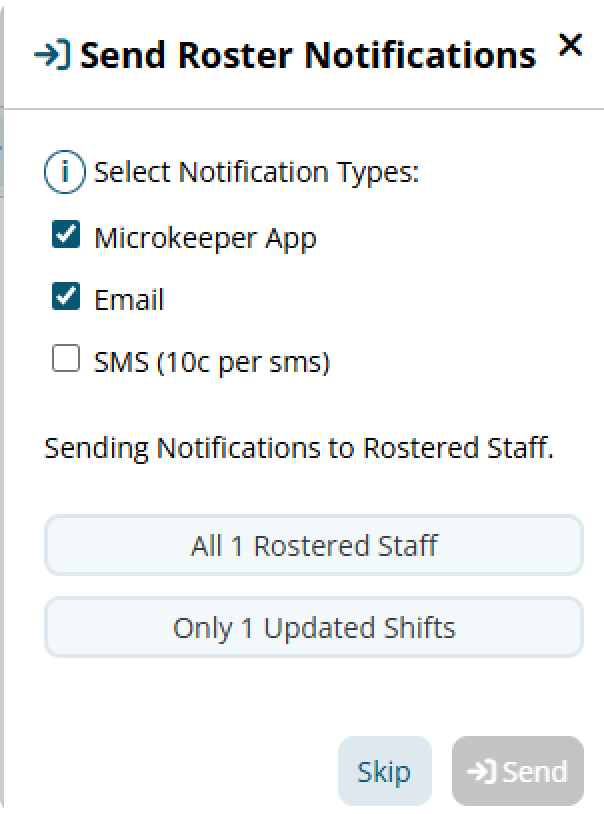
Notifications can be resent at any time by Navigating to Menu > Rosters > Roster Calendar > More Actions > Send Notifications
A roster can be unlocked at any time. Unlocking the roster will remove access for the employees and make the roster editable once again.
How the Roster looks on the Staffs Console
Once a roster has been published, it will be viewable by the staff through their Employee Console.
Menu > Home > Employee Console
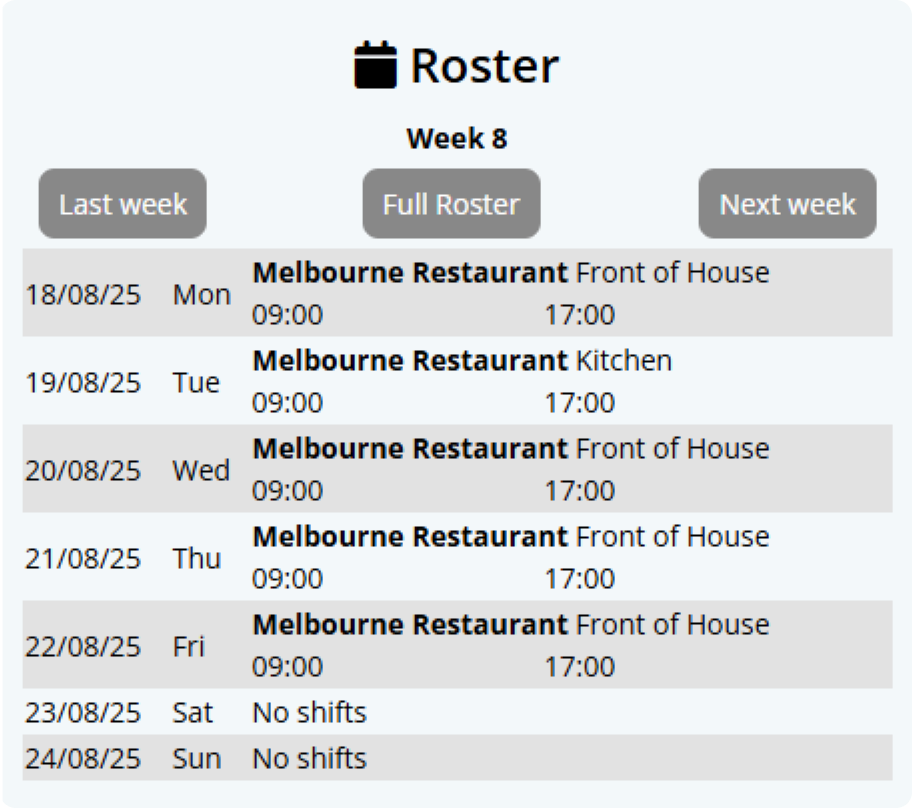
The "Roster" tile will display the weekly roster with all the key details of the shift.
The roster interface shows a week-by-week view organised by day, displaying each shift's start time, end time, location/role assignment, and any roster notes.
Staff can navigate between weeks using the "Last Week" and "Next Week" buttons.
Graphical Breakdown
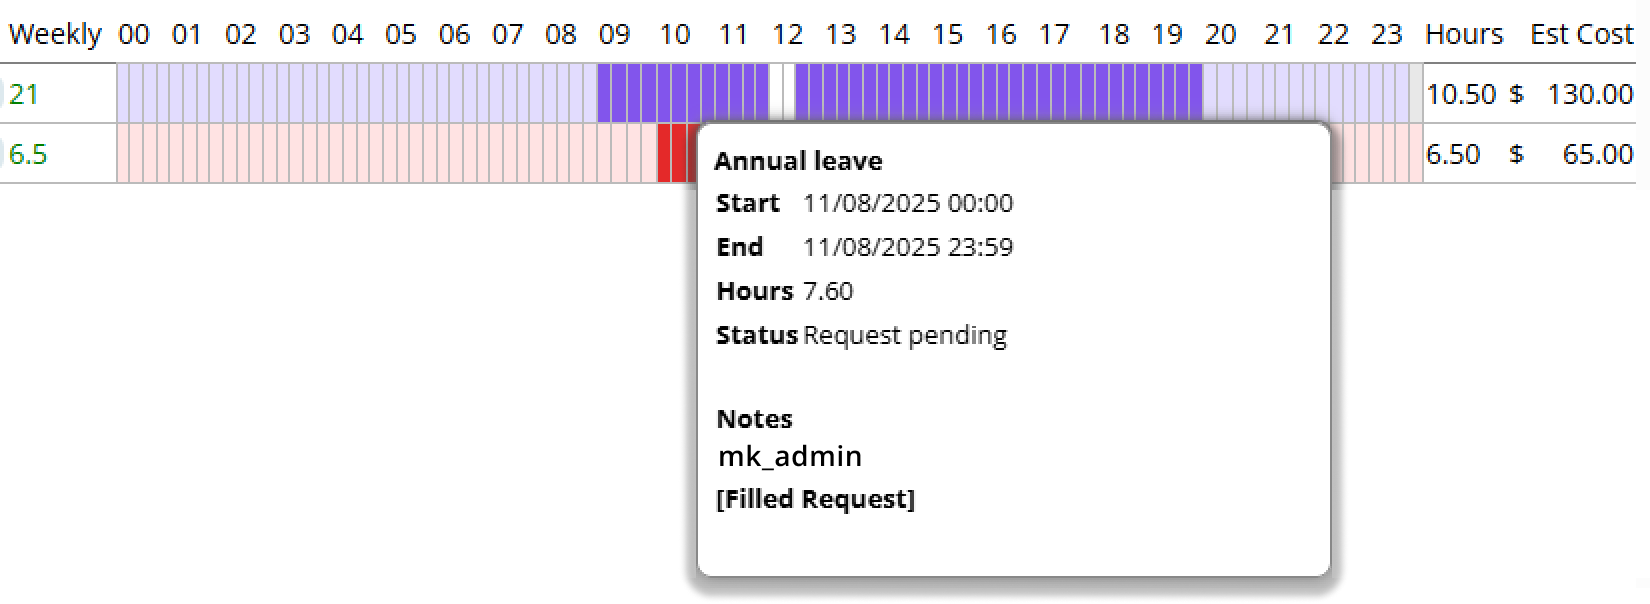
- Weekly Hours: Total rostered for the staff for the week.
- Unavailability Times: Light red shading shows when staff are unavailable to work.
- Conflict with Availability: Dark red shading indicates a direct clash between rostered shifts and the employee's unavailable hours.
- Scheduled Hours: 24 hour graphical representation of the shift.
- Pay Rate Multiplier Change: Different shades of location colour indicates changes in pay multipliers throughout the shift.
- Shift Total Hours: Total hours rostered for this shift
- Shift Estimated Cost: Approximate cost of the rostered shift based on rostered hours and pay settings
- Total Hours Summary: Total hours for the entire Location/Role.
- Total Cost Summary: Total cost for the entire Location/Role

Unavailability on the Roster
Unavailability is visually shown on the graphical roster using different colour highlights. These help you quickly identify when an employee can't be rostered or when a shift clashes with their availability:
- Light Red: Unavailable based on staff profile settings or an existing shift
- Red: A rostered shift clashes with staff's availability.
- Light Purple: Time off has been requested via a leave request (e.g. annual leave, sick leave, or unpaid leave)
- Purple: A rostered shift clashes with staff's leave request.

There are three types of unavailability shown on the roster:
1. Weekly Availability Settings
Set regular availability by the employee or in each employee's profile. An example this is used for, James has study class every Tuesday and sets their unavailability to match.
If you try to roster James on this day, the system will flag a clash.
2. Previously Assigned Shifts
Once an employee is rostered for a shift, that time becomes unavailable for other overlapping shifts.
If you try to assign another shift during that same period, a clash will be triggered.
3. Leave Requests
When an employee submits a leave request, their roster will show that period as unavailable.
If a shift is or was scheduled during a leave request, a clash will be shown.
Hovering over an unavailable rostered shift will provide more details on why there is a flag. I.e. Leave Request for that date.
Exporting the Roster
There are multiple options for exporting a roster out of Microkeeper from the Roster Calendar page.
Navigate to Menu > Rosters > Roster Calendar
Calendar View
Select More Actions and Calendar View to open the Calendar View page.

Configure the display options using the toolbar buttons at the top:
- Calendar: Choose the calendar type to display
- Location: Select which locations to include
- Date: Select the first date of the roster
- Range: Choose the date range
- Days: Select which days of the week to show
- Detail: Configure merge options and availability display
- Display: Choose which columns and information to show
- Shorten: Adjust text length for various fields
To export the customised roster:
- Configure the display options as needed
- Press Ctrl+P (Windows) or Command+P (Mac)
- Choose to print or save as PDF
PDF Export
Select More Actions and PDF Export to generate the static print display roster.
Choose from the following options:
- Order as Rostered
- Order by Employee Username
- Order by Start Time
- Order by End Time
To export the static print display roster:
- Press Ctrl+P (Windows) or Command+P (Mac)
- Choose to print or save as PDF