External Calendar
This guide will demonstrate how to Sync your Microkeeper Roster Calendar to your external Calendar.
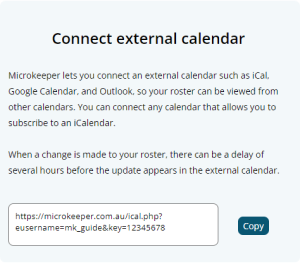
Microkeeper lets you connect an external calendar so that the rosters you manage can be viewed from other calendars like iCal and Google Calendar.
You can connect to any calendar that allows you to subscribe to an iCalendar.
When a change is made to the roster, keep in mind is that there may be a delay before the change appears in the external calendar.
Below you will find step by step instructions on syncing your calendar with iPhone, Mac, Google, and Outlook.
Managers Navigate
Menu > Payroll > Calendar
1.Click on the learn more button

Employees
Navigate
Menu > Home > Roster
1. Click on the Learn more button

2.Select your Location. This will give you your unique URL for your personal calendar feed.
Below is an example of what this looks like.
3.Copy the URL provided and connect it to your
Please keep this URL secure, as anyone with this address can subscribe to your calendar.
Connecting to iPhone Calendar
1.On your iPhone, find the Settings app.

2.Find the Mail, Contacts, Calendars setting.

3.Select Time Zone Support.

4.Make sure that Time Zone Support is turned on. This ensures that event dates and times on your calendar will always display in the selected time zone.
If it's turned off, your events will display according to the time zone of your current location.

5.Go back to the main calendar settings, and click Add Account.
6.Select Other.

7.Go to Add Subscribed Calendar.
8.In the Server field, type in the URL for your External Microkeeper Calendar and then click Next.
(The address is quite long, so you may find it easier to log into Microkeeper on your iPhone, copy the address,
and then go back to Settings on your iPhone and paste the address directly into the Server field.)

9.Edit the description of your calendar (this is optional) and click Done.
Iphone rename

10.Your calendar will now display as one of the Subscribed Calendars on your iPhone.
11.Now, go to your Calendar app and select "Calendars" from the bottom.
You should now see your new Microkeeper calendar under the heading that says Subscribed.
Please Note: if you upgrade to a new iOS (the iPhone's operating system), you may experience a broken sync.
If this happens, remove the subscribed calendar and repeats the steps above to get the sync set up again.
Connecting to Mac Calendar
1.Open Calendar for Mac.

2.Go to the File menu and choose New Calendar Subscription.

3.Enter the calendar URL for your external Microkeeper calendar . Then press the Subscribe button.
4.Configure your calendar by choosing a name and setting the auto-refresh period.
We recommend every hour (this means that your Mac calendar will check for any roster changes every hour). Then choose "OK."

5.After a few seconds, your calendar should be ready and will show up in your list of "Other" calendars.
Connecting to Google Calendar
1.Sign in to your Google account.
2.Go to your calendar, and select Other Calendars. From the menu, choose 'Add by URL'.
3.Enter the calendar URL for you External Microkeeper Calendar, and then select Add Calendar.

4. After a few seconds, your calendar will appear on the left side of the page.
5.Rename the calendar by selecting Calendar settings.
6.Enter the correct name in Calendar Name field, and click Save.
7. When you go back to your calendar, it will now display under the name that you have just set up and your Roster should be available.
Connecting to Outlook
1. Open up Outlook.
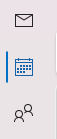
2. At the left hand side you can toggle between your Mail and Calendar.
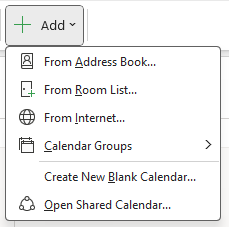
3. In the Tool Bar select the Add option and then select "From Internet..."

4. Copy your key from before and select 'Ok'.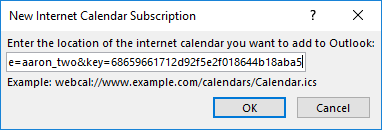
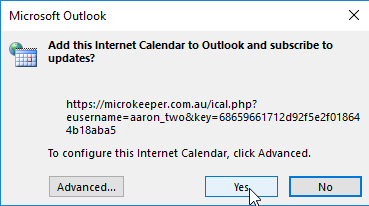
5. Clicking Yes allows Outlook to always have the latest version of your roster.
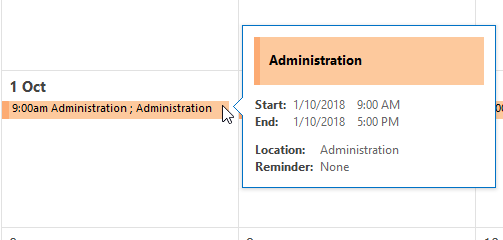
6. Hovering over a shift will give you the following