Custom Reports with Report Builder
Custom Reports in Microkeeper allow you to create tailored reports that suit your specific business needs. Using the Report Builder, you can define custom parameters and filters to generate precise reports for detailed analysis.
Navigate
Navigate to Menu > Payroll > Reports > Report Builder
Creating a new Custom Report
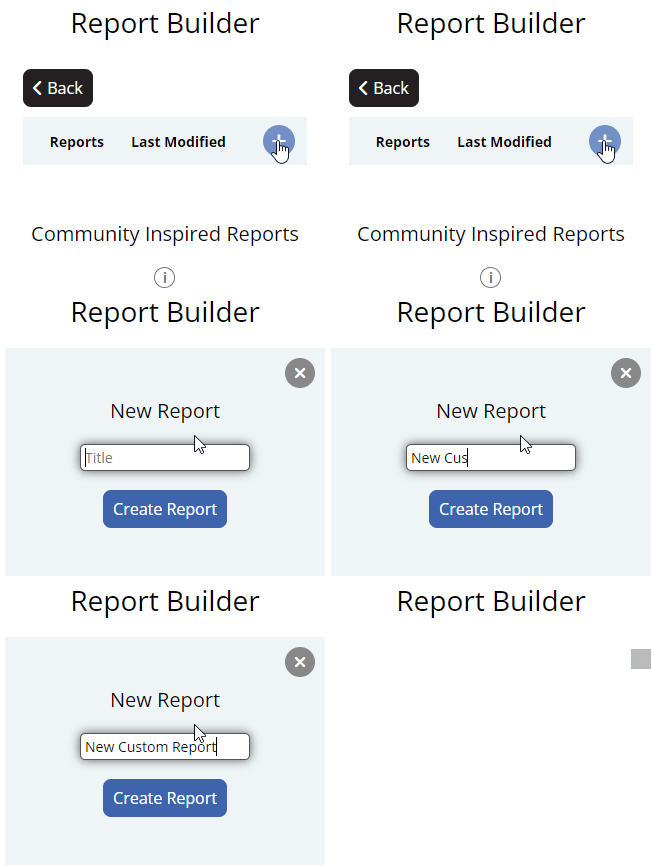
Click the "+" button to begin creating a new report.
Enter a descriptive title for your report
Click the Create Report button to confirm and proceed to configuring the report in detail.
Configuring the Custom Report
The configuration process is divided into several steps, allowing you to customize the content and layout of your report extensively.
Step 1: Configuration
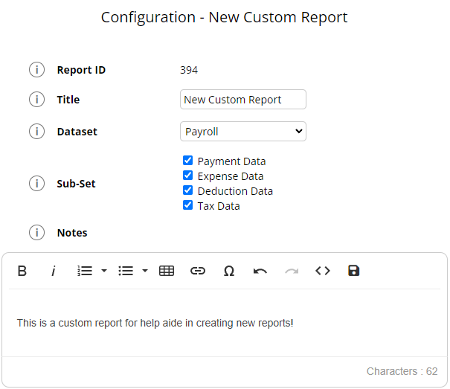
In the configuration step, you set up essential details of your Custom Report, defining how data is collected and presented. This includes:
- Report ID: Automatically assigned to uniquely identify your report.
- Title: Name of the report displayed.
- Dataset: Select the primary dataset that the report will use. The selected dataset determine the available data used to generate the Custom Report.
- Data Subset: Configure the Data Subset options. This allows a focused selection of data when generating the Custom Report
- Payroll Dataset Subset Options -
- Payment Data: Wages, Allowances, etc
- Expense Data: Super, Before Tax Salary Sacrifice, etc
- Deductions Data: Child Support, After Tax Salary Sacrifice, etc
- Tax Data: PAYG
- Payroll Dataset Subset Options -
- Notes: Add any notes to the report as a description. This could include information on the intended use of the report, specific considerations, or any other relevant details that can aid those analysing the data.
Step 2: Columns
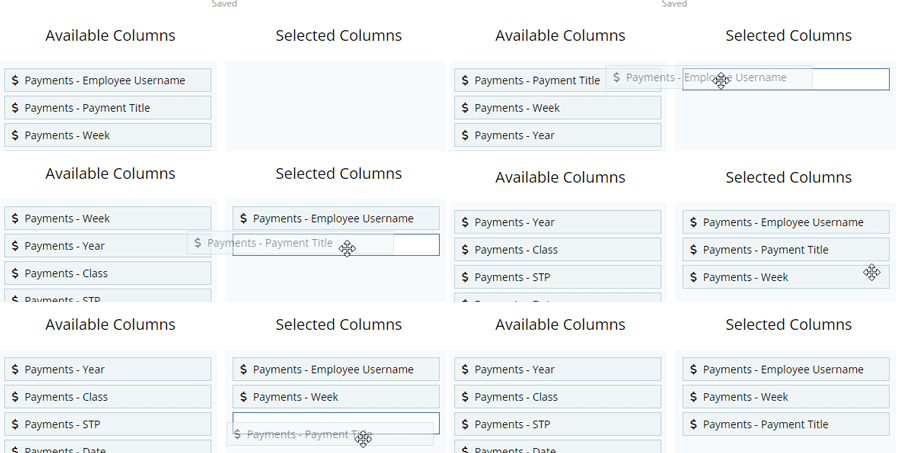
In this step, you select and organize the data columns that will appear in your report. This determines the structure of the information presented:
- Select Columns: Choose from a list of available data fields. Drag and drop to add them to your report.
- Arrange Columns: Order the columns as needed by dragging them into the desired sequence.
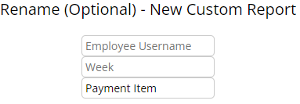
Step 3: Rename Columns (Optional)
This optional step allows you to customize the column headers in your report for clarity or to meet specific data presentation requirements:
- Rename Columns: Modify the names of the columns to be more descriptive or to align with external reporting standards.
Step 4: Filters (Optional)
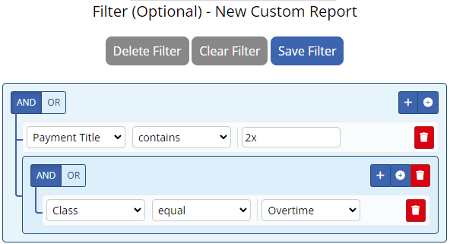
This step allows you to refine the data included in your custom report by applying specific filters. Use the Query Builder to set conditions that the data must meet to be included in the report:
- Add Filters: Click the "+" icon to add a new condition. Each condition consists of selecting a field, an operator, and specifying a value:
- Field: Choose a data field like "Payment Title", "Class", or "STP".
- Operator: Select how the field should be compared to your value (e.g., "equals", "begins with").
- Value: Input the value to filter by (e.g., specific class name or payment type).
- Logical Operators: At the beginning of each filter or group of filters, select "AND" if all conditions must be met, or "OR" if any condition suffices.
- Nested Groups: For more complex filtering, add nested groups with their own conditions by clicking the "plus" icon of any condition.
- Manage Filters:
- Delete Filter: Remove the current filter set.
- Clear Filter: Reset all fields within the current filter without removing the structure.
- Save Filter: Save the configured filters to apply them to your report.
Generating a Custom Report
Once you have created and configured your Custom Report, they can be found on the Reports page.
Navigate to Menu > Payroll > Reports > Custom Reports
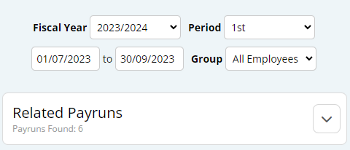
Select the Time Period
Before selecting a report, you may want to specify a time period. If not specified, the system will automatically select the most recent payment date.
Period Selection: Allows refining aspects such as:
- Fiscal Year: Choose from available fiscal years.
- Period of Time: Select monthly, quarterly, or yearly periods.
- Group: Filter by employee groups or status.
The Related Payruns filter will display specific runs within your selected criteria.
Note: When selecting a time period, payruns are assigned by payment date.
Select and view your Report
Once the time period is selected, you can proceed to choose and view your report based on your selected criteria of Payruns.
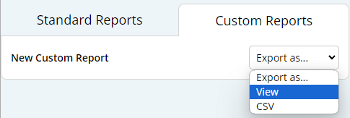
On each report you can either select to export the report format as:
- View - View the Report as HTML
- CSV - Download the report as CSV file
If you wish to print the report, view the report as HTML and then click the Print button.
