Timesheet vs Roster
The Timesheet vs Roster page is used to review the Timesheet data recorded by employees. This guide will run through all the functionality of the timesheet vs roster page.
Navigate
Menu > Rosters > Timesheet
A Breakdown of the Timesheet vs Roster page
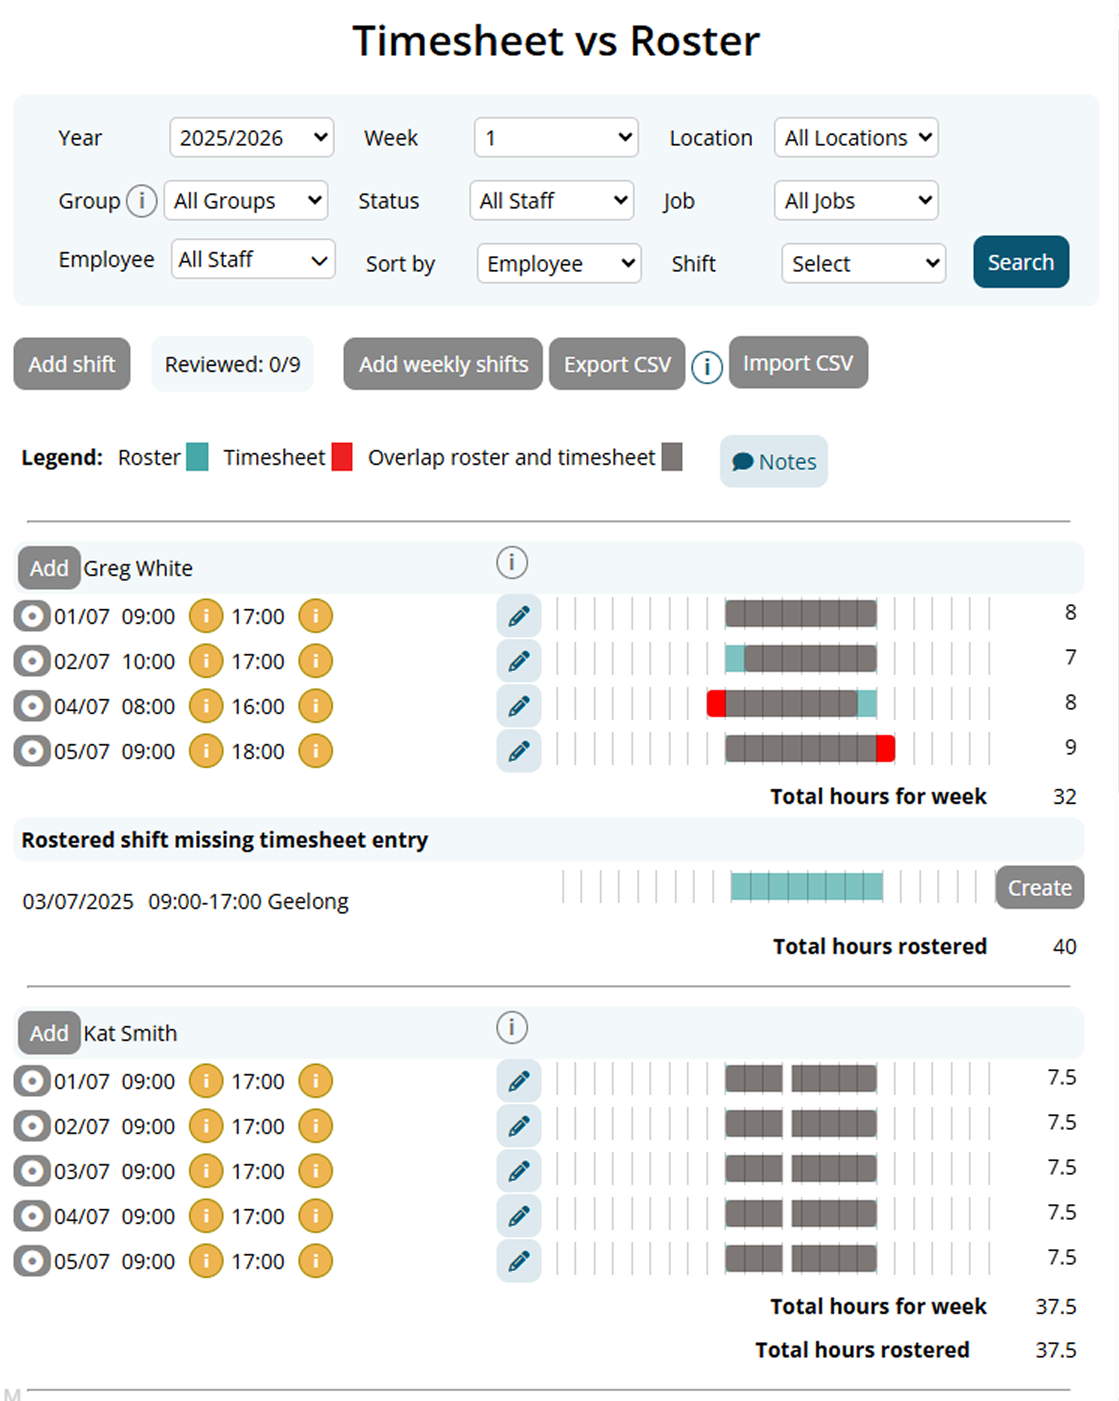
The Timesheet vs Roster page is used to quickly compare the timesheet data to the roster data and allow for adjustments.
Filter Bar
The top of the page has a filter which can be used to configure which timesheets are displayed
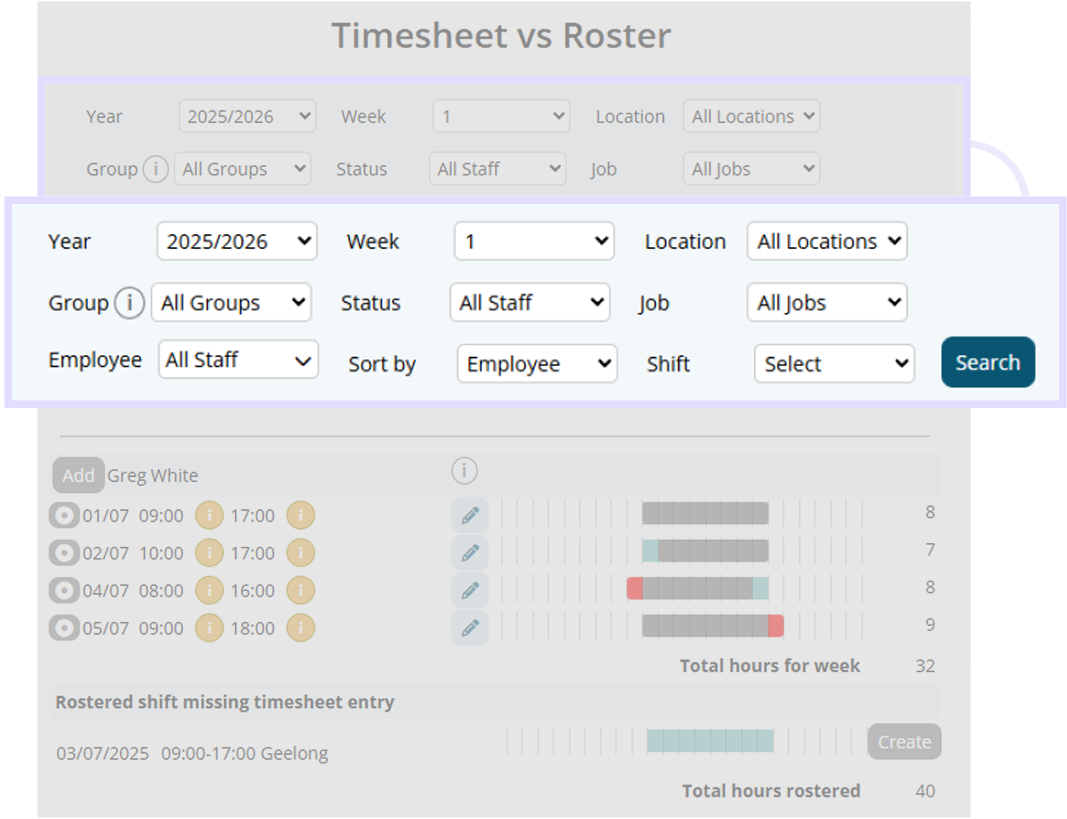
The filter can be used to further breakdown the data by:
- Year
- Week
- Location
- Group
- Status: Filter by employment status
- Client
- Job
- Employee
- Sort By: Sort by employee or day
- Shift: Filter by the shift status.
Employee List
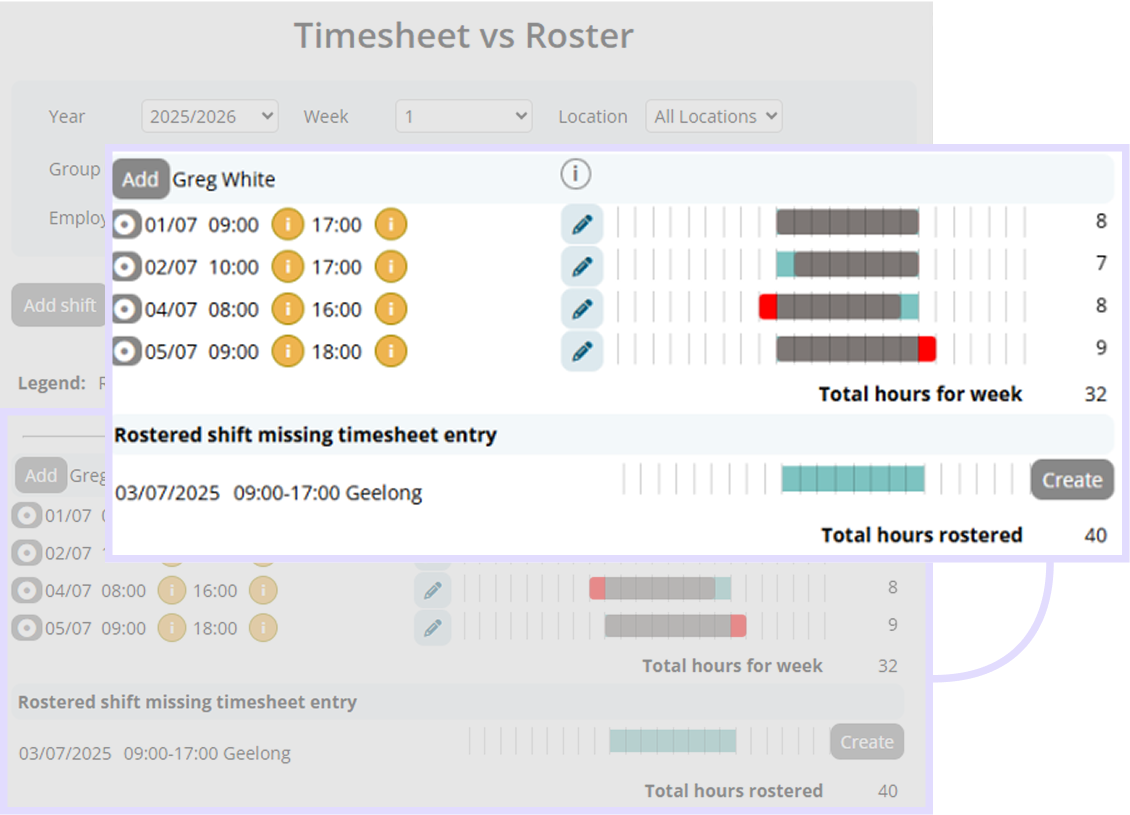
The page lists employees with their respective timesheets data.
-b3c75.png)
Timesheet and Roster Entries
Each timesheet entry displays a timeline of hours worked (timesheet) and hours scheduled (roster). Overlaps and discrepancies are color-coded for easy viewing.
- Roster is displayed in green
- Timesheet is displayed in red
- Overlap of both roster and timesheet is displayed in gray
Another way to look at the legend is red will cost the business more and green will cost the business less, if wages are calculated from timesheet data.
Each timesheet entry will also show its method of creation:
| Icon | Description |
 | The employee has used their fingerprint to clock their hours |
| The employee has used Facial Recognition to clock their hours | |
| i | Employee clocked hours using the employee console |
| GPS used to clock hours, click to view the location | |
| i | This entry was created from the roster |
| i | Manually entered, mouse over to see who created this entry |
| i | An employee has manually entered their own timesheet entry |
Actions Buttons
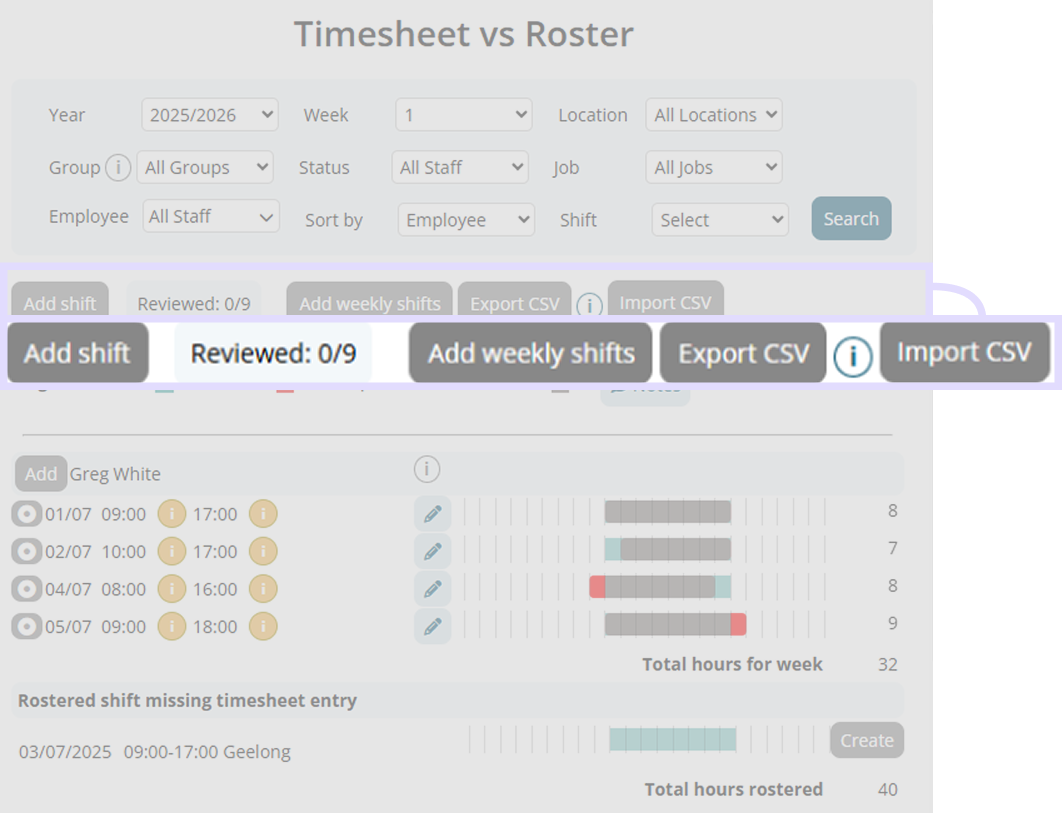
You can also add shifts directly by using the Add Shift option buttons.
Exporting and Importing CSV data is also available.
How is timesheet data generated?
The Timesheet vs Roster page will be populated by any timesheets captured by employees throughout their work day. The clock on/off guide describes how the employee can clock their worked hours.
Timesheet data can also be manually created by managers or can be generated
You can also manually create an entry or generate the Timesheet data from roster.
How to manually create Timesheet entries
Click the Add Shift button. A new Add Shift window will open.
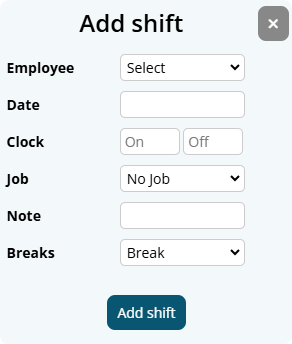
The shift can be entered after filling the required fields:
- Employee
- Date
- Clock
The other fields are optional. Click the Add Shift button to create the timesheet entry.
Adding Weekly Shifts
You can add multiple shifts for an employee over a week. Click the Add weekly shifts button to bring open the window.

Select the staff whom you want to add the bulk shifts, then fill in the applicable fields. At a minimum, the Start and End times must be entered.
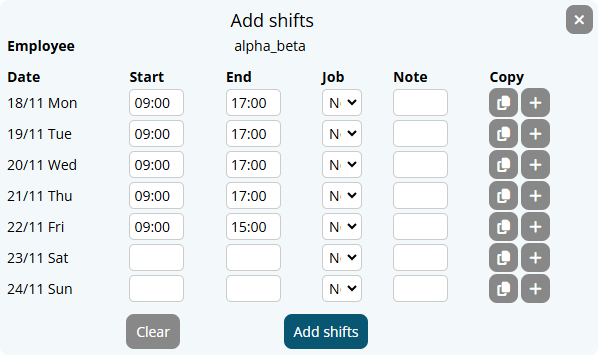
A split shift can be created by clicking the Plus button for the corresponding day.

Once finished click Add Shifts, and they will be added to the employee's timesheet.
How to adjust a timesheet entry
Timesheets can be adjusted by editing the timesheet.
Click the Edit button to open the Update Shift window.
Make any changes to the available fields and click the Update button to confirm changes
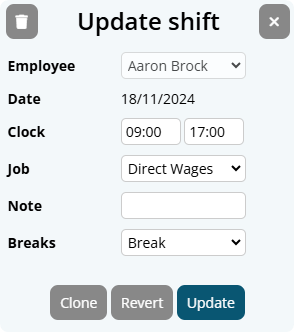
The Revert button can be used to quickly match the timesheet hours to the rostered hours.
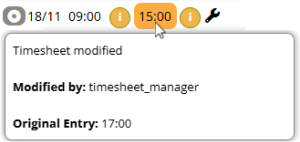
After a timesheet has been adjusted, the system will highlight any recorded changes to the clocked time. This can be hovered over to see the originally clocking time and which manager has made the adjustment.
Adding a Timesheet Note
Managers can add notes when reviewing timesheet entries.
Click the date/time of the timesheet entry. On the "Update Shift" window, add a Note and click Update.
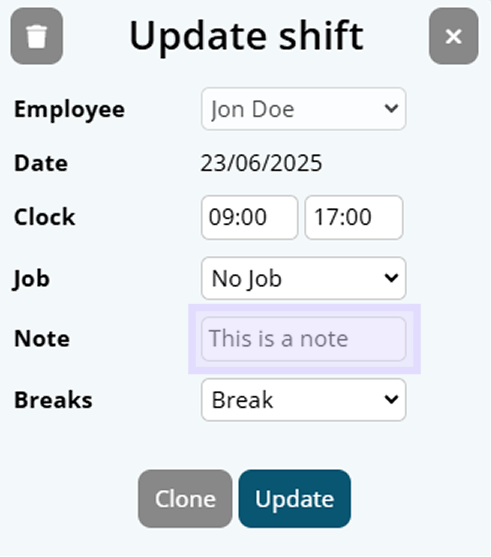
An employee can add a timesheet note from the Employee Console page.
Deleting a Shift
Shifts can be deleted in two ways.
Click the date/time of the shift you wish to delete. On the "Update Shift" window, click the Rubbish Bin icon located on the top left of the window.
You can also hover over the Shift Timeline Bar and press "delete" on the keyboard.
Identifying discrepancies
The roster is rarely going to match the timesheet perfectly.
Every business will find different trends from the information on this page.
Perfectly Clocked Hours

The above illustration is an example of an employee who has clocked his work hours exactly the same as his roster.
| Under all circumstances this is what you should be aiming for from every employee and from realistic planning. |
Clocking on Late

The above example is of an employee who clocked on late every morning.
You can use this information to identify possible issues.
Working Back Late

The employee in the above example worked back late on one of their shifts.
Missed shift
Employees will miss shifts and other employees will fill in for them.
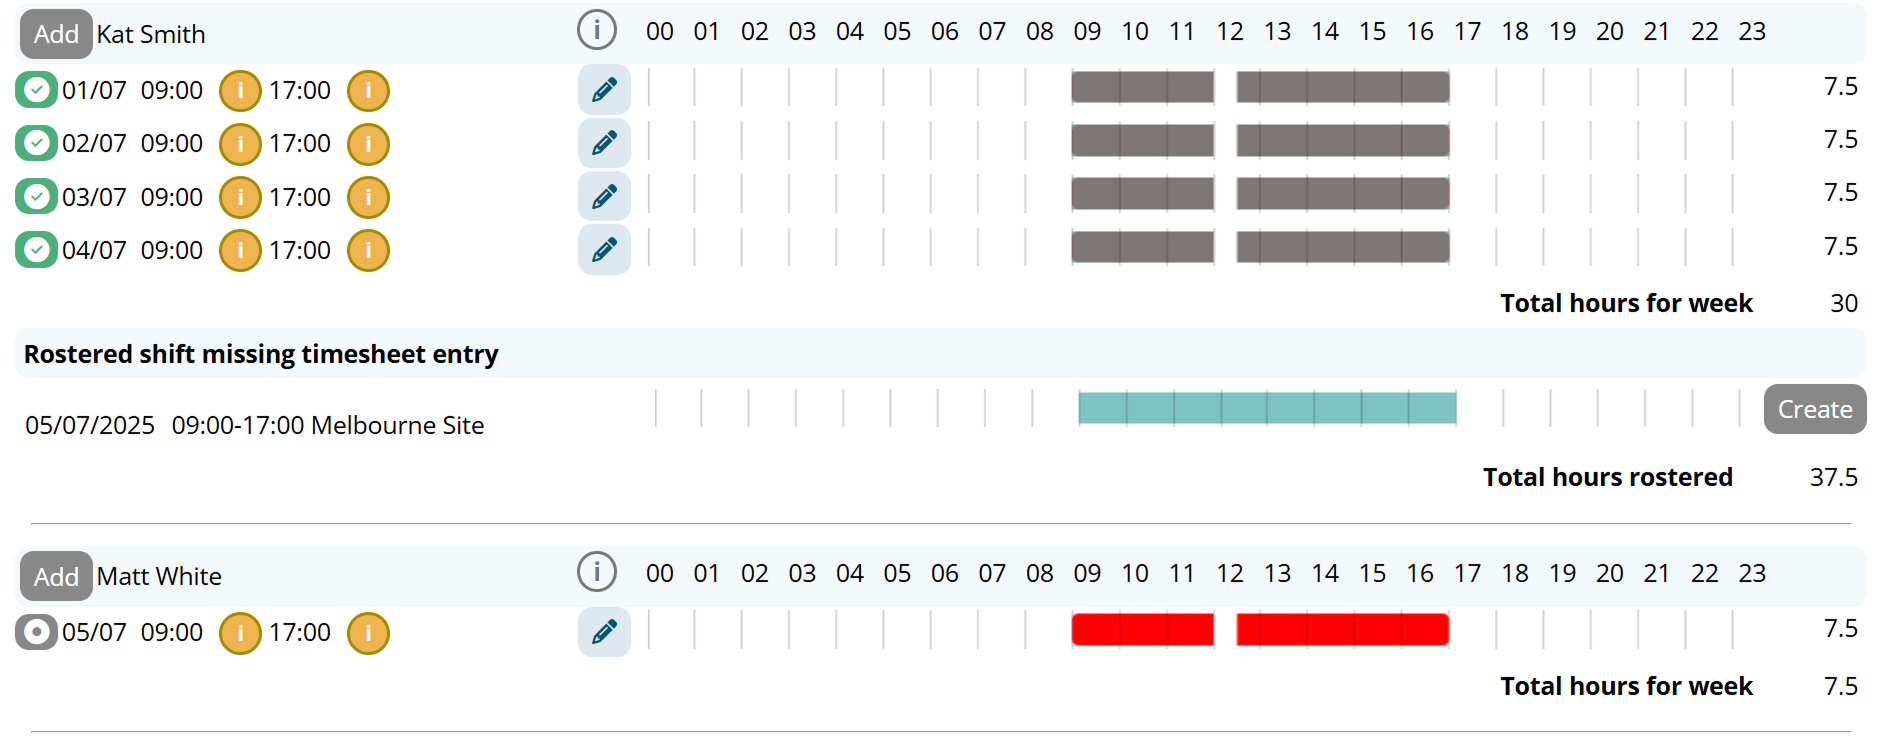
The above example illustrates that Kat Smith missed her shift on the 5th (Green roster).
She may have forgotten to clock her hours.
If this was the case we could click the Create button and add her shift.
However, in this case, she called in sick and Matt White filled in for her.
We can easily spot the shift that Matt worked but was not rostered for (Red shift entry).
Reason behind discrepancies
There are many reasons why the hours clocked don't match the hours rostered.
Including
- The employee had to work back late
- The allocated roster is not enough time to complete all work
- The employee had to cover another employees shift
- The employee was running late to work
- The employee forgot to clock on/off
- The employee had a sick day and shift was not clocked at all
- Many more
Shift work
Note: There is a script that runs at midnight that checks for any employees that have not clocked out.
The system will automatically clock off any employees who have not yet done so at midnight. If employees work past midnight then this can be turned off.
Navigate to Menu > Settings > General > Global > Timesheet Settings - Shift Work
Select the setting Shift Work - Staff work past midnight.

An employee can clock work past midnight.
Example
| John Smith | Clocks on at | 20:00 (8pm) |
| Clocks off at | 04:00 (4am) |
The system will acknowledge this has occurred and calculate a total of 8 hours worked (4 to midnight and 4 past midnight).
All your shift rules will still function.