The Roster Process
The Rostering module enhances the scheduling and rostering of your employees planned worked hours. This guide will give you an overview of Microkeeper's Roster Process.
What are Rosters?

Rosters are the pre-planned scheduled hours of work for your employees. They outline the specific days and times employees are required to work.
Rostering Work Flow in Microkeeper
The roster process in Microkeeper follows three main steps:
- Create Rosters - Schedule staff shifts on the Roster Calendar
- Publish Rosters - Lock and distribute the roster schedule
- Record Shifts - Timesheet data is created
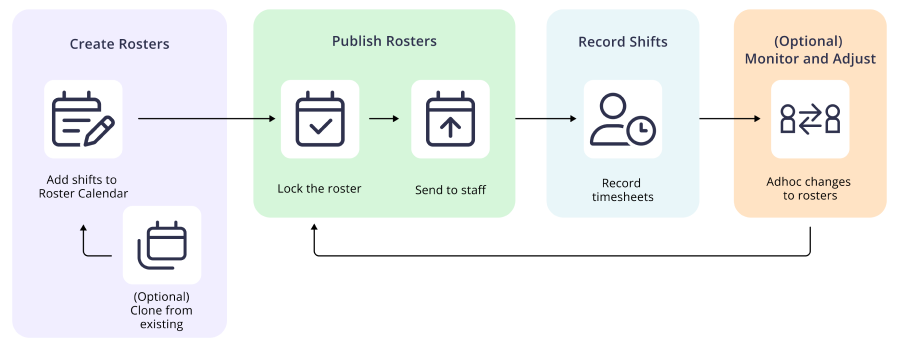
Create Rosters
- Add rostered shifts to the Roster Calendar
- (Optional) Clone from a Roster Template or existing week
Publish Rosters
- Make the rosters available to staff by Locking the roster
- Communicate the roster to staff
- Mobile App notification
- Sync to personal calendars (iCal, Google Calendar, Outlook)
- SMS rosters
- Print rosters
Record Time
- Timesheet data is generated by:
- Staff clock in and out of shifts
- Timesheet data is created by managers
- Timesheet data is generated from roster data
Monitor and Adjust
- Make any last minute roster shift changes if needed