Xero Integration
Payroll data generated by Microkeeper can be sent directly to the Xero accounting suite.
Table of Contents
Data Flow Diagram

Configure your accounting suite to Xero
You will first need to configure your accounting suite option to Xero before you can integrate your payroll data into Xero Accounting.
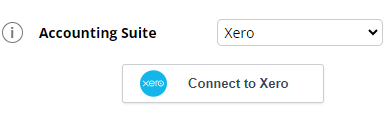
Navigate to Menu > Settings > General > Global > System Settings - Integrate Accounting Suite - Select Xero
Under System Settings select the Xero option from the drop down menu then select Connect to Xero
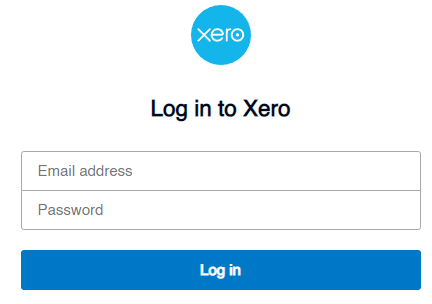
Login to Xero with your credentials to authorise the Microkeeper connection.
The connection to Xero will remain permanently connected.
Configuring your Xero Invoice Journal
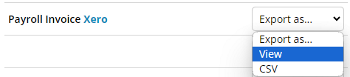
The Xero integration is setup within the Reports page.
Navigate to Menu > Payroll > Reports > Accounting Export - Export as - View
Xero Configuration
Microkeeper will need to retrieve the Accounts from Xero.
On first time integration, you will need to configure which figures you want to send to which Accounts.
This is done by:
1. Selecting Setup Xero
2. Get Accounts from Xero. Microkeeper will need to retrieve the Accounts from Xero.
3. Get Tracking Categories from Xero (If Required)
4. Select Account for each Cost to Business using drop down box.
6. Select Tracking Codes (If required)
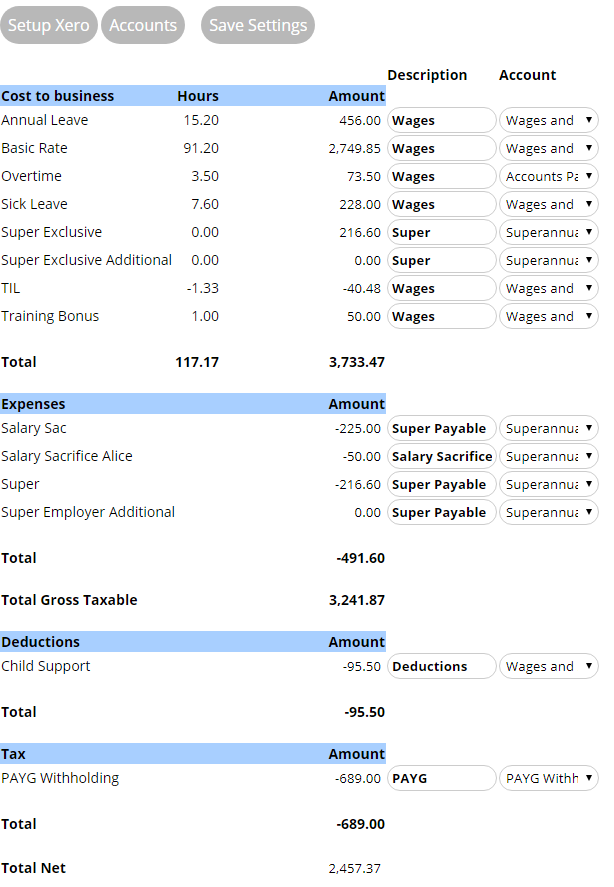
Save Xero Settings.

The above configuration will work for many scenarios.
Weekly Process
On a weekly basis, it's required to send the payable bill to Xero.
Send the Payrun data to Xero.

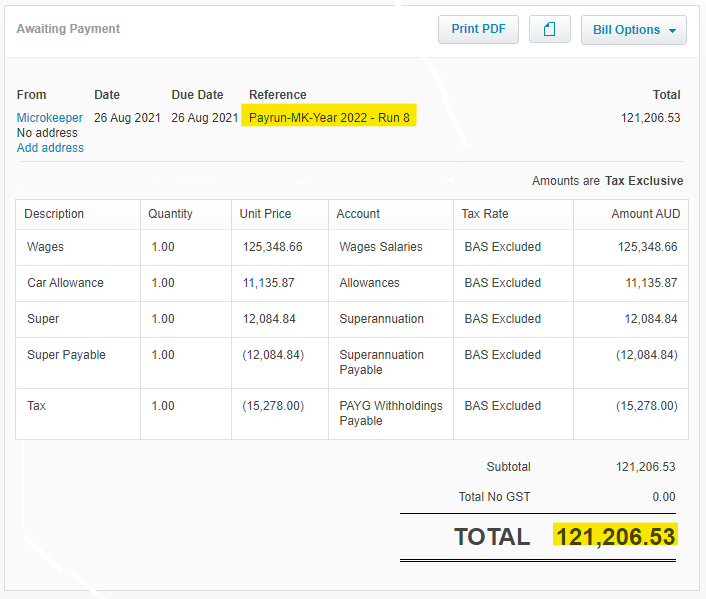
The invoice will appear as an Invoice in the Xero system under > Business > Bills to Pay > Awaiting Payment
Reconciliation
Assuming wages were paid with the ABA file, a day to two later Xero will automatically find the payment in the business bank account.
The amount Xero pulls from the bank and the net invoice sent from Microkeeper should match and automatically reconcile.
Corrections
If the incorrect data is sent to Xero, simply send the data again, the new data will replace the old data.
Do not Void the invoice in Xero, then it can not be updated.
If you do void the invoice, you will need to make a copy of that invoice in Xero.

Additional Notes
We recommend using your bookkeeper, accountant or contacting Microkeeper support to help with the initial configuration.
Once setup, this process can be done in a couple of minutes.
Please Note: All names for values MUST be different. If a new name for a value appears, this will have to be added to the appropriate account, this is likely to occur with following weeks. |
Troubleshooting Connection
If you're receiving an connection error with Xero (Commonly Error 403) we recommend disconnecting the Xero app on both platforms.
1. In Microkeeper, navigate to Settings > General > Global > System Settings and disconnect Xero account / connection.
2. In Xero, navigate to and click the organisation name, then select Settings.
3. Click Connected Apps.
4. Under the Connected apps heading click Disconnect beside the Microkeeper app.
5. With the connection removed on both systems, within Microkeeper reconnect your Xero Account.
Let us know how you go
If you would like to leave a review about the Microkeeper - Xero integration please do so at the Xero Business Community page.