Chart of Accounts Guide
This guide explains how to configure account codes and tracking categories in the Microkeeper's Chart of Accounts to match your accounting system.
Overview of the Chart of Accounts
The Chart of Accounts page is used to configure a list of account codes and tracking categories you can use to record and map against your payroll costs in Microkeeper. These accounts should match the chart of accounts in your accounting system so the payroll journal export can be easily imported into your selected accounting system platform.
Prerequisite Configure your accounting system
You will first need to select the accounting system for the business before you can set up the Chart of Accounts.
- Navigate to Menu > Settings > General > Global
- Under Global - System Settings > Accounting Suite
- Select your accounting system
Navigate to Chart of Accounts
- Navigate to Menu > Settings > General > Global
- Under Global - System Settings > Accounting Suite
- Click Chart of Accounts to enter the Chart of Accounts page
If you have multiple ABNs, select the ABN you wish to configure in the dropdown list on the top right of the page. Each ABN has its own Chart of Accounts configuration.
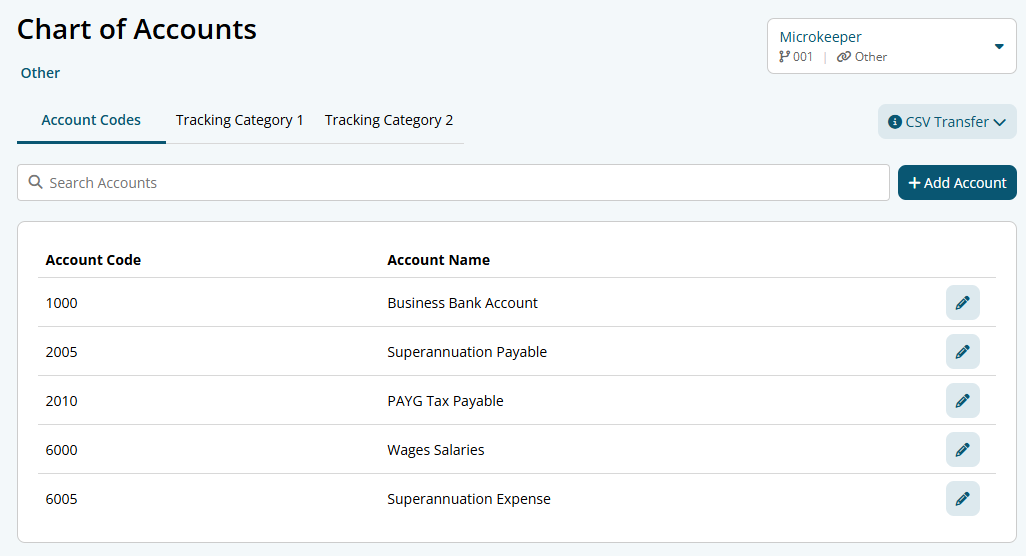
Configure Account Codes in Chart of Accounts
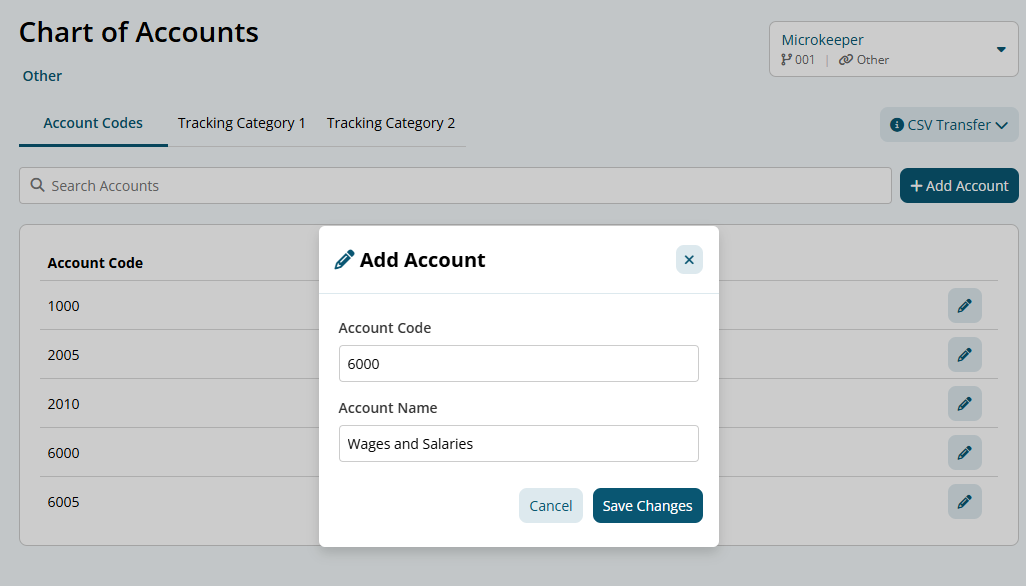
Add an Account Code
The first tab in the Chart of Accounts is Account Codes. Use it to create the account mappings that the Payroll Journal export will use.
- Open the Account Codes tab
- Click the Add Account button to set up a new account code
- Enter the Account Code
- This should be the GL code from your accounting system
- Enter the Account Note / Description
- Use a clear and recognisable label
- Click Add Account to save the account code
If you are using Xero or Reckon, see Integrated accounting suites and syncing below.
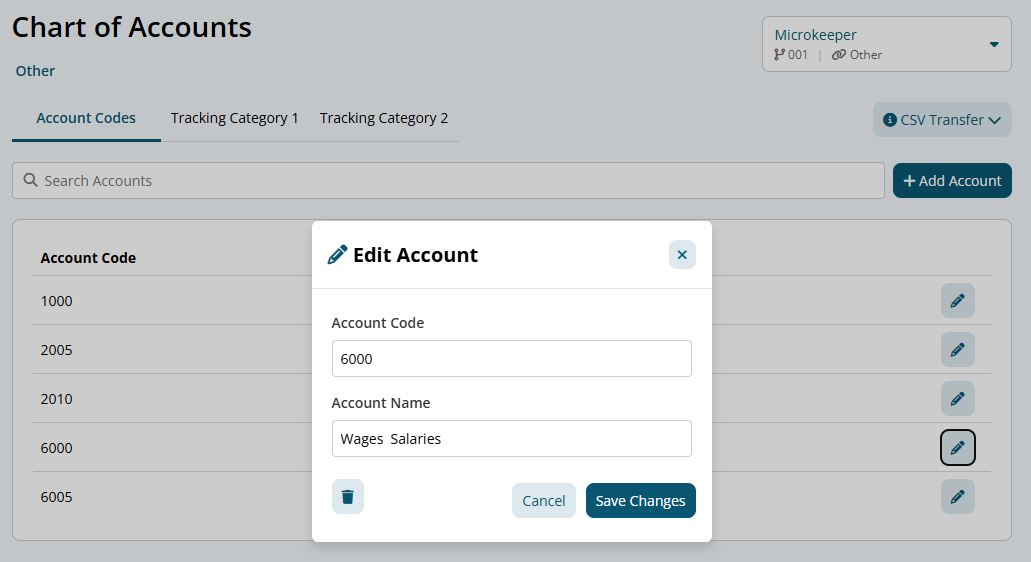
Edit an Account Code
- Open the Account Codes tab
- Locate the account code you want to edit
- Click the "Edit (pencil)" button next to the account
- Update the Account Code and/or Account Name
- Click "Save Changes" to apply the changes
Configure Tracking Categories in Chart of Accounts
Tracking categories are optional custom labels that can used to breakdown payments data by departments, locations, or projects, without expanding the account codes in the chart of accounts.
In Microkeeper, you can set up up to two tracking categories in total. Each tracking category can have multiple tracking options. A category must have at least one tracking option before it can be assigned to payroll costs.
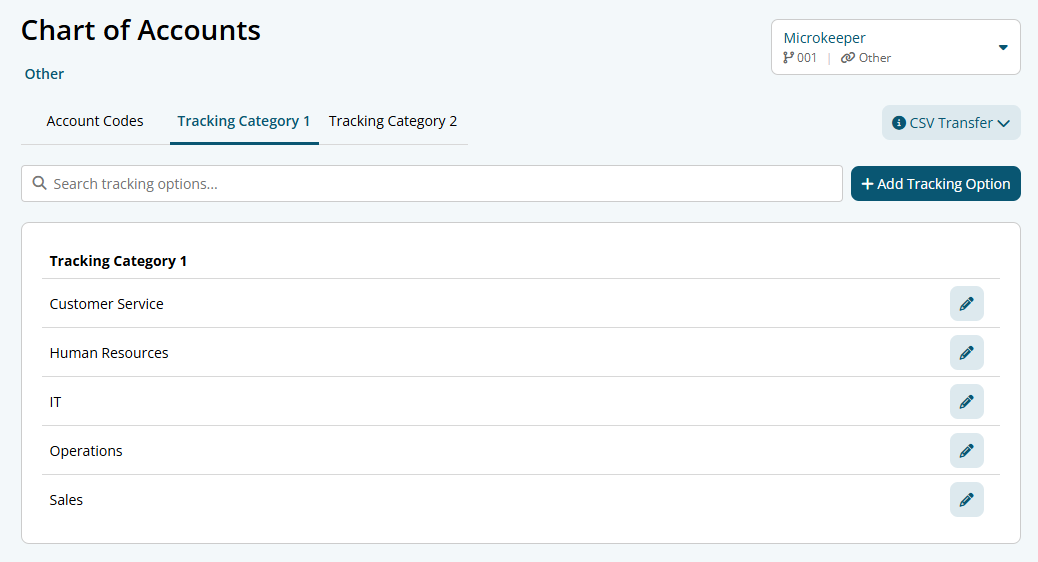
Add a Tracking Category Option
- Click the Tracking Categories tab
- Click the Add Tracking Option button
- Enter the Tracking Category Name
- This must match the name used in your accounting system
- Click Add Option to save
Edit a Tracking Category Option
- Click the Tracking Categories tab
- Locate the tracking option you want to edit
- Click the Edit (pencil) button next to the tracking option
- Update the Tracking Option Name
- Click "Save Option" to apply the changes
Integrated accounting suites and syncing
For integrated accounting suites (such as Xero or Reckon):
- Account codes and tracking categories are read-only
- Configuration is managed via syncing, not manual entry
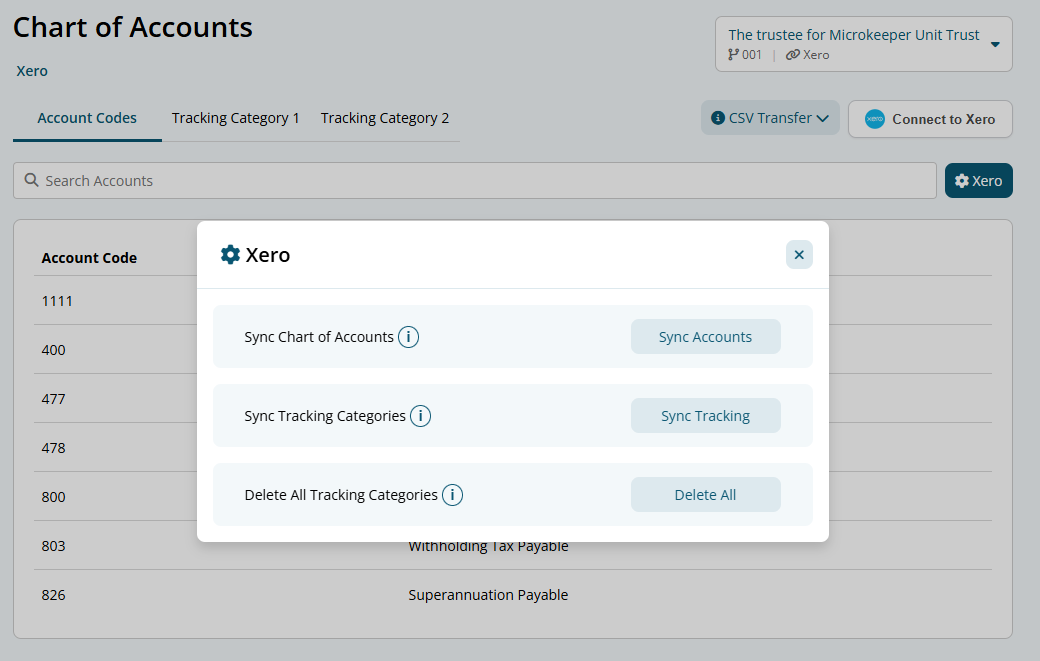
To sync your data:
- Click the Settings (cog) icon
- Select either:
- Sync Accounts, or
- Sync Tracking
This pulls the latest configuration from your connected accounting system and keeps Microkeeper aligned with your current Chart of Accounts.