Cost Centre Reporting
Every shift records a Location, Role and Job. This guide covers how to see the hours worked on each, and how to carry them into your pay runs, payslips, reports and accounting export, so you can see wage costs by place, type of work and job.
For what Location, Role and Job are and how a shift gets them, see Cost Centres.
| Required plan | All plans |
|---|---|
| Required access | Reports. Full reports also need Payroll access. The hours report needs Jobs and Clients. |
| To turn on Payroll Breakdown | Settings |
Turn on Payroll Breakdown
Timesheets always record the three cost centres. Payroll Breakdown decides which of them each line of pay keeps when you calculate a pay run.
Navigate to Menu > Settings > General > Global, then click Payroll Settings. Under Payroll Breakdown, tick Location, Role and Job for the cost centres you track. Each saves as soon as you tick it.
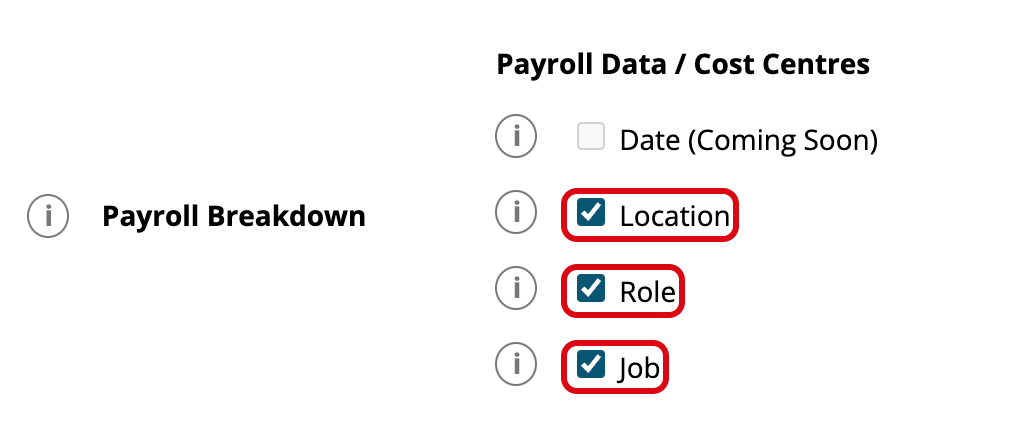
Microkeeper turns these on for you:
- Location is on for new businesses from the day they sign up.
- Role turns on when you add your first Role, on the Roles page or by importing Roles.
- Job turns on when you add your first Job, on the Jobs page or through a timesheet CSV import.
This only happens with the first one, so if you turn a breakdown off, it stays off.
Pay lines keep the cost centres that are ticked when the pay run is calculated, so tick the ones you need before you calculate.
An employee's Default Location, Default Role and Default Job fields also only show on their profile once the matching breakdown is ticked. Salaried employees' pay lines take those defaults.
Show cost centres on payslips
Payslip Display, below Payroll Breakdown, is separate. It only changes whether the employee's payslip shows a line for each Location, Role or Job, and doesn't change what's tracked.
See hours by cost centre
Hours Worked on Cost Centre totals the timesheet hours for each combination of Location, Role and Job. It works from timesheets, so it doesn't need a pay run or Payroll Breakdown, and it needs Jobs and Clients access rather than payroll access.
Navigate to Menu > Manage > Jobs, then click Hours Report.
- Choose the Year and a Period, such as a month, a quarter or the entire year, or enter a Start Date and End Date. Then click Display. The dates start as last month, and the range must be less than a year.
- To narrow it down, choose one or more in Job, Client, Location, Role or Employee. The tables update straight away.
- Under Cost Centre columns, untick a cost centre to add its rows together. For example, untick Role and Job to see the hours for each Location. The page remembers your choice on this computer.
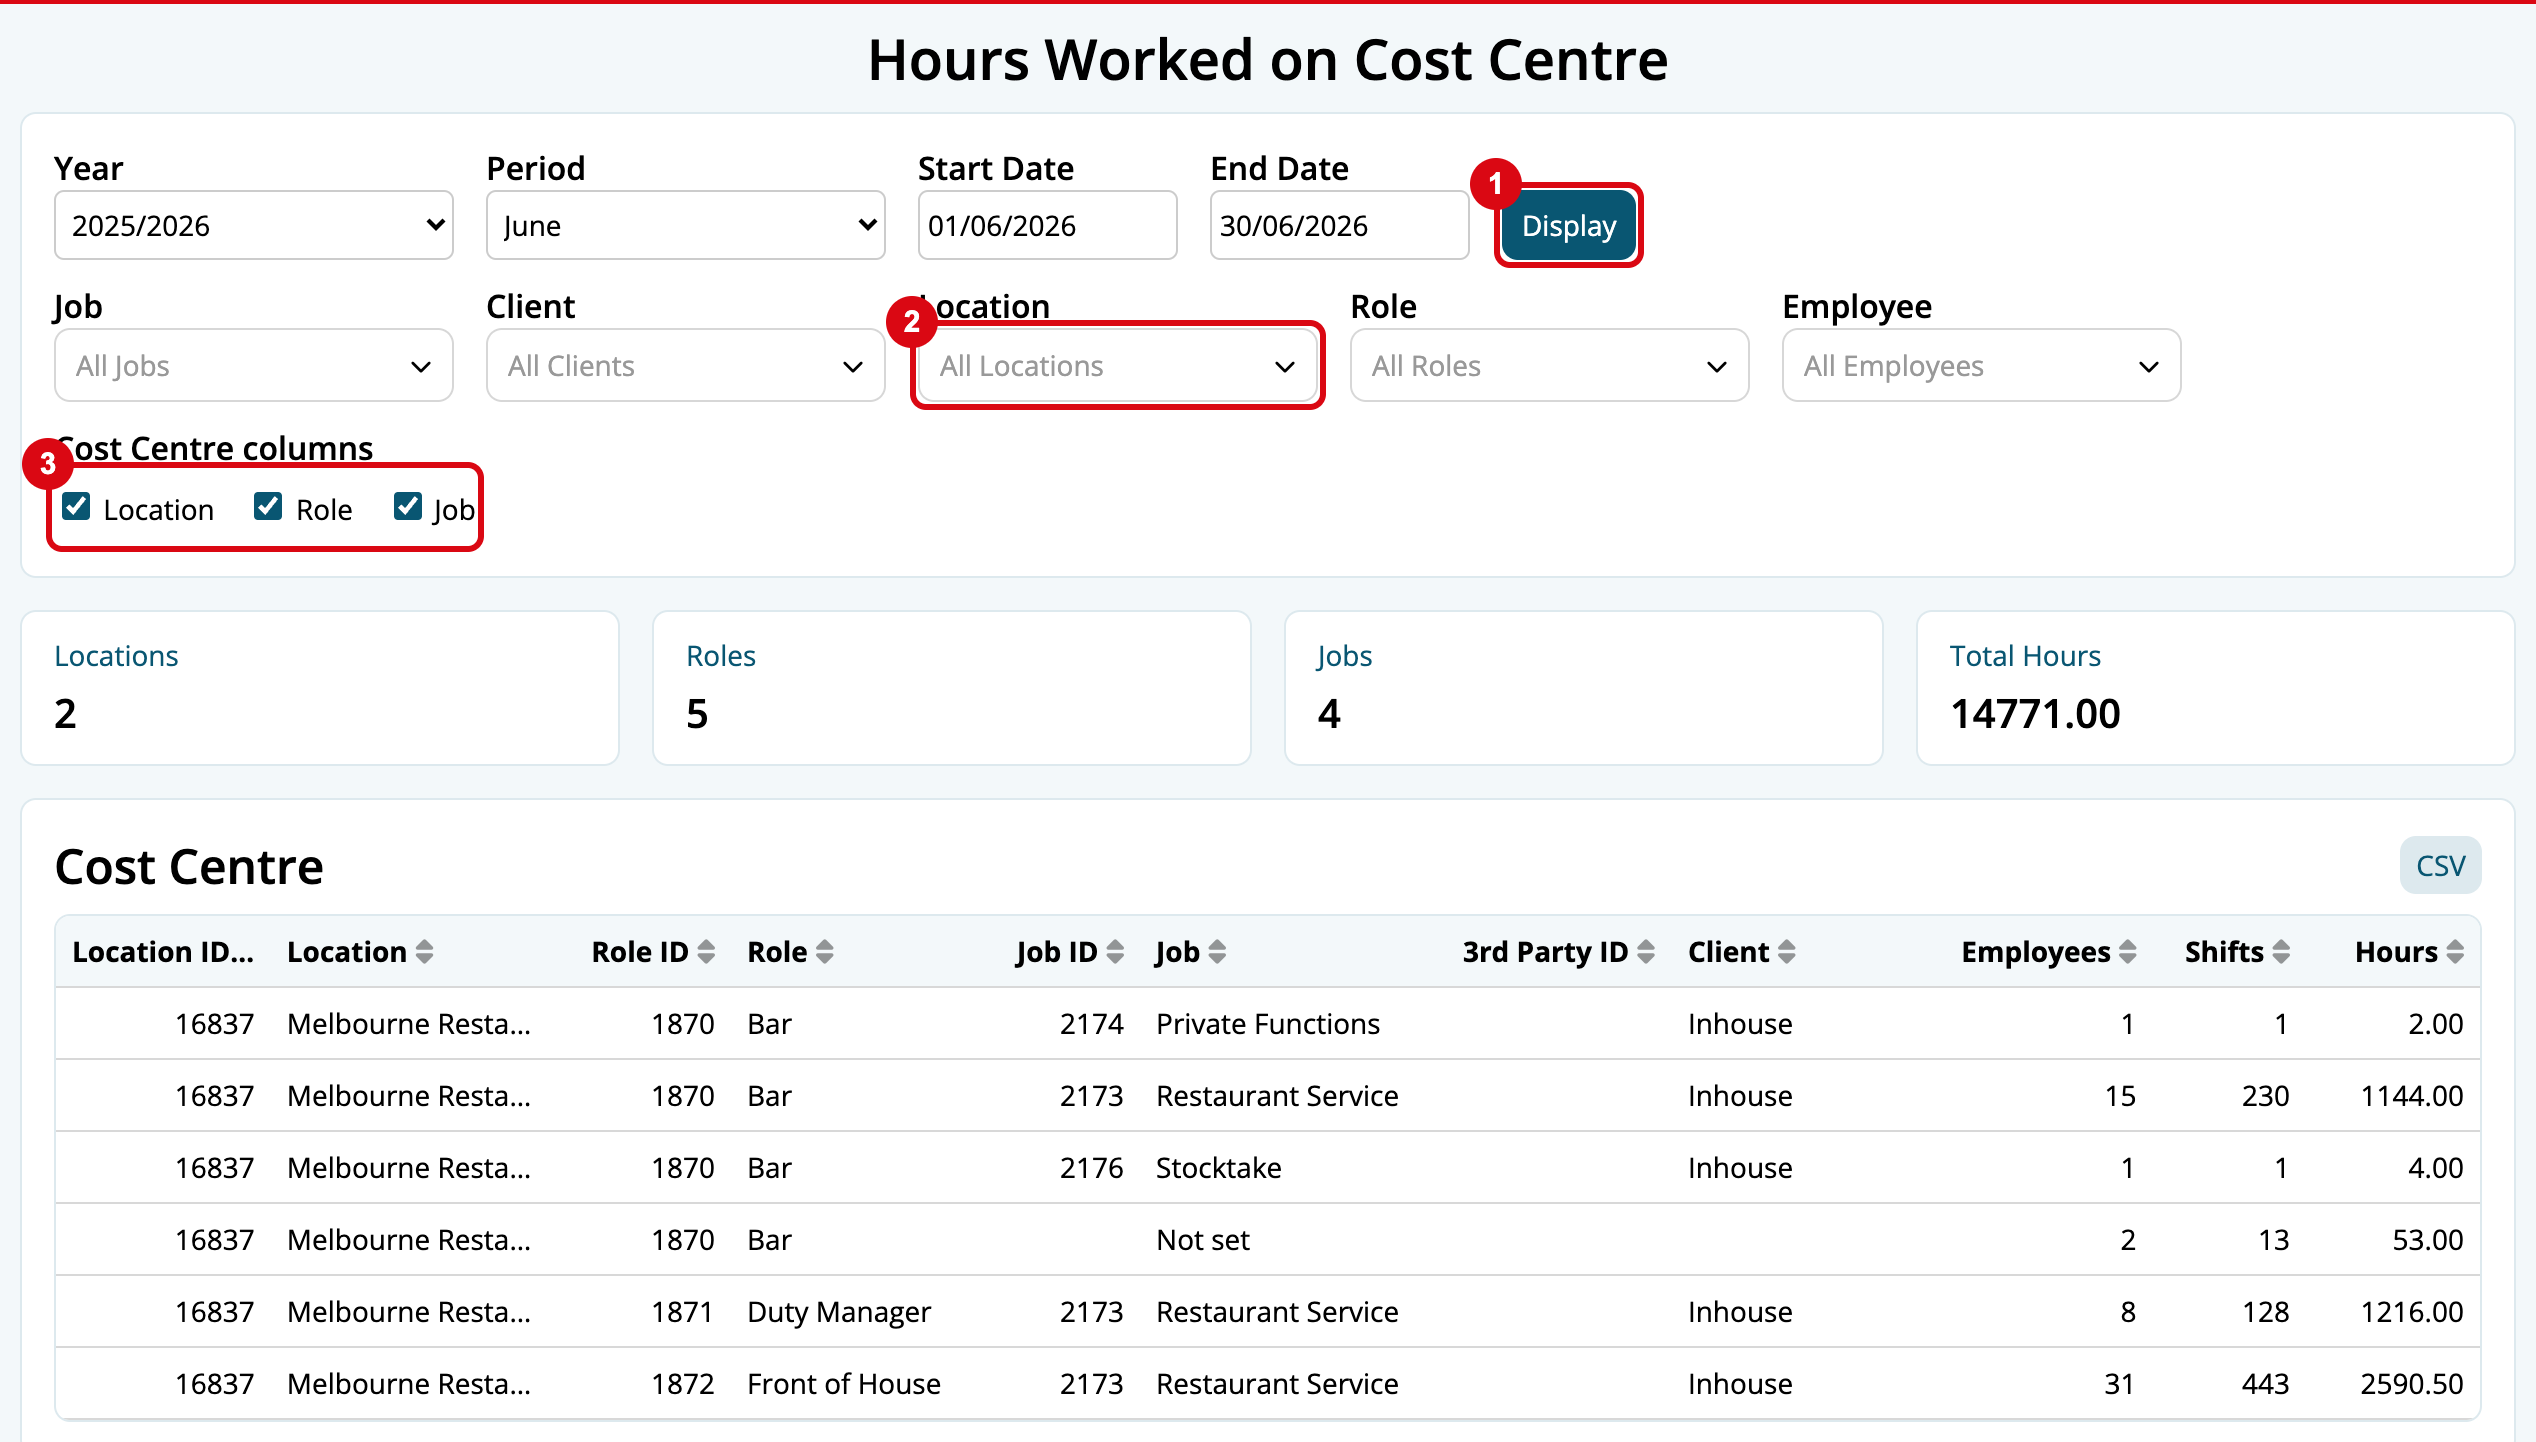
The page shows how many Locations, Roles and Jobs have hours and the Total Hours, then these tables. Each has a CSV button to download it, and you can sort by any column.
| Table | What it shows |
|---|---|
| Cost Centre | Each combination of Location, Role and Job, with its Client and 3rd Party ID, and how many employees and shifts it has, and its hours. Not set means shifts with no Location, Role or Job. |
| Employee | Each employee's hours for each Location, Role and Job. |
| Note | Hours grouped by the note on the shift. |
| Full Shift List | Every shift: employee, Job, Client, Location, Role, date, clock on and off times, breaks, note and hours, with a button to open its timesheet. |
Info
The pencil button next to a note in the Note table changes that note on every shift it covers, not only in the report.
To find and fix shifts with no Location, see Cost Centres.
See wage costs by cost centre in reports
Navigate to Menu > Payroll > Reports. Payments Data lists every line of pay with its Location, Role and Job.
Once the Job breakdown is on, the Job reports are listed too, such as Payroll Breakdown by Job and Payroll by Job by Employee. They show what each Job cost, including penalty rates, overtime, leave and super. For each Job report, and hours by Job, see Jobs.
To total wages by Location or Role, build a report in Report Builder with the Payroll dataset and Payment Data, and group it by Location Title or Role Title. See Report Builder.
Split your accounting export by cost centre
On a pay run's Complete Payrun > 3. Export, Breakdown By can split payments by Location, Role and Job, alongside Title, Date and Class. Each line then gets its own account and tracking category, so your accounts show wages by cost centre.
Splitting by Date isn't recommended: it adds manual work every pay run.
For mapping lines to accounts and tracking categories, see Accounting Export.